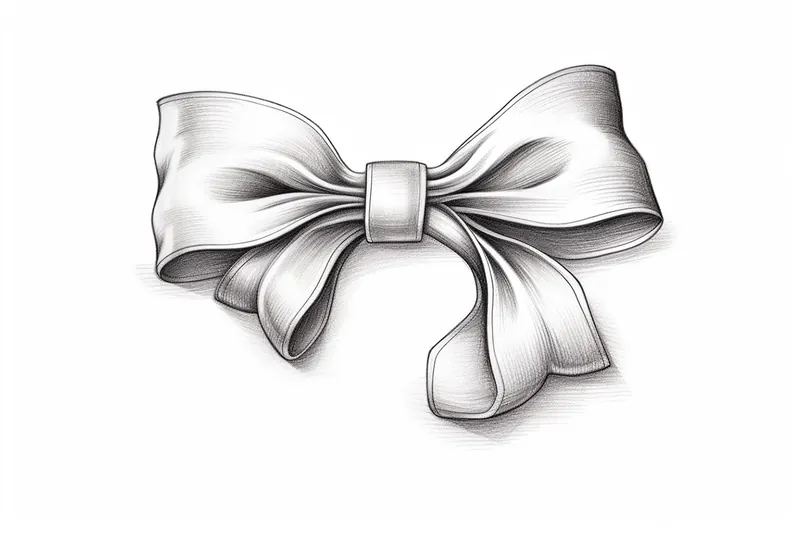
How to Draw a Ribbon
Learn how to draw a ribbon in this step-by-step tutorial. Enhance your artistic skills and create beautiful ribbon designs for your artwork or design projects.
Materials You'll Need
- Pencil
- Paper
- Eraser
Ribbons are more than just simple strips of fabric—they are classic symbols of celebration, awareness, and style. You'll find them adorning gift boxes, woven into festive decorations, accenting fashion accessories, or used as meaningful motifs in illustrations. Because of their graceful curves and delicate folds, ribbons can bring a sense of movement and sophistication to your artwork. Whether you're designing a heartfelt greeting card, working on a logo, or simply wanting to enhance your drawing skills, knowing how to draw a ribbon is a valuable artistic technique that opens up a world of creative possibilities.
Learning how to draw a ribbon can benefit artists of all levels. For beginners, ribbons are an excellent subject to practice basic shapes, flowing lines, and the fundamentals of shading to create volume and depth. For more advanced artists, ribbons offer the opportunity to experiment with light, shadow, and texture, challenging your ability to capture the way fabric twists and bends. In this step-by-step tutorial, we'll break down the process into manageable stages, making it easy to follow along regardless of your experience. With a little patience and practice, you'll soon be able to add beautiful, realistic ribbons to any artwork. So, gather your materials, get comfortable, and let's embark on this creative journey together—you'll be amazed at what you can achieve!
Materials Required
Before we begin, gather the following materials:
Now that you have all the necessary materials, let's dive into the steps of drawing a ribbon.
Step 1: Sketch the Ribbon's Outline
Start by lightly sketching the outline of the ribbon using your pencil. Determine the shape and size you want your ribbon to be. Ribbons can be simple and straight or more intricate with loops and folds.
Step 2: Draw the Ribbon's Tail
Next, draw the ribbon's tail by extending two curved lines from one end of the ribbon's outline. The tail can be short or long, depending on your preference. Ensure the lines flow smoothly and follow the direction of the ribbon.
Step 3: Create the First Loop
Now, draw the first loop of the ribbon. This loop will add dimension and movement to the design. Start by drawing a curved line that overlaps the ribbon's outline near the center. Then, connect the ends of the curved line to the ribbon's outline with two short straight lines.
Step 4: Repeat the Loop
Tip: To enhance the realism of your ribbon drawing, take time to observe real ribbons or reference images closely; pay attention to how they interact with light and shadow. This will help you understand the subtle curves and folds that give ribbons their characteristic flow. Start with loose, sweeping strokes to outline the basic shape, and then gradually refine the details, incorporating varying shades to depict depth and texture—this will make your final artwork more dynamic and lifelike.
Continue by creating additional loops. The number of loops depends on the size and style of ribbon you desire. To draw the next loop, create another curved line that overlaps the ribbon's outline and connects to the previous loop. Repeat this process until you've achieved the desired number of loops.
Step 5: Add Folds and Curves
To make the ribbon look more realistic, add folds and curves along its length. These folds can be created by drawing short curved lines that bend away from the center of the ribbon. Vary the lengths and shapes of the folds to add depth and interest to your drawing.
Step 6: Clean up the Sketch
Use an eraser to carefully remove any unnecessary guidelines and lines from your sketch. Clean up the outline of the ribbon to make it more defined and polished.
Step 7: Add Details
To make your ribbon drawing even more visually appealing, you can add some details. For example, you can draw the edges of the ribbon slightly wavy or serrated to give it a decorative look. You can also add patterns or designs to the ribbon using colored pencils or markers if you'd like.
Step 8: Shade and Color (Optional)
If you want to take your ribbon drawing to the next level, add shading and color. Determine the light source in your drawing and shade the ribbon accordingly. Use a darker pencil or marker to add shadows and depth to the folds and curves. Then, carefully color the ribbon using your preferred colors. Experiment with different shades and color combinations to achieve the desired effect.
Mistake Alert: A common mistake when drawing ribbons is making the twists and folds look stiff or angular, rather than capturing their natural, flowing curves. This usually happens when artists rely too much on straight lines or sharp corners, forgetting that ribbons are made of flexible fabric that bends smoothly. To avoid this, observe real ribbons or reference images and notice how the edges gently arc and overlap, creating soft, continuous shapes. Try sketching your ribbon with loose, sweeping pencil strokes first, lightly mapping out the overall path before refining the folds and shadows—this will help your ribbon appear graceful and lifelike.
Conclusion
Drawing a ribbon may seem daunting at first, but by following these step-by-step instructions, you can easily create a beautiful ribbon design. Remember to start with a light sketch, add loops and folds to create dimension, and clean up your drawing before adding details. With practice and patience, you'll be able to create stunning ribbons to enhance any artwork or design.
Fun Facts About Ribbon
- The word "ribbon" comes from the Middle English "ribban," meaning a narrow strip of cloth.
- Ribbons have been used for centuries as symbols of awareness and support, with the American Cancer Society highlighting their role in health campaigns.
- Silk ribbons were highly prized in 17th-century Europe and were often imported from France.
- The Guinness World Record for the longest awareness ribbon was set in 2014, measuring over 8 kilometers, as reported by Guinness World Records.
- Ribbons are a key element in many traditional Japanese crafts, such as mizuhiki, which uses decorative cords for gift wrapping.
- In fashion, ribbons have been used as trims and accessories since the Renaissance.
- The yellow ribbon became a symbol of hope and remembrance during the Iran Hostage Crisis in 1979.
- Ribbons are commonly awarded as prizes in competitions, with the blue ribbon signifying first place in the National FFA Organization and other events.
- Modern ribbons are made from a variety of materials, including satin and grosgrain.
Suggestions for Scenes and Settings for Ribbon Drawings
- A ribbon gracefully floating in the wind across a scenic landscape, such as a meadow or garden.
- Gift boxes stacked for a celebration, each tied with a different style of ribbon bow.
- A vintage hair ribbon woven into an intricate hairstyle or hat, highlighting fashion from a particular era.
- Ribbons wrapped around a bouquet of flowers, cascading elegantly down the stems.
- Awareness ribbons grouped together, each representing a different cause and color.
- A playful kitten or puppy tangled in a pile of colorful ribbons.
- A holiday wreath or festive garland adorned with ribbons and bows.
- A dancer twirling with long, flowing ribbons trailing from their costume or hands.
- Ribbons incorporated into a magical scene, such as floating in the air with sparkles or glowing effects.
- A close-up study of a single ribbon with dramatic lighting, focusing on the curves, folds, and texture.