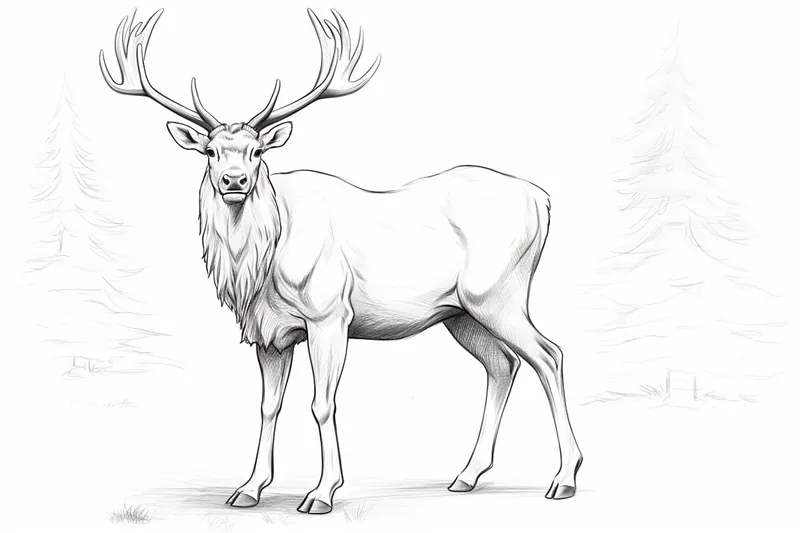
How to Draw a Reindeer
Learn how to draw a reindeer with this step-by-step tutorial. From basic guidelines to shading and adding color, create your own festive artwork.
Materials You'll Need
- Pencil
- Paper
- Eraser
Reindeer are enchanting creatures often associated with winter, snowy landscapes, and the magic of the holiday season. Known for their majestic antlers and gentle demeanor, these animals have captivated artists, storytellers, and nature lovers for generations. Learning how to draw a reindeer not only allows you to capture the beauty of this iconic animal, but it also gives you the opportunity to add a festive touch to your greeting cards, seasonal decorations, or personal sketchbook. By exploring the unique features of a reindeer—like its distinctive antlers, soft fur, and expressive eyes—you'll deepen your understanding of animal anatomy and artistic observation.
This tutorial is designed for artists of all skill levels, whether you're a beginner eager to practice basic shapes and proportions or a more experienced artist looking to refine your animal drawing techniques. You'll learn how to break down complex forms into simple, manageable steps, making the process approachable and enjoyable. Techniques such as light sketching, layering details, and shading will be covered to help you create a lifelike and expressive reindeer. If you've ever wondered exactly how to draw a reindeer, this guide will walk you through each stage, ensuring you gain confidence and new skills along the way.
So gather your favorite drawing materials and prepare to embark on a creative journey. Remember, every artist improves with practice, and each drawing is a step forward in your artistic growth. Let's dive in together and discover just how rewarding and fun it can be to bring a reindeer to life on your page!
Materials Required
Before we begin, gather the following materials:
- Paper: Choose a smooth, heavyweight paper that can handle pencils, markers, or any other drawing medium of your choice.
- Pencils: Have a range of pencils available, such as an HB or #2 pencil for light sketching and darker pencils like 4B or 6B for adding depth and shading.
- Eraser: Keep a kneaded eraser handy for lifting pencil lines and correcting mistakes without leaving residue.
- Fine-tip markers: If you prefer working with markers, have a few fine-tip markers in different colors ready.
- Colored pencils or markers (optional): For those who wish to add color to their drawing, have colored pencils or markers in various shades of brown, black, and red.
- Reference image: Find a clear reference image of a reindeer to help you visualize its features and proportions as you draw. You can print one out or use a digital device for reference.
Now that you've gathered your materials, let's dive into the step-by-step process of drawing a reindeer.
Step 1: Basic Guidelines
Start by lightly sketching the basic guidelines for the reindeer's body. Draw a large oval shape for the body and a smaller circle for the head. These shapes will serve as your foundation for the reindeer's proportions.
Step 2: Outline the Body and Head
Using the basic guidelines, outline the body and head of the reindeer. Pay attention to the proportions and shape of the reference image as you draw the curves and contours. Keep your lines light and adjustable.
Step 3: Draw the Legs and Hooves
Next, draw the legs and hooves of the reindeer. Reindeer have slender legs with small hooves. Sketch the legs with simple lines and add the hooves at the bottom. Remember to maintain proper proportions and symmetry.
Step 4: Add the Antlers
Draw the antlers on top of the reindeer's head. Reindeer have branched antlers, so start by sketching the main branches and then add smaller branches and details. Take your time to create a natural and balanced antler shape.
Step 5: Outline the Facial Features
Now it's time to add the facial features of the reindeer. Begin with the eyes by drawing two almond-shaped circles. Add a small circle for the nose and two curved lines for the mouth. Pay attention to the placement and size of these features to capture the reindeer's expression accurately.
Step 6: Refine the Details
Refine the outline of your reindeer by adding more details. Define the shape of the body, legs, and hooves with smooth and confident lines. Add curves and contours to give the reindeer a three-dimensional look.
Step 7: Add Shading and Texture
To make your reindeer drawing more realistic, add shading and texture. Identify the light source in your reference image and darken areas that would be in shadow. Use hatch marks or gentle shading to indicate fur texture. Take your time with this step to achieve a more lifelike result.
Step 8: Finalize the Drawing
Once you are satisfied with the details and shading, go over your drawing with darker pencils or fine-tip markers to create more contrast and definition. Make any necessary adjustments or corrections before moving on to the final step.
Step 9: Optional - Add Color
If you want to add color to your drawing, now is the time. Use colored pencils or markers to bring your reindeer to life. Pay attention to the colors and patterns in your reference image, and don't be afraid to experiment and add your own artistic flair.
Tip: When drawing reindeer, pay special attention to the base shapes that make up their body—start with simple ovals for the head and torso, and lightly sketch a pair of elongated rectangles for the legs. Use a reference photo to observe how the antlers branch out; sketch these with sweeping, gentle curves rather than straight lines, as real antlers have a graceful, organic flow. For texture, try using short, overlapping pencil strokes along the neck and chest to suggest the reindeer's thick, soft fur, gradually building up layers for a realistic effect. Don't forget to keep your lines light in the beginning so you can easily adjust proportions as you refine your sketch—this flexibility will help you capture the reindeer's natural elegance.
Conclusion
Congratulations, you have completed your reindeer drawing! By following these step-by-step instructions, you have learned how to capture the beauty and grace of this majestic animal on paper. Remember to practice and experiment with different techniques to further enhance your drawing skills. Happy drawing!
Fun Facts About Reindeer
- Both male and female reindeer grow antlers, which is unique among deer species.
- Reindeer are also known as caribou in North America.
- Reindeer have specialized noses that warm cold air before it enters their lungs.
- Some reindeer migrate over 3,000 miles a year, making them one of the longest-migrating land mammals.
- Reindeer can see ultraviolet light, which helps them spot predators and food in snowy landscapes.
- Reindeer hooves adapt to the seasons, becoming spongy in summer and hard in winter for better traction.
- Reindeer milk is richer in protein and fat than cow's milk.
- They are well-adapted to cold climates, with thick fur that covers even their noses.
- Reindeer play a central role in the cultures and livelihoods of many Arctic indigenous peoples.
Suggestions for Scenes and Settings for Reindeer Drawings
- A reindeer standing proudly on a snowy hill beneath the shimmering northern lights.
- A playful reindeer calf frolicking through a pine forest dusted with fresh snow.
- A reindeer team pulling a festive sleigh filled with wrapped gifts and jingling bells.
- A close-up portrait of a reindeer's face with frost crystals sparkling on its antlers.
- A herd of reindeer crossing a frozen river at sunrise, their breath visible in the cold air.
- A whimsical reindeer wearing a scarf and holiday lights tangled in its antlers.
- Two reindeer nuzzling together in a peaceful clearing surrounded by winter berries.
- A magical scene of a reindeer flying across a starry night sky above a quiet village.
- A reindeer grazing beside a cozy log cabin with smoke curling from the chimney.
- A reindeer silhouetted against a glowing full moon in a tranquil winter landscape.