How to Draw a Record Player
Learn how to draw a record player with this step-by-step tutorial. Create a detailed and realistic representation of this iconic music device.
Materials You'll Need
- Pencil
- Paper
- Eraser
Record players, with their elegant design and vintage charm, have long been treasured as icons of musical history. These devices are more than just tools for playing vinyl records—they represent a bridge between generations, evoking memories of classic tunes and the warmth of analog sound. Their unique combination of geometric shapes, subtle details, and mechanical parts makes them a fascinating and rewarding subject to capture through drawing. Whether you're a music lover, a fan of retro aesthetics, or simply someone looking to expand your artistic repertoire, learning how to draw a record player can be both enjoyable and meaningful.
In this tutorial, you'll discover how to draw a record player step by step, even if you're just starting out with sketching. We'll guide you through each stage—from outlining the smooth curves of the turntable to adding the intricate details of the tonearm and stylus. This lesson is perfect for artists of all skill levels, as it emphasizes basic shapes, careful observation, and simple shading techniques to bring your drawing to life. By the end, you'll have not only improved your technical skills but also created a piece of art that celebrates the timeless beauty of music. So gather your drawing materials, follow along, and remember: every line you make is another step toward mastering your craft—have fun and let your creativity spin!
Materials Required
Before we begin, make sure you have the following materials ready:
- Drawing paper
- Pencil
- Eraser
- Fine-tip pen or marker
- Ruler
- Compass (optional)
- Colored pencils or markers (optional)
Now that you have everything you need, let's dive into the steps:
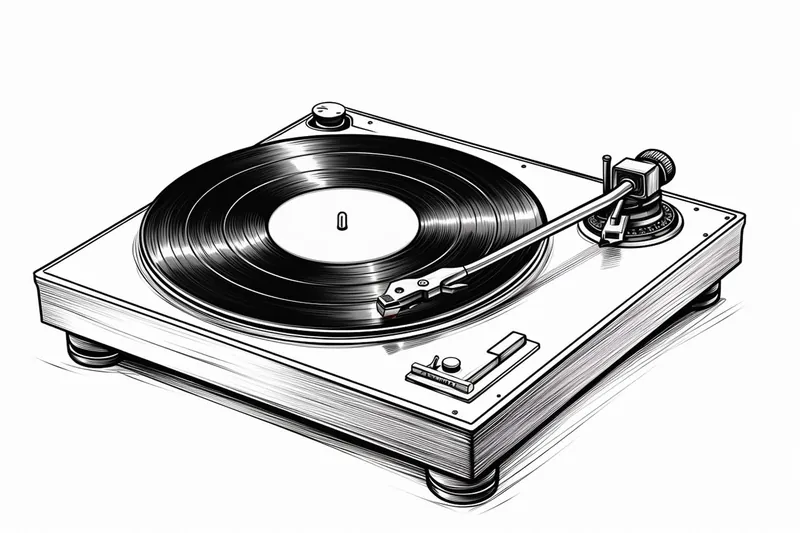
Step 1: Draw the Base
Start by drawing a rectangle shape for the base of the record player. Use your ruler to create straight lines and ensure the proportions are accurate. Consider the size and shape you want your record player to be, keeping in mind that the dimensions may vary depending on your preference and style.
Step 2: Add the Platter
Inside the base, draw a smaller circle representing the platter where the record will sit. You can use a compass to create a perfect circle or simply draw one freehand. Make sure the circle is centered within the base.
Step 3: Sketch the Tonearm
On the right side of the base, draw a straight line extending upwards. This will serve as the tonearm. At the top of the line, draw a smaller rectangle shape for the tonearm rest. Add a curved line at the end of the tonearm to represent the stylus or needle.
Step 4: Create the Controls
Below the platter, draw a rectangular box to represent the control panel. Divide the box into sections using straight lines. Include buttons, dials, and switches to add detail and realism to your drawing. Feel free to reference images of real record player controls for inspiration.
Step 5: Design the Speakers
Draw two rectangular shapes on either side of the base to represent the speakers. You can add details like speaker grills or logos to make them more visually appealing. Remember to ensure the proportions are balanced with the rest of the drawing.
Step 6: Add the Legs
To give your record player stability, draw four legs extending downward from the base. These can be simple rectangular shapes or more elaborate designs depending on your style. Make sure the legs are evenly spaced and well-proportioned.
Step 7: Refine and Erase
Take a step back and evaluate your drawing so far. Use your pencil to refine any lines or shapes that may need adjustment. Erase any unnecessary guidelines or stray marks to clean up your drawing.
Tip: As you draw each component of the record player, take the time to observe real-life references or images to capture the intricate details more accurately, such as the texture of the wood or the design of the knobs. This practice not only enhances realism in your artwork but also helps you develop a keen eye for detail, leading to improved overall drawing skills.
Step 8: Ink Your Drawing
Once you are satisfied with the pencil sketch, trace over the final lines with a fine-tip pen or marker. This will give your drawing a bold and finished look. Be careful not to rush, and take your time to ensure smooth and confident lines.
Step 9: Color Your Drawing (Optional)
If you prefer a colored drawing, now is the time to bring it to life! Use colored pencils or markers to add vibrant tones to your record player. You can choose realistic colors or get creative with your own unique color scheme.
Conclusion
Congratulations! You have successfully learned how to draw a record player. By following these step-by-step instructions, you should have created a beautiful representation of this timeless music device. Remember to practice and experiment with different styles and techniques to further enhance your artistic skills. Enjoy the process of creating and let your imagination take you on a creative journey.
Fun Facts About Record Players
- The first commercial record player, known as the phonograph, was invented by Thomas Edison in 1877.
- Vinyl records played on record players are making a comeback, with sales reaching their highest levels since the 1980s according to the Recording Industry Association of America.
- The stylus, or needle, of a record player is typically made from diamond due to its durability and ability to accurately read grooves.
- Record players operate at different speeds, most commonly 33 1/3, 45, and 78 revolutions per minute (RPM).
- High-fidelity (hi-fi) record players became popular in the 1950s, revolutionizing home audio quality.
- Turntablism, the art of manipulating sounds and creating music using record players, is a key element of hip-hop culture.
- Some rare vinyl records played on record players can sell for thousands of dollars.
- Record players use a process called analog playback, which many audiophiles believe produces a warmer sound.
Suggestions for Scenes and Settings for Record Player Drawings
- A cozy living room corner with a vintage record player spinning a classic vinyl, surrounded by stacks of albums and a comfy armchair.
- An outdoor garden party table, with a retro record player playing music as fairy lights twinkle above and friends gather around.
- A close-up view of a record player, featuring intricate reflections on the stylus as it gently touches the spinning vinyl.
- A 1960s-inspired teenage bedroom, showcasing a colorful record player beside posters of legendary musicians and a lava lamp.
- A minimalist, modern apartment with a sleek record player as the centerpiece on a stylish sideboard, paired with potted plants.
- A music lover's creative workspace, where a record player sits among sketchbooks, headphones, and art supplies in gentle afternoon light.
- An atmospheric night scene with a record player illuminated by the glow of neon lights and cityscape visible through the window.
- A vintage record store interior, highlighting an array of record players on display and customers flipping through vinyl crates.
- A whimsical, surreal setting where a giant record player sits in a field of flowers, with birds perched on the tonearm and animals dancing nearby.
- A family gathering in a rustic cabin, where an old record player plays holiday tunes while people dance and laugh by the fireplace.