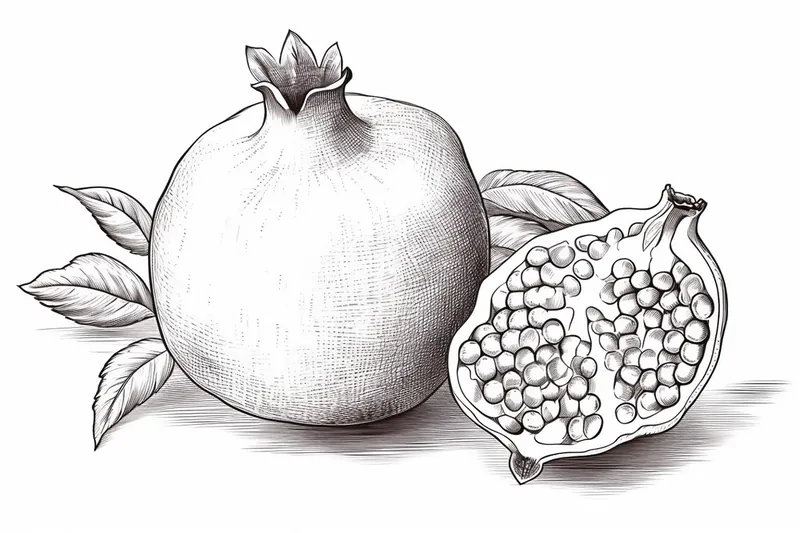
How to Draw a Pomegranate
Learn how to draw a pomegranate step by step with this easy-to-follow tutorial. Explore the world of fruit drawing and hone your artistic skills.
Materials You'll Need
- Pencil
- Paper
- Eraser
The pomegranate is a fruit that has fascinated artists and storytellers for centuries. Known for its rich red color, unique round shape, and the cluster of jewel-like seeds inside, the pomegranate holds cultural and symbolic significance across many traditions. Its intricate structure and vibrant appearance make it a delightful and challenging subject for artists, providing opportunities to practice observation and attention to detail. Whether you are interested in botanical illustration, still life drawing, or simply want to expand your skills, learning how to draw a pomegranate can be both enjoyable and educational.
Drawing a pomegranate allows you to experiment with various techniques, such as shading, layering, and texturing, to capture the glossy skin and the delicate, translucent seeds. This tutorial is designed for artists of all levels, from beginners looking to build their foundational skills to more experienced creators seeking to refine their technique. By following this step-by-step guide on how to draw a pomegranate, you'll develop your ability to observe shapes, work with gradients, and create realistic fruit illustrations. No matter where you are on your artistic journey, you'll find that drawing a pomegranate is both a rewarding and motivating project.
So, gather your drawing materials and get ready to bring this beautiful fruit to life on paper. With a bit of patience and practice, you'll be amazed at what you can achieve. Let's dive in and discover the art of pomegranate drawing together!
Materials Required
Before we dive into the step-by-step instructions, let's gather the materials you will need for this drawing:
- Drawing paper: Choose a smooth, heavyweight paper that can handle various drawing techniques, such as mixed media paper or bristol board.
- Pencil: Use a range of pencils with different lead hardness, such as HB, 2B, and 4B.
- Eraser: Have a kneaded eraser or a soft vinyl eraser to correct and adjust your drawing.
- Blending stump or tortillon: These tools are useful for blending and smudging graphite to create smooth gradations.
- Pencil sharpener: Keep your pencils sharp to achieve fine details in your drawing.
- Reference image: Find a high-quality photo or a real pomegranate to use as a reference. Observing the details and colors of a real pomegranate can greatly enhance your drawing.
Now that we have everything we need, let's begin the step-by-step process of drawing a pomegranate.
Step 1: Sketching the Outline
Start by lightly sketching the basic shape of the pomegranate using a light pencil. Begin with a circle for the main body of the fruit and add a curved line at the top for the stem. Keep your lines loose and fluid, as you will be refining and adding details later.
Step 2: Mapping the Sections
Observe your reference image or pomegranate, and lightly draw the sections or lobes of the fruit on your sketch. Pomegranates typically have five to six sections, so make sure to evenly space them around the circular shape of the fruit. These sections will form the framework for adding details later on.
Step 3: Adding Texture
To create the texture of the pomegranate's skin, lightly sketch small oval shapes within each section. These ovals should overlap slightly and vary in size to mimic the bumps and irregularities of the fruit's skin. Take your time with this step, as capturing the texture is key to making your drawing look realistic.
Step 4: Refining the Shape
Now that you have the basic outline and texture, it's time to refine the shape of the pomegranate. Carefully go over your sketch, adding more definition to the curves and contours of the fruit. Pay attention to the subtle changes in shape and size between each section. Use a darker pencil or press harder with your pencil to emphasize the shadows and highlights.
Step 5: Shading and Adding Depth
To give your drawing dimension and depth, begin shading the pomegranate. Start by identifying the main light source in your reference image or imagine one if you're working from memory. Shade the areas on the opposite side of the light source, as they will be darker. Gradually build up layers of shading using different pencil hardnesses to create smooth transitions between light and dark areas. Use your blending stump or tortillon to blend and smudge the graphite for a more realistic effect.
Step 6: Adding Details
Now that you have the basic shading and form of the pomegranate, it's time to add more details. Focus on the stem, which is often dry and woody in appearance. Use short, quick strokes to depict the texture of the stem, emphasizing its uneven and rough surface. Pay attention to the highlight areas and use lighter pencil pressure or an eraser to create the illusion of shine and dimension.
Step 7: Final Touches
Take a step back and assess your drawing. Are there any areas that need more shading or refining? Make any necessary adjustments to ensure your drawing accurately represents a pomegranate. Add any additional details, such as small imperfections or highlights, to make your drawing more realistic.
Tip: To effectively capture the pomegranate's glossy skin, start by layering your colors gradually. Use colored pencils or watercolors for a smooth application—begin with a light base layer of red, then build up with darker shades and subtle hints of purple or burgundy for depth. Pay close attention to the highlights, using an eraser or a white gel pen to gently lift color for a sparkling effect where light hits the fruit. Additionally, observe the texture; tiny dots and irregularities can be suggested with fine strokes or stippling, creating a more realistic appearance. Don't rush—allow each layer to dry if you're using wet media before adding more detail, ensuring a vibrant and dimensional result.
Conclusion
Congratulations! You have successfully drawn a pomegranate from start to finish. Drawing fruit can be a delightful way to hone your artistic skills and appreciate the beauty of nature. Remember, practice makes perfect, so don't be afraid to try drawing different fruits or experiment with different techniques. With time and practice, your drawings will become more detailed and lifelike. I hope you enjoyed this step-by-step guide on how to draw a pomegranate and found it helpful in your artistic journey.
Fun Facts About Pomegranate
- Pomegranates are one of the oldest cultivated fruits, with evidence of their use dating back to ancient Persia and Egypt.
- Each pomegranate contains hundreds of edible seeds called arils, which are packed with antioxidants.
- The name "pomegranate" comes from the Latin words "pomum" (apple) and "granatum" (seeded).
- Pomegranates are a symbol of fertility and abundance in many cultures, including Greek and Persian traditions.
- Pomegranate juice has been shown to have anti-inflammatory effects and may help lower blood pressure.
- The pomegranate tree can live for over 200 years in ideal conditions.
- Pomegranates are featured in ancient art and mythology, including the story of Persephone in Greek mythology.
- India is currently the world's largest producer of pomegranates.
- Pomegranate peel, often discarded, contains compounds used in traditional medicine and natural dyes.
Suggestions for Scenes and Settings for Pomegranate Drawings
- A close-up cross-section of a pomegranate, highlighting the glistening seeds and intricate internal structure.
- A still life arrangement featuring a pomegranate alongside other autumn fruits like grapes and leaves on a rustic wooden table.
- A pomegranate half spilling seeds onto a patterned ceramic plate, with dramatic lighting to emphasize texture and color.
- An ancient Persian market scene with baskets overflowing with ripe pomegranates and bustling merchants.
- A botanical illustration style drawing, labeling the parts of a pomegranate with fine lines and soft watercolor washes.
- Juicy pomegranate seeds scattered on an open book, with a glass of juice and a few leaves for a cozy, literary vibe.
- A pomegranate hanging from a leafy branch, with a bird perched nearby pecking at the fruit.
- A mystical or symbolic setting, such as a pomegranate resting on a velvet cloth with glowing candles to evoke ancient mythology.
- Children picking pomegranates in a sunlit orchard, capturing the joy of harvest and vibrant colors of the fruit.
- A surreal scene where pomegranate seeds transform into jeweled raindrops falling onto a reflective surface.