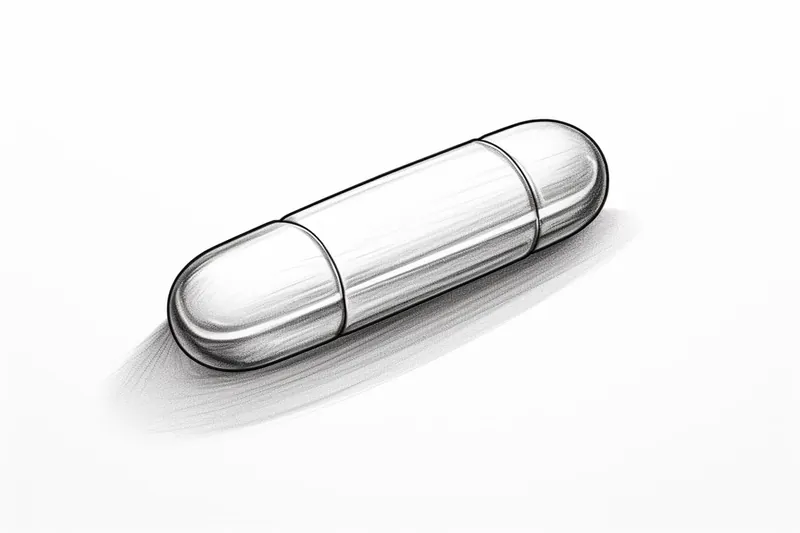
How to Draw a Pill
Learn how to draw a pill in a step-by-step guide. Create a realistic and detailed depiction of a pill using simple drawing techniques. Perfect for aspiring artists or a fun drawing project.
Materials You'll Need
- Pencil
- Paper
- Eraser
Pills are a common sight in our everyday lives, symbolizing health, medicine, and science. Drawing a pill might seem simple at first glance, but capturing its smooth, symmetrical shape and glossy surface can be a rewarding artistic challenge. Whether you are interested in medical illustration, creating educational materials, or simply practicing your drawing skills, learning how to draw a pill can add a unique element to your artwork. Pills often appear in still life drawings and can also be used to convey important messages about wellness or healthcare in visual storytelling.
In this tutorial, you'll discover how to draw a pill step by step, making use of basic shapes, careful symmetry, and subtle shading techniques to achieve a realistic effect. This subject is suitable for artists of all skill levels, from beginners just starting to explore form and shading, to more advanced artists who wish to refine their attention to detail and surface texture. Drawing a pill will help you practice proportion, smooth line work, and the use of highlights to create a three-dimensional look. With a few simple materials and a bit of patience, you'll be amazed at how realistic your drawing can become.
Whether you want to enhance your sketchbook with everyday objects or need an illustration for a project, learning how to draw a pill is a valuable skill to add to your repertoire. So gather your drawing supplies, set aside some creative time, and let's embark on this artistic journey together. With practice and attention to detail, you'll gain confidence in your abilities and enjoy the process of bringing even the simplest objects to life on paper!
Materials Required
To begin drawing a pill, you'll need the following materials:
- Paper: Choose a smooth and sturdy paper that is suitable for drawing. A sketchbook or drawing pad would work well.
- Pencil: Use a standard graphite pencil for sketching and outlining the pill shape. You can also use different grades of pencils for shading.
- Eraser: Have a good quality eraser on hand to correct any mistakes or make adjustments to your drawing.
- Ruler: A ruler will come in handy to ensure precise measurements and straight lines.
- Drawing Compass: Use a compass to draw perfectly round shapes for the top and bottom of the pill.
Now that you have all the necessary materials, let's dive into the step-by-step process of drawing a pill.
Step 1: Sketch the Outline
Start by lightly sketching the basic shape of the pill using your pencil. Draw a long and narrow rectangle standing upright. This will be the main body of the pill. Pay attention to the proportions and make sure the sides are straight and parallel.
Step 2: Add Curved Edges
Now, using your compass, draw two small circles on the top and bottom of the rectangle. These circles will represent the rounded ends of the pill. Make sure they are centered and have a consistent diameter.
Step 3: Refine the Shape
With the basic outline in place, take your pencil and refine the shape of the pill. Smooth out any rough edges and make sure the curves flow naturally. Pay attention to the details, such as the rounded corners and the symmetry of the shape.
Step 4: Add the Pill Details
To make your pill drawing more realistic, it's important to add some details. Start by sketching a line down the middle of the pill to create the division between the two halves. Then, draw a small circle near the top to represent the indentation where the medication is usually imprinted. You can also add additional smaller lines or markings to give your pill drawing some texture and depth.
Step 5: Shade and Highlight
To give your pill a three-dimensional look, it's time to add some shading and highlighting. Determine the direction of the light source and shade one side of the pill accordingly. Use a softer pencil grade, like a 2B or 4B, to create a smooth and gradual transition from light to dark. Add some highlights on the opposite side of the pill using an eraser, gently lifting off some graphite to create bright spots.
Step 6: Fine-Tune Your Drawing
Take a step back and evaluate your pill drawing so far. Make any necessary adjustments or refinements. Pay attention to the proportions, symmetry, and overall balance of the drawing. Use your eraser to correct any mistakes or clean up any smudges.
Step 7: Add Shadows and Final Details
To make your pill drawing appear more realistic, it's important to add some shadows. Determine the direction of the light source once again and shade the areas that would be in shadow. Use a blending tool or your finger to blend and soften the shadows. Add any final details, such as small reflections or highlights, to complete your drawing.
Tip: To achieve a realistic look when drawing a pill, focus on the shapes and contours that define its form. Start by sketching an oval for the main body of the pill, ensuring that both ends are symmetrical. Once you have the basic shape, lightly outline the edges to create the distinct curved surface. Use a blending stump or your finger to gently smudge the shading along the sides, which will help convey the glossy texture. Don't forget to add highlights by leaving small areas of the surface white; these will mimic the light reflecting off the pill's smooth exterior. Practice varying your pressure with the pencil to create depth and dimension, making the pill pop off the page!
Conclusion
Congratulations! You have successfully learned how to draw a pill. By following these step-by-step instructions and using your creativity, you were able to create a realistic and detailed depiction of a pill. Remember, practice makes perfect, so keep honing your drawing skills and experimenting with different techniques. Keep exploring the world of art and let your imagination run wild!
Fun Facts About Pill
- The word pill comes from the Latin "pilula," meaning "little ball."
- The first commercially produced pills were made in the 19th century, revolutionizing medicine delivery.
- Some pills are designed with special coatings to ensure they dissolve in the intestine rather than the stomach.
- The most commonly prescribed pill in the world is lisinopril, used to treat high blood pressure.
- Capsules, a type of pill, were invented in 1834 by French pharmacist François Mothes.
- Pills can be made in many shapes and colors to help patients identify their medication easily.
- Some pills are scored so they can be split for dose adjustment or easier swallowing.
- The first oral contraceptive pill was approved by the FDA in 1960, marking a major milestone in reproductive health.
- Gelatin, often used in pill capsules, is derived from animal collagen.
- Some modern pills use 3D printing technology to create precise dosages.
Suggestions for Scenes and Settings for Pill Drawings
- A pill resting on the open palm of a hand, emphasizing the scale and human connection to medicine.
- An array of colorful pills spilled from a pill bottle onto a reflective surface, playing with light and reflections.
- A single pill magnified under a glass lens, focusing on texture, details, and surface shine.
- Pills arranged into a creative pattern or mosaic, forming a recognizable shape or symbol (e.g., a heart or medical cross).
- A close-up of a pill cut in half, revealing its inner layers and structure.
- [A still life scene featuring a pill alongside other common objects like a glass of water, a clock](https://yonderoo.com/how-to-draw-a-clock/), and a prescription note.
- A futuristic setting where a pill is being assembled by robotic arms on a high-tech conveyor belt.
- A whimsical scene where the pill is transformed into a tiny vehicle or home for imaginary mini-creatures.
- A dramatic composition with a pill illuminated by a single spotlight in an otherwise dark space, highlighting its significance.
- An educational diagram showing the evolution of pill design throughout history, with labeled illustrations.