How to Draw a Night Sky
Learn how to draw a captivating night sky with this step-by-step tutorial. Discover techniques for creating stars, galaxies, and other celestial objects.
Materials You'll Need
- Pencil
- Paper
- Eraser
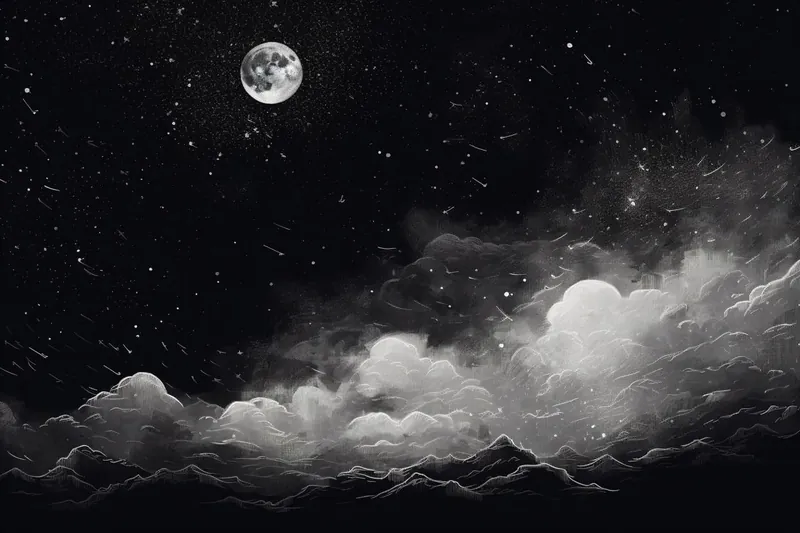
The night sky has captivated human imagination for centuries, serving as a timeless muse for artists, poets, and dreamers alike. Its vast expanse filled with twinkling stars, glowing moons, and swirling galaxies offers a breathtaking spectacle that invites creative expression. Learning how to draw a night sky not only allows you to recreate this mesmerizing scene on paper but also provides an opportunity to develop a deeper appreciation for the subtle beauty and complexity of the cosmos. Whether you want to incorporate a celestial backdrop into your artwork or simply enjoy the meditative process of sketching the heavens, mastering this subject can be both fulfilling and inspiring.
This tutorial is designed for artists of all skill levels, from beginners eager to explore new themes to experienced illustrators wanting to refine their techniques. Drawing a night sky involves understanding how to create smooth gradients to represent the dark sky, as well as mastering the delicate placement of stars, the glow of the moon, and the texture of distant galaxies. Techniques such as layering, shading, and blending will be demonstrated step-by-step, helping you build confidence and control over your materials. The process encourages patience and attention to detail, making it an excellent exercise in both creativity and technical skill.
By following this comprehensive guide on how to draw a night sky, you'll gain valuable insights into capturing the ethereal quality of nighttime scenes and learn practical tips to bring your celestial visions to life. So prepare your pencils, erasers, and imagination—this artistic journey promises not only to enhance your drawing skills but also to leave you with a stunning piece that celebrates the wonder of the universe. Let's embark on this creative adventure together and transform the mysteries of the night sky into a beautiful work of art!
Materials Required
Before we begin, make sure you have the following materials:
- Drawing paper
- Pencil or graphite stick
- Eraser
- Soft pastels (various shades of blue, black, and purple)
- Chalk pastels (white and yellow)
- Blending tools (cotton swabs, tissue paper, or blending stumps)
Step 1: Prepare your drawing surface
Start by choosing a smooth drawing paper. A heavyweight paper will work best as it can withstand the blending of pastels. You can use any size paper you prefer, depending on how big you want your night sky to be. Make sure the paper is clean and free from smudges or marks.
Step 2: Sketch the horizon line
Tip: To enhance your night sky drawing, consider using a reference image of a real night sky scene to guide your color choices and star placements. Observing how light and shadow interact in actual celestial photographs will help you create more realistic gradients and textures in your artwork. Additionally, experimenting with various blending tools can yield unique effects, so don't hesitate to try different techniques to achieve the ethereal quality of the night sky.
Using a pencil or graphite stick, lightly sketch a horizontal line across your paper to represent the horizon. This line will serve as a guide for placing the elements in your night sky drawing.
Step 3: Create the background
Using soft pastels, begin by applying light strokes of blue, starting from the top of the paper and gradually transitioning to darker shades as you move towards the bottom. Experiment with different shades of blue, purple, and even a touch of black to create depth and dimension.
Step 4: Add stars and galaxies
To create a starry night sky, use a white chalk pastel or a white pencil to draw small dots randomly across the dark background. Vary the sizes and intensities of the dots to give the impression of stars at different distances. You can also smudge the dots slightly with your finger or a blending tool to create a subtle glow.
For a more dramatic effect, add clusters of stars or galaxies using a white or yellow chalk pastel. These clusters can be scattered across the sky, following the natural curves and shapes you see in pictures of real night skies.
Step 5: Incorporate the moon or other celestial objects
If you wish to include the moon in your drawing, lightly sketch its shape using a pencil. Then, blend in shades of gray, white, and even a hint of yellow to give it a three-dimensional appearance. Use blending tools to soften the edges and create a smooth transition between the moon and the surrounding sky.
Alternatively, you can add other celestial objects such as planets, comets, or even a shooting star. Draw these objects using a combination of colors and shapes that stand out against the dark background.
Step 6: Enhance the details
To add depth and dimension to your night sky, experiment with different blending techniques. You can use a cotton swab or a blending stump to softly blend the pastel colors together, creating a seamless transition between shades. You can also use tissue paper to gently smudge and soften certain areas, such as the glow around the moon or the edges of the stars.
Step 7: Final touches
Take a step back and evaluate your drawing. Look for any areas that need refinement or additional details. You can use a kneaded eraser to lift or lighten certain areas if needed. Pay attention to the overall balance and composition of your night sky, making sure that the elements are harmoniously arranged.
Conclusion
Drawing a night sky allows us to explore the vastness of the universe and tap into our imagination. By following these step-by-step instructions, you can create your own mesmerizing night sky artwork. Remember to experiment with different colors, blending techniques, and celestial objects to make your drawing unique. So grab your drawing materials and let your creativity soar under the starry night sky!
Fun Facts About Night Sky
- The night sky appears dark because Earth's atmosphere scatters sunlight, blocking most of the sun's light during nighttime.
- Stars twinkle due to atmospheric turbulence causing light to bend.
- The Milky Way galaxy, visible as a milky band in the night sky, contains over 100 billion stars.
- The moon's phases affect the brightness of the night sky, influencing how many stars are visible.
- Meteor showers occur when Earth passes through debris left by comets, creating spectacular streaks of light.
- Light pollution from cities can obscure the night sky, making it harder to see stars.
- The color of stars indicates their temperature, with blue stars being hotter than red ones.
- Constellations are patterns of stars historically used for navigation and storytelling.
Suggestions for Scenes and Settings for Night Sky Drawings
- A tranquil lakeside reflecting the shimmering stars and a crescent moon overhead.
- A silhouette of a lone tree atop a hill with a swirling Milky Way galaxy stretching across the sky.
- A bustling city skyline illuminated beneath a starry sky with occasional shooting stars.
- A desert scene with cacti and sand dunes under a vast, galaxy-filled night sky.
- An ancient stone circle or ruins bathed in moonlight with constellations vividly visible.
- A mountain range with snow-capped peaks glowing faintly under the glow of a full moon.
- A quiet beach with gentle waves reflecting stars and a distant comet streaking across the horizon.
- A fantasy setting featuring floating islands or castles beneath a cosmic sky filled with colorful nebulae.
- A campsite scene with tents and a campfire, surrounded by a sky teeming with stars and planets.
- A forest clearing where fireflies mingle with stars, creating a magical twinkling effect.