How to Draw a Mandrill
Learn how to draw a mandrill with this step-by-step tutorial. Capture the unique features and vibrant colors of this fascinating primate in your artwork.
Materials You'll Need
- Pencil
- Paper
- Eraser
Welcome to this in-depth tutorial on how to draw a mandrill, one of the most striking and colorful primates in the animal kingdom! Native to the rainforests of Central Africa, mandrills are instantly recognizable thanks to their vibrant blue and red facial markings, expressive eyes, and impressive manes. Their bold appearance makes them a favorite subject for wildlife artists and anyone captivated by the beauty of nature. Capturing the unique character and vivid features of a mandrill in your drawing not only enhances your understanding of animal anatomy but also allows you to explore the use of color, shading, and texture in a fun and creative way.
Whether you are a beginner looking to improve your observation and drawing skills, or an experienced artist eager for a new challenge, learning how to draw a mandrill offers a wonderful opportunity to practice techniques like building up layers, blending colors, and rendering fur detail. This step-by-step guide is designed to break down the process into manageable steps, so artists of all skill levels can follow along with confidence. By the end of this tutorial, you'll have a finished mandrill drawing that you can be proud of, and you'll gain valuable experience that can be applied to other animal portraits as well.
So, gather your favorite drawing tools and get ready to unleash your creativity! Remember, every artist develops their style through practice and patience—don't be afraid to experiment and enjoy the journey as you learn how to draw a mandrill. Let's dive in and bring this fascinating creature to life on your page!
Materials Required
Before we begin, make sure you have the following materials ready:
- [Drawing paper or sketchbook](https://yonderoo.com/best-sketchbooks-for-artists/)
- Pencil
- Eraser
- Fine-tip black marker or pen
- Colored pencils or markers (optional)
Now that you have all the necessary materials, let's dive into the drawing process.
Step 1: Outline the Basic Shape
Start by lightly sketching an oval shape for the head of the mandrill. This oval should be slightly tilted to one side. Next, draw a curved line for the back and add a larger oval shape below it for the body. Connect the two shapes with curved lines to form the neck and shoulders of the mandrill.
Step 2: Add Facial Features
Using the basic shape as a guide, sketch the facial features of the mandrill. Begin by drawing two large circles for the eyes. Place them towards the upper part of the head, closer to the left side. Inside each eye, draw a smaller circle for the iris and a smaller dot for the pupil. Add curved lines above each eye for the eyebrows.
Below the eyes, draw a triangular-shaped nose with rounded corners. Extend a curved line from each side of the nose to form the mandrill's snout. Add a curved line above the nose for the upper lip and a slightly longer line below the nose for the lower lip.
Step 3: Draw Ears, Hair, and Details
To create the mandrill's ears, draw two curved shapes on each side of the head. Inside each ear, draw a few small curved lines to represent the inner structure.
Next, add some hair on top of the mandrill's head. Draw a series of small, curved lines that start from the top of the head and flow towards the right side. These lines should give the impression of wild hair.
Now, it's time to add some details. Sketch a few small curved lines around the mandrill's eyes to define the skin folds. Add a curved line above each eye for the crease of the eyelids. Draw a few lines on the snout to indicate wrinkles and texture.
Step 4: Refine the Face and Body
Using the initial sketch as a guide, start refining the outline of the mandrill's face and body. Draw smooth, flowing lines to define the contours and shape of the head, body, and limbs. Take your time with this step to ensure that the proportions and anatomy of the mandrill are accurate.
Step 5: Add Fur Texture
To give the mandrill a realistic touch, add some fur texture. Start by shading in the dark areas, such as the mandrill's nose, mouth, and ears. Use light, short strokes to mimic the appearance of fur. Gradually build up the shading, paying attention to the direction of the fur. Use a variety of strokes to create depth and dimension.
Step 6: Finalize the Drawing
At this point, your mandrill drawing is almost complete. Erase any unnecessary lines and smudges, leaving behind only the clean lines and shading. If you prefer a more finished look, you can outline the main features with a fine-tip black marker or pen to make them stand out.
Did You Know?: The mandrill's dazzling face isn't just for show—those bright blue and red colors actually get more intense when the animal is excited or agitated! Unlike many mammals whose colors come from fur, a mandrill's vivid hues are caused by structural coloration in their skin, which reflects light in unique ways. Scientists believe these colors help mandrills communicate social status and mood within their groups, making their faces an expressive "canvas" in the wild. As you draw, pay extra attention to the gradients and transitions in color, since they're not only beautiful but also play a vital role in the mandrill's daily life.
Tip: When drawing a mandrill, pay special attention to the unique shape and proportions of its face, which is key to capturing its character. Start with light, loose sketches to outline the basic structure, focusing on the large brow ridge and prominent snout. Use reference images to study the vibrant colors and textures of the mandrill's fur and facial markings; colored pencils or pastels can be excellent for layering these hues. To create depth, layer your colors gradually, blending them with a blending stump or your fingers to mimic the soft transitions in the mandrill's fur. Finally, add fine details, such as the whiskers and the intricate patterns on the face, last to ensure they stand out against the vibrant colors you've applied. Remember, embracing the process and allowing your style to develop will lead to a more satisfying result!
Conclusion
Congratulations on completing your mandrill drawing! By breaking down the process into simple steps, we have explored how to capture the unique features and character of this fascinating primate. Remember, practice makes perfect, so don't be afraid to keep experimenting and refining your technique. With time, you'll be able to create even more detailed and realistic animal drawings. Have fun and keep exploring your artistic abilities!
Gallery of Mandrill Drawings


Fun Facts About Mandrill
- The mandrill is the world's largest monkey species, with adult males weighing up to 54 kg.
- Mandrills are famous for their vibrant blue and red facial coloration, which becomes brighter when they are excited.
- They live in the rainforests of Central Africa, primarily in countries like Gabon, Cameroon, and Congo.
- Mandrills have extremely large social groups called "hordes," sometimes numbering over 600 individuals.
- Their colorful faces and rumps are used for communication and attracting mates.
- Mandrills are omnivores, eating fruits, seeds, insects, and even small vertebrates.
- Unlike most monkeys, mandrills have cheek pouches to store food while foraging.
- Mandrills are classified as Vulnerable due to habitat loss and hunting.
Suggestions for Scenes and Settings for Mandrill Drawings
- [A mandrill perched on a mossy tree branch in the lush rainforest](https://yonderoo.com/how-to-draw-a-rainforest/), surrounded by vibrant green foliage and dappled sunlight.
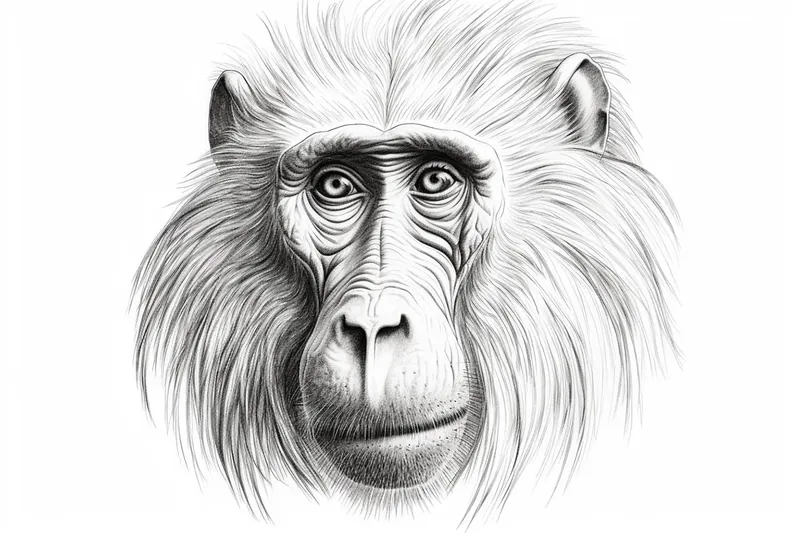
- Close-up portrait of a mandrill displaying its colorful face and expressive eyes, emphasizing fur texture and facial markings.
- A playful mandrill family interacting—grooming, playing, or cuddling—on the forest floor scattered with leaves and flowers.
- Mandrill drinking from a clear jungle stream, with reflections and ripples in the water.
- A dramatic scene of a mandrill roaring or yawning, showing off its impressive teeth and powerful jaw.
- Mandrill foraging for fruit or insects, surrounded by fallen tropical fruits and insects on the ground.
- A young mandrill swinging from vines, capturing movement and dynamic poses in a jungle canopy setting.
- Mandrill sitting quietly at dawn, with soft morning light filtering through the misty rainforest.
- Stylized mandrill using bold, abstract colors and patterns to highlight its distinctive facial features.
- A scene showing a mandrill in a rainstorm, with wet fur and dramatic lighting, emphasizing the animal's resilience in its natural habitat.