How to Draw a Macaw
Learn how to draw a macaw with this step-by-step guide. From sketching the basic shapes to adding vibrant colors, create your own masterpiece.
Materials You'll Need
- Pencil
- Paper
- Eraser
Macaws are among the most striking and recognizable birds in the world, famed for their brilliant plumage and charismatic personalities. Native to the rainforests of Central and South America, these parrots boast an array of vivid colors—such as blues, reds, yellows, and greens—that make them a favorite subject for artists of all skill levels. Their distinctive curved beaks, expressive eyes, and long, elegant tail feathers add to their visual appeal, and capturing their likeness on paper offers a rewarding challenge for any budding artist.
Learning how to draw a macaw not only allows you to practice important drawing techniques, such as shading, layering colors, and rendering feathers, but also gives you the chance to study bird anatomy and proportions. Whether you're creating a realistic wildlife portrait, a vibrant illustration, or simply want to expand your drawing repertoire, mastering the art of drawing a macaw will help you improve your observation skills and add a splash of color to your portfolio. This subject is ideal for beginners eager to experiment with bold hues and for more experienced artists looking to refine their detail work.
Throughout this step-by-step tutorial, you'll receive clear guidance on how to draw a macaw, from outlining the basic body shapes to adding the final dazzling details. All you need are some basic art supplies and a bit of patience. Remember, the key to improvement is practice, so don't worry if your first attempt isn't perfect. Embrace the creative journey and enjoy bringing this magnificent bird to life on your page!
Materials Required
To begin with, make sure you have the following materials ready:
- Paper: Use a good quality paper that is suitable for drawing. A smooth or medium-textured paper works well for this project.
- Pencils: Get a set of graphite pencils with varying degrees of hardness, such as 2H, HB, and 2B. These will help you achieve different shades and textures in your drawing.
- Eraser: Choose an eraser that is soft and gentle on the paper. A kneaded eraser is a great option as it can be shaped to erase small details.
- Colored Pencils: You will need a set of colored pencils to add the vibrant colors of the macaw to your drawing. Look for a set that includes a variety of colors, including blues, yellows, greens, and reds.
- Reference Image: Find a clear and detailed reference image of a macaw. This will help you accurately depict the bird's features and colors during the drawing process.
Now that you have gathered all the materials, let's dive into the step-by-step process of drawing a macaw!
Step 1: Sketch the Basic Shapes
Begin by lightly sketching the basic shapes that make up the macaw's body. Start with a large oval shape for the body, and add a smaller circle on top for the head. Then, sketch a long oval shape for the tail, and two overlapping ovals for the wings.
Step 2: Add Details to the Head
Now, let's focus on the macaw's head. Sketch a slightly curved line across the smaller circle to divide it into two parts, representing the macaw's beak. Next, draw a small circle for the eye, and add a tiny dot inside to indicate the pupil. Don't forget to sketch the macaw's distinctive facial feathers around the eye area.
Step 3: Draw the Wings and Tail
Refine the shapes of the wings and tail by adding more curves and details. Pay attention to the overlapping feathers and the unique patterns found on a macaw's plumage. Remember to keep the lines soft and flowing to create a sense of movement and grace.
Step 4: Outline the Body
Using a darker pencil, carefully trace over the sketched shapes to create a more defined outline for the macaw's body. Be mindful of the proportions and take your time to get it right. Pay close attention to the curves and contours of the bird's body, as well as the varying thicknesses of the feathers.
Step 5: Add Feathers and Texture
Now it's time to add the intricate details of the macaw's feathers. Start by lightly sketching the outline of the individual feathers using quick, short strokes. Blend in the strokes with a blending stump or a tortillon to create a smooth transition between the feathers. This will help add depth and texture to your drawing.
Step 6: Start Coloring
Now that you have completed the pencil sketch, it's time to bring your macaw to life with vibrant colors! Begin by using your colored pencils to add the base colors to the bird's body. Layer the colors gradually, starting with lighter shades and building up to the darker ones. Pay attention to the reference image for guidance on where to apply each color.
Step 7: Add Details and Highlights
Next, use your colored pencils to add the smaller details and highlights to the macaw's feathers. Add darker shades to create depth and dimension, and use lighter colors or white to highlight certain areas, such as the edges of the feathers or areas where the light hits the bird.
Step 8: Finalize the Drawing
Take a step back and evaluate your drawing. Make any necessary adjustments to the colors, shapes, or proportions to ensure that your macaw looks realistic and vibrant. Once you are satisfied with the result, use your darkest colored pencil or a fine-tipped pen to darken the outlines and add any final details.
Tip: When drawing a macaw, pay special attention to the layering of feathers and the direction of your pencil or brush strokes—feathers on the wings and tail often overlap in smooth, slightly curved patterns that follow the natural flow of the bird's body. Use a sharp colored pencil or a fine brush to sketch the feather details lightly, then build up vibrant color in layers to achieve the rich saturation macaws are known for. For the beak and eye, switch to a harder pencil or a fine liner to capture those crisp, defined edges that contrast with the softness of the plumage. Don't forget to step back occasionally and check the overall balance of colors and shapes to ensure your macaw remains lively and harmonious on the page!
Conclusion
Congratulations on completing your macaw drawing! By following the steps outlined in this guide and using your creativity, you have successfully captured the beauty and intricate details of this stunning bird. Drawing a macaw may seem intimidating at first, but with practice and patience, you will be able to create breathtaking artworks.
Remember to have fun and experiment with different techniques to make your drawing unique. So keep practicing, and soon you'll be able to draw not just macaws, but a whole variety of birds and animals. Happy drawing!
Fun Facts About Macaw
- Macaws are the largest parrots in the world, with the hyacinth macaw reaching up to 40 inches in length.
- These birds are native to the rainforests of Central and South America, thriving in lush, tropical environments.
- Macaws are known for their intelligence and can mimic human speech.
- Their strong, curved beaks are powerful enough to crack open hard nuts and seeds.
- Many macaw species form lifelong monogamous pairs, often seen flying together.
- Some macaws, like the blue-and-yellow macaw, can live up to 60 years or more in captivity.
- Macaws use their feet like hands to grasp food and climb.
- Brightly colored feathers help macaws blend into the vibrant rainforest canopy.
- Many macaw species are endangered due to habitat loss and illegal pet trade.
Suggestions for Scenes and Settings for Macaw Drawings
- A vibrant macaw perched on a rainforest branch surrounded by lush green foliage and tropical flowers.
- A pair of macaws interacting playfully in mid-flight, wings spread wide against a bright blue sky.
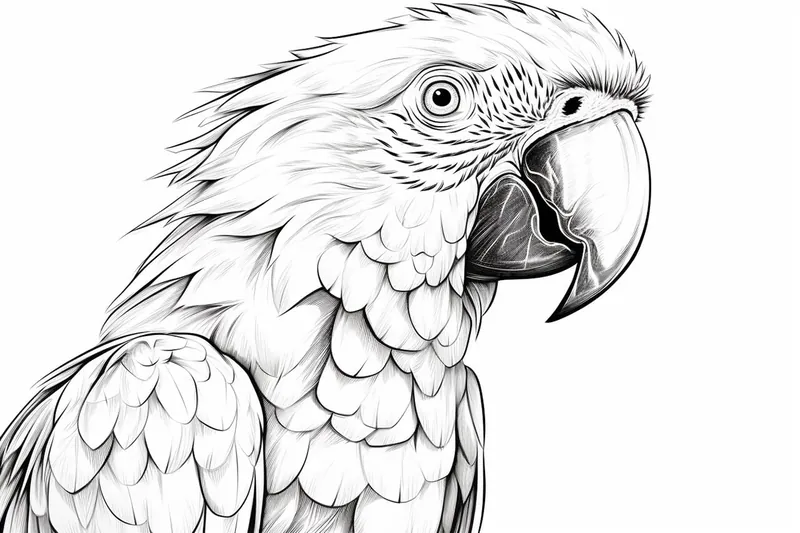
- A close-up portrait focusing on a macaw's expressive face and intricate feather patterns.
- A macaw perched on a wooden perch inside a sunlit aviary with dappled light filtering through the trees.
- A family of macaws gathered around a clay lick by a riverbank, displaying their social behaviors.
- A macaw in the rain, feathers slightly ruffled and droplets sparkling on its colorful plumage.
- A scene from a marketplace in South America with a macaw curiously exploring baskets of fruit.
- An imaginative setting where a macaw soars above the rainforest canopy during a dramatic sunset.
- [A macaw interacting with other rainforest creatures such as monkeys, butterflies, or tree frogs](https://yonderoo.com/how-to-draw-a-tree-frog/).
- A stylized, abstract version of a macaw using bold geometric shapes and exaggerated colors for a modern art effect.