How to Draw a Log
Learn how to draw a log with this step-by-step drawing tutorial. Create a realistic and detailed log drawing using simple techniques. Perfect for beginners and experienced artists alike.
Materials You'll Need
- Pencil
- Paper
- Eraser
Drawing is a timeless and rewarding form of artistic expression that allows us to explore and capture the intricate details of the natural world. One fascinating subject to practice with is the humble log—a piece of wood that tells a story of nature's cycles and the passage of time through its rings, texture, and unique shape. Learning how to draw a log not only helps you improve your observational skills but also teaches you how to depict texture, depth, and shading realistically. This makes it an excellent exercise for artists looking to enhance their ability to render natural objects with authenticity and detail.Whether you are just beginning your artistic journey or have some experience under your belt, this tutorial will guide you through the process of creating a detailed and lifelike drawing of a log. You will learn techniques such as contour drawing to capture the overall shape, shading to emphasize the cylindrical form, and texturing methods to replicate the rough bark and smooth inner rings. Drawing a log challenges your understanding of light and shadow, as well as your patience and attention to fine details, making it a valuable exercise for improving your overall drawing skills.By the end of this tutorial on how to draw a log, you will have gained confidence in rendering natural textures and forms, and you'll have a beautiful piece of art that reflects your growing skill. Remember, every artist starts with simple subjects, and with practice, your drawings will become more nuanced and expressive. So, gather your materials, embrace the process, and enjoy bringing this natural element to life on your paper!
Materials Required
To draw a log, you will need the following materials:
- [Drawing paper or sketchbook](https://yonderoo.com/best-sketchbooks-for-artists/)
- Pencils of various grades (2B, 4B, 6B)
- Eraser
- Blending stump or cotton swabs
Now that you have gathered all the necessary materials, let's dive into the steps of drawing a log.
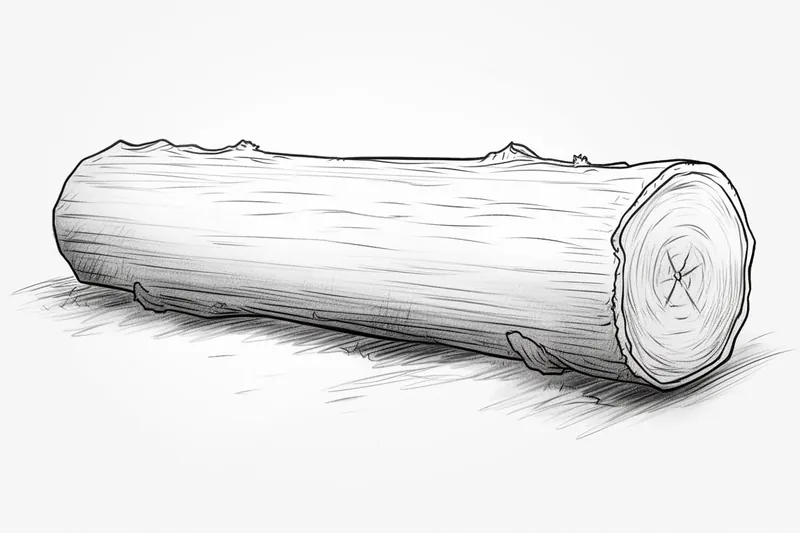
Step 1: Outline the Basic Shape
To begin, lightly sketch the basic shape of the log on your drawing paper. Start by drawing a horizontal line for the ground, and then sketch an oval shape on top of it. This oval will be the cross-section of the log.
Step 2: Add Texture and Details
Now that we have the basic shape, let's add some texture and details to make the log more realistic. Look closely at a reference image of a log or an actual log if you have one, and observe the patterns and details present on its surface.
Using your pencils of various grades, begin by lightly shading the outer edges of the log. Use a softer pencil like a 4B or 6B to create the darker areas, while a 2B pencil can be used for lighter shading. Gradually build up the shading, working from the edges towards the center of the log.
Step 3: Create Knots and Cracks
To make the log look more interesting, let's add some knots and cracks. Knots are areas where branches used to emerge from the log, and cracks are natural splits in the wood. These features add character to the log.
Using your pencils, draw irregular shapes and lines to represent knots and cracks on the surface of the log. Make sure to vary the thickness and direction of these lines to create a realistic effect.
Step 4: Add Shadows and Highlights
Shadows and highlights play a crucial role in creating depth and dimension in your drawing. Observe how the light falls on the log and identify areas that would be in shadow and areas that would catch the light.
Using a softer pencil, darken the areas of the log that are in shadow, paying attention to the direction and intensity of the light source. Use an eraser to create highlights by gently lifting off some of the graphite. This will give your log drawing a three-dimensional appearance.
Step 5: Refine and Blend
Tip: To enhance your drawing of a log, consider using reference images or observing a real log in nature, as this will provide valuable insights into the unique textures, colors, and patterns you should capture. Pay close attention to how light interacts with the surface—this can help you make more informed decisions about shading and highlights, ultimately adding depth and realism to your artwork.
Now that you have the basic forms, texture, and shading in place, it's time to refine your drawing. Take a step back and assess your work so far. Look for areas that need more detailing or adjustments.
Use a sharp pencil to add more details and refine the texture of the log. Pay attention to the small cracks, grains, and imperfections on the surface. Take your time and work slowly to achieve the desired level of realism.
To smooth out any harsh lines or transitions, use a blending stump or a cotton swab to gently blend the shading. This will help create a more realistic and cohesive look.
Step 6: Final Touches
In this final step, take a moment to evaluate your drawing as a whole. Are there any areas that need further refinement or adjustment? Make any necessary changes to ensure the log looks realistic and visually appealing.
You can also consider adding additional elements to your drawing, such as fallen leaves, moss, or mushrooms around the log, to enhance the overall composition.
Conclusion
Drawing a log is a rewarding exercise that allows you to practice your observation skills and shading techniques. By following the step-by-step instructions in this tutorial, you can create a realistic and detailed drawing of a log. Remember to take your time, be patient, and enjoy the process of bringing nature to life on paper.
So grab your pencils, embrace your inner artist, and start drawing a log today!
Fun Facts About Logs
- The rings inside a log can reveal the tree's age and the environmental conditions it experienced, a science known as dendrochronology.
- Logs play a crucial role in forest ecosystems by providing habitats for insects, fungi, and small animals, as explained by the US Forest Service.
- When logs decompose, they return essential nutrients to the soil, supporting new plant growth, a process detailed by the Natural Resources Conservation Service.
- Logs have been used historically as building materials, fuel, and even as primitive bridges, as documented by the Encyclopedia Britannica.
- The texture and grain patterns in a log are unique to each tree species, influencing the wood's strength and appearance, according to the Wood Database.
- Floating logs were historically used to transport timber down rivers, a method known as log driving, described by the HistoryLink.
- Some logs can preserve ancient DNA and environmental data, helping scientists study past climates, as reported by Nature Scientific Reports.
Suggestions for Scenes and Settings for Log Drawings
- A solitary log resting on a forest floor covered with fallen leaves and small mushrooms.
- A cross-section of a log showing detailed tree rings, surrounded by scattered wood chips and bark fragments.
- A moss-covered log lying beside a gentle stream, with reflections and ripples in the water.
- A log serving as a natural bench in a park setting, with blades of grass and dappled sunlight filtering through trees.
- A log with visible knots and cracks, partially buried in soil with tiny plants sprouting around it.
- A close-up view of a log's textured bark, highlighting roughness and intricate patterns of cracks and splits.
- A log with a small insect colony, such as ants or beetles, crawling over its surface to add dynamic life.
- A weathered log on a beach, surrounded by sand, seashells, and driftwood fragments.
- A log in early winter, partially covered with frost or snow, emphasizing contrast between textures.
- A composition featuring a log as the base for autumnal elements like acorns, pinecones, and colorful leaves.