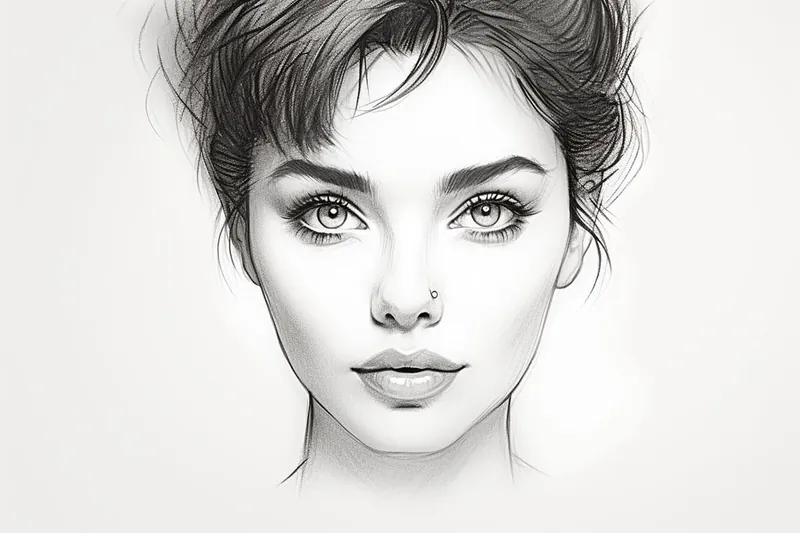
How to Draw a Human Face
Learn how to draw a human face in this step-by-step tutorial. Discover the techniques for creating realistic portraits, from basic shapes to final details.
Materials You'll Need
- Pencil
- Paper
- Eraser
The human face is one of the most expressive and recognizable subjects in art, capturing the essence of personality, mood, and character. Whether you are interested in portraiture, character design, or simply want to improve your observational skills, learning how to draw a human face is a rewarding and valuable pursuit. Faces have fascinated artists for centuries, as each one is unique and can convey a wide range of emotions through subtle details and proportions. By studying facial features and their relationships, you gain insight into both artistic techniques and the beauty of human diversity.
Many aspiring artists are drawn to portraits because of the challenge and satisfaction they present. Drawing a human face allows you to practice essential skills such as proportion, shading, and anatomy while encouraging close observation and patience. Whether you are a beginner picking up a pencil for the first time or an intermediate artist looking to refine your technique, this step-by-step guide on how to draw a human face will help demystify the process. We will break down the face into manageable parts and guide you through each stage, from sketching the basic shapes to adding lifelike details and shading for depth.
Remember, everyone starts somewhere, and improvement comes with practice and persistence. Don't be discouraged by initial mistakes; instead, see them as opportunities to learn and grow as an artist. With patience and an open mind, you'll soon be able to capture the subtle nuances that make every face unique. So, gather your materials and let's embark on this creative journey together—your next masterpiece could be just a few steps away!
Materials Required
Before we begin, let's gather the necessary materials that you'll need for this drawing tutorial:
- [Drawing paper or sketchbook](https://yonderoo.com/best-sketchbooks-for-artists/)
- Pencils of varying hardness (HB, 2B, 4B, etc.)
- Eraser
- Blending stump or cotton swabs
- Ruler
- Reference photo of a human face or mirror
Having the right materials will make the process smoother and help you achieve better results. Now, let's dive into the step-by-step instructions!
Step 1: Start with Basic Shapes
Begin by lightly sketching the basic shapes that make up the human face. Use a circle for the head and add guidelines to indicate the position of the eyes, nose, and mouth. These guidelines will serve as a reference as you progress with your drawing.
Step 2: Outline the Proportions
Using the guidelines as a reference, carefully outline the proportions of the face. Pay attention to the placement and size of the features. Remember that everyone's face is unique, so take your time to observe and capture the individual characteristics of the person you are drawing.
Step 3: Add the Eyes
The eyes are often considered the most expressive feature of the face. Start by sketching the shape of each eye, paying close attention to the eyelids and eyelashes. Then, add the iris and the pupil. Make sure to capture the reflections and shadows in the eyes to add depth and realism.
Step 4: Draw the Nose
Move on to drawing the nose by carefully observing its shape and proportions. Start with the bridge of the nose and then add the nostrils. Pay attention to the shadows and highlights that define the nose's form. Remember to keep your lines light and adjust them as needed.
Step 5: Capture the Lips
The lips can greatly impact the overall expression of the face. Begin by outlining the shape and volume of the upper and lower lips. Pay attention to the curves and angles. Add shading to create depth and highlight the subtle variations in tone.
Step 6: Depict the Ears
Ears may often be overlooked, but they are an essential part of a realistic portrait. Observe the shape and position of the ears in relation to the rest of the face. Start with the outline and then add the details, such as the helix and earlobe. Remember to incorporate shading to give the ears dimension.
Step 7: Define the Hairline
Tip: To enhance your drawing accuracy, consider using a grid technique; lightly overlay a grid on your reference photo and replicate it on your drawing surface. This method helps you break down the face into smaller, manageable sections, making it easier to focus on proportions and placements of features like the eyes, nose, and mouth. Remember to keep your lines light during the initial sketching phase, allowing for adjustments as you refine the details.
Drawing the hairline can help frame the face and give it a more realistic look. Observe how the hair flows and pays attention to its texture and volume. Start by sketching the overall shape of the hair and then add the individual strands using light, feathery strokes.
Step 8: Refine the Features
Now that you have the basic structure in place, it's time to refine and add more details to the features. Observe the reference photo or look in the mirror to capture the unique characteristics of the individual you are drawing. Add additional shading and highlights to create depth and realism.
Step 9: Add Shadows and Highlights
Shadows and highlights play a crucial role in giving a three-dimensional look to your drawing. Study the reference photo or observe the lighting conditions, and carefully add shading to areas that are in shadow. Use an eraser or a blending stump to create smooth transitions between light and dark areas.
Step 10: Finalize the Details
To complete your drawing, take a moment to refine and add any final touches. Pay attention to small details like wrinkles, freckles, or other unique features that make the face individual. Take your time and make any necessary adjustments until you are satisfied with the result.
Mistake Alert: A frequent mistake beginners make is placing the eyes too high up on the face, often because we subconsciously focus on the forehead less and exaggerate the space below the eyes. This can make faces look unnatural or out of proportion. To avoid this, remember that in a typical adult face, the eyes actually sit about halfway between the top of the head and the bottom of the chin. Try lightly sketching a horizontal guideline across the center of your oval face shape before drawing the eyes—this simple step instantly improves accuracy and helps anchor your other features! Always double-check your proportions as you refine your sketch to catch and correct this common pitfall early.
Conclusion
Drawing a human face is an art form that requires patience, observation, and practice. By following these step-by-step instructions and using the right materials, you can develop your skills and create stunning portraits. Remember, each face is unique, so embrace the opportunity to capture the individuality of the person you are drawing. With time and dedication, you'll become more confident and skilled in capturing the essence of the human face.
So grab your pencils, paper, and reference photo, and start your journey of drawing beautiful human faces. With practice, you'll see improvement and enjoy the process of bringing faces to life on paper.
Fun Facts About Human Face
- The human face has 43 muscles, many of which are used to create facial expressions.
- On average, people can recognize and remember about 5,000 different faces.
- Facial symmetry is often associated with attractiveness.
- Eyebrows play a crucial role in facial recognition.
- Humans are experts at reading emotions from faces, a skill known as facial affect recognition.
- The nose is the most protruding part of the human face and is unique to each individual.
- Babies can recognize faces within hours of birth, according to research.
- There are six universally recognized facial expressions: happiness, sadness, fear, disgust, anger, and surprise.
- Facial hair grows faster than any other hair on the body.
- Each person's face is unique due to a combination of genetics and environmental factors.
Suggestions for Scenes and Settings for Human Face Drawings
- A portrait of a person caught mid-laughter, capturing the joy and energy in their facial features.
- An elderly face with deep wrinkles and expressive eyes, telling a story of a life well-lived.
- A dramatic, close-up face illuminated by a single side light, emphasizing shadows and highlights.
- A child's face looking up in wonder, perhaps watching falling rain or a butterfly landing nearby.
- A face partially obscured by hands, hair, or a scarf, focusing on the expressive eyes.
- A character study showing a face reacting to intense emotion: surprise, fear, or sadness.
- An imaginative portrait blending human features with elements from nature, such as leaves or flowers.
- A group of diverse faces side by side, highlighting differences in age, ethnicity, and expression.
- A self-portrait drawn from a mirror, capturing your authentic mood in the moment.
- A face reflected in water or glass, challenging you to draw both the subject and their reflection.