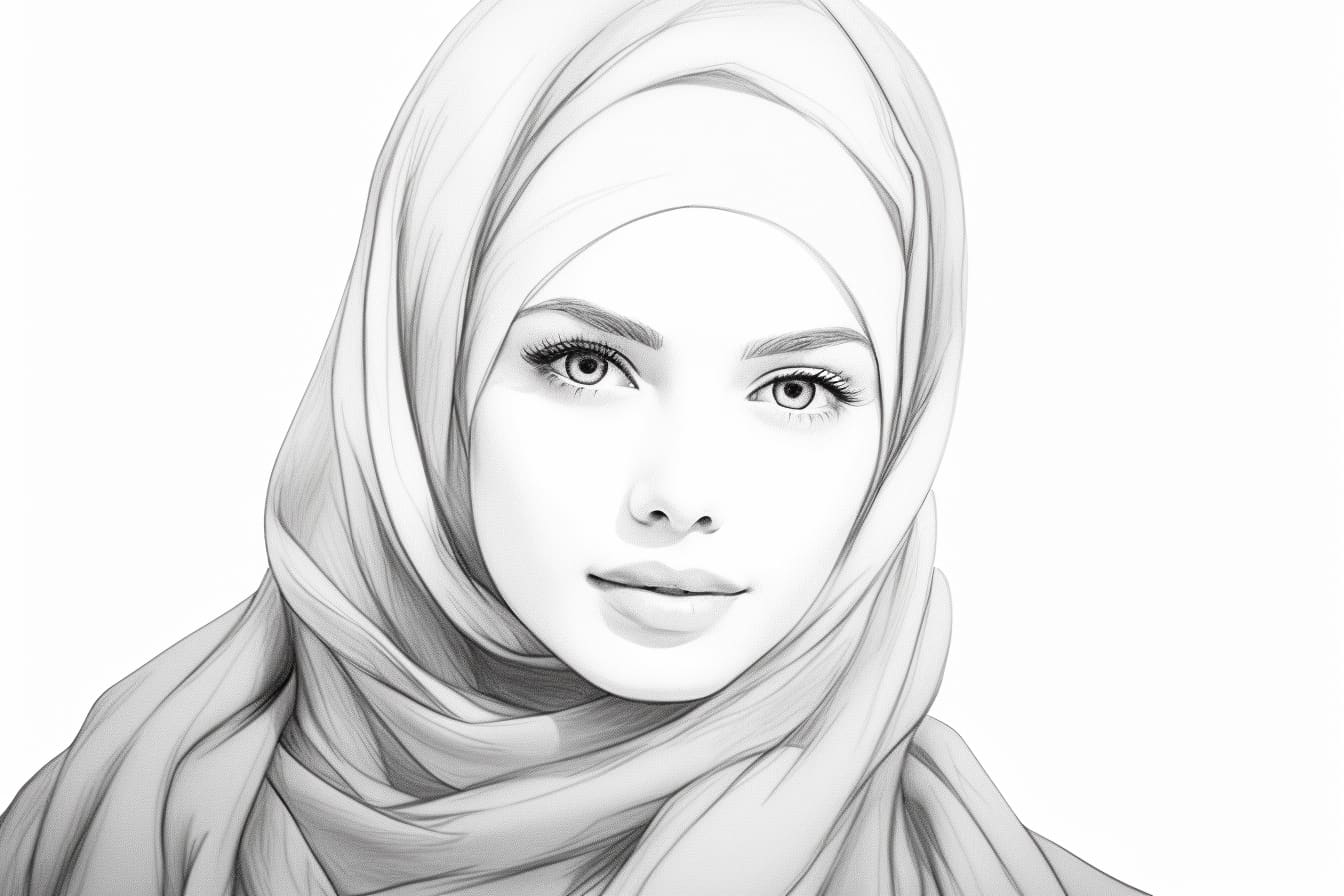
Drawing a hijab can be a beautiful representation of Muslim culture and style. Whether you are an artist looking to add diversity to your artwork or someone interested in learning more about hijabs, this step-by-step guide will teach you how to draw a hijab with ease. In this article, we will cover the materials you need, as well as provide clear instructions on how to draw a hijab.
Required Materials
Before we begin, gather the following materials:
- Pencil
- Eraser
- Drawing paper
- Colored pencils or markers (optional)
Now that you have your materials ready, let’s get started!
Step 1: Draw the Face
Start by drawing a rough outline of the face. Keep it simple but proportional. You can draw a circle for the head and add vertical and horizontal guidelines to help you align the facial features.
Step 2: Sketch the Hijab Shape
Using light pencil strokes, sketch the overall shape of the hijab. The hijab typically covers the head, neck, and shoulders, with various styles and folds. You can start by drawing a curved line from one side of the face to the other, just above the guidelines you drew in the previous step.
Step 3: Add Draping
To make the hijab appear more realistic, add some draping details. You can do this by sketching curved lines within the hijab shape, following the contours of the head and neck. Pay attention to where the fabric would naturally fold and overlap.
Step 4: Define the Face
Now that the hijab shape is taking form, it’s time to define the facial features. Use the guidelines as a reference and draw the eyes, nose, and mouth within the face outline. Remember to keep the face proportions accurate and adjust them as needed.
Step 5: Refine the Hijab Shape
With the facial features in place, it’s time to refine the hijab shape. Use bold pencil lines to outline the final shape, erasing any unnecessary guidelines. Make sure the hijab covers the hair and extends down the neck and shoulders.
Step 6: Add Texture and Details
To bring the hijab to life, add texture and details. You can do this by lightly shading areas of the hijab to create the illusion of folds and creases. If you’re using colored pencils or markers, choose appropriate colors for the fabric and add shading and highlights for depth.
Step 7: Final Touches
Take a moment to review your drawing and make any necessary adjustments. Erase any stray lines or smudges, and refine the facial features if needed. Want to add more details? Consider drawing accessories like earrings or a necklace to complement the hijab.
Conclusion
Drawing a hijab can be a rewarding artistic experience and a way to appreciate and celebrate Muslim culture. By following these step-by-step instructions, you can create a beautiful representation of a hijab in your artwork. Remember to practice, experiment with different styles, and most importantly, have fun expressing your creativity through drawing hijabs.