How to Draw a Ghoul
Learn how to draw a ghoul in this step-by-step tutorial. Follow our instructions to create a spooky ghoul masterpiece. Perfect for Halloween or any haunted occasion.
Materials You'll Need
- Pencil
- Paper
- Eraser
Ghouls are a classic figure in folklore and horror stories, often depicted as eerie, undead creatures that haunt graveyards and feed on the living. With their haunting expressions and skeletal forms, ghouls have become a popular subject in art, comics, and films, making them an intriguing choice for artists who enjoy exploring the macabre and supernatural. Learning how to draw a ghoul allows you to bring this chilling character to life on paper, whether you want to create a spooky illustration for Halloween, enhance your fantasy art portfolio, or simply challenge yourself with a new type of creature design.
Drawing a ghoul can be a rewarding experience for artists of all skill levels. Beginners will benefit from practicing foundational drawing techniques, such as sketching basic shapes and adding expressive details, while more experienced artists can experiment with dramatic shading, dynamic poses, and unique interpretations of this iconic monster. Throughout this tutorial on how to draw a ghoul, we'll break down the process into simple, manageable steps so you can develop your own distinct style while honing your observation and rendering skills.
No matter your experience, don't be afraid to get creative and add your own twist to your ghoul drawing. Remember, every great artist started with a single line, and with patience and practice, you'll be able to create a ghoul that's as creepy—or as quirky—as you can imagine. So gather your drawing materials, unleash your imagination, and let's dive into the world of ghouls!
Materials Required
Before we begin, make sure you have the following materials on hand:
These materials will provide you with the necessary tools to sketch, outline, and add color to your ghoul drawing. Feel free to adjust the materials based on your preferences and artistic style.
Step 1: Sketch the Basic Shape
Start by lightly sketching the basic shape of your ghoul. Begin with a circle for the head and add a slightly elongated oval shape below it for the body. This will serve as a foundation for the rest of the drawing. Don't worry about perfection at this stage - we'll refine the details later.
Step 2: Outline the Head and Facial Features
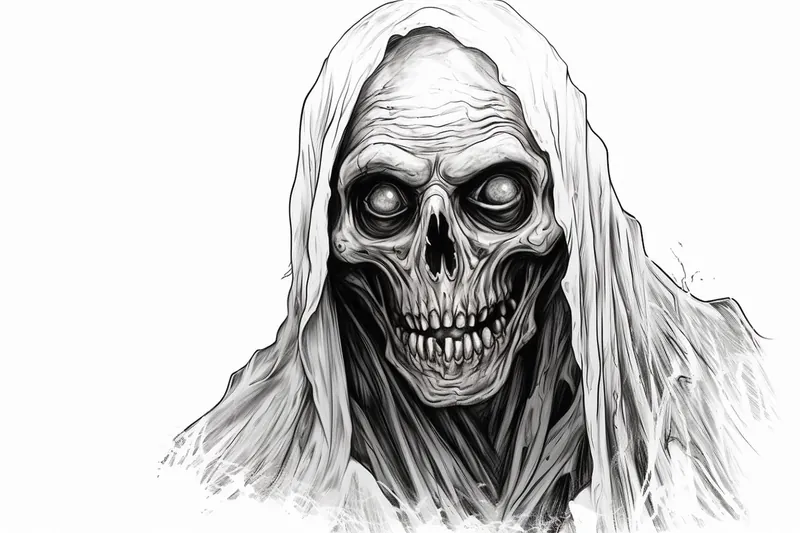
Using your pencil, you can carefully outline the shape of the ghoul's head, defining the desired features. Ghouls are often portrayed with sunken eyes, so draw two oval shapes for the eyes, placing them slightly below the center of the head. Add a curved line for the mouth, emphasizing sharp teeth or fangs. Remember to include other characteristic details, such as wrinkles or scars, to give your ghoul its unique look.
Step 3: Add the Hair and Ears
Next, add the hair and ears to your ghoul. Ghouls are commonly depicted with messy, unkempt hair, so feel free to get creative with the hairstyle. Add some uneven strands and make the hair textured by lightly sketching small lines and strokes. For the ears, draw two small, pointed shapes on either side of the ghoul's head. Remember, ghouls are often associated with a more sinister look, so you can exaggerate the features for added effect.
Step 4: Refine the Body Shape
Now it's time to refine the body shape of your ghoul. Add more definition to the initial oval shape by sketching the outlines of the arms, legs, and torso. Ghouls are known for their gaunt and skeletal appearance, so keep that in mind as you sketch the body's proportions. You can also add ripped or tattered clothing to give your ghoul some additional character and personality.
Step 5: Detail the Face and Features
With the basic structure complete, it's time to add more detail to the face and other features of your ghoul. Use your pencil to carefully refine the shape of the eyes, adding depth and shading to create a hollowed-out look. You can also darken the areas around the eyes and mouth to enhance the ghoul's creepy appearance. Experiment with different shading techniques to achieve the desired effect.
Step 6: Finalize the Outline
Tip: As you work through the steps of drawing your ghoul, consider using reference images of actual ghoulish figures from folklore or modern interpretations to inspire your design, especially when it comes to capturing unique facial features and body proportions. This practice can help you visualize the eerie characteristics that make ghouls so compelling while allowing you to add your own creative twists, ultimately enhancing the authenticity and impact of your artwork.
Once you're satisfied with the details, go over your pencil sketch with a fine-tipped pen or marker to finalize the outline of your ghoul. This will make the drawing more defined and help the details stand out. Be patient and take your time to ensure a steady hand as you trace over the lines. You can erase any remaining pencil marks once the ink has dried.
Step 7: Color Your Ghoul (Optional)
If you prefer to add color to your drawing, now is the time to do so. Use colored pencils or markers to bring your ghoul to life. Ghouls are often depicted with pale, lifeless skin tones, so start with a light base color and gradually build up the shading. Experiment with different color combinations and techniques to add depth and dimension to your drawing. Don't be afraid to get creative with your color choices!
Wild Inspiration: Imagine a ghoul not in a graveyard, but floating weightlessly through the cosmic expanse of deep space—its tattered robes drifting like nebulae, with spectral starlight illuminating hollow eye sockets. Instead of bones and decaying flesh, its body is made up of swirling galaxies and dark matter, with tiny comets and asteroids orbiting its skeletal frame. Give it a crown of shimmering meteor fragments and hands that trail cosmic dust, as if it can conjure black holes with a gesture. By merging horror with sci-fi fantasy, you'll create a ghoul that's both haunting and breathtaking, challenging yourself to blend textures like decaying cloth with the vast, glowing patterns of outer space. Push your imagination further by adding celestial symbols or ancient alien runes carved into its bones, making your cosmic ghoul truly out of this world!
Conclusion
Congratulations on completing your ghoul drawing! I hope this step-by-step guide has been helpful in creating your own spooky masterpiece. Remember, practice makes perfect, so keep honing your drawing skills and experimenting with different styles. With time and dedication, you'll be able to create even more detailed and haunting ghouls. Happy drawing!
Fun Facts About Ghoul
- The word "ghoul" originates from the Arabic term ghūl, which refers to a demon or monster that dwells in graveyards.
- Ghouls are often associated with horror literature and have appeared in stories since the 18th century.
- In traditional folklore, ghouls are believed to feed on human flesh and haunt burial grounds.
- Ghouls made their first major appearance in Western literature in Antoine Galland's translation of One Thousand and One Nights.
- Modern depictions of ghouls in pop culture often show them as zombie-like creatures with a taste for the macabre.
- Ghouls are a recurring monster in the popular tabletop game Dungeons & Dragons, where they paralyze their victims with a touch.
- In Japanese media, the term "ghoul" gained new popularity with the manga and anime series Tokyo Ghoul.
- Some legends claim ghouls can shapeshift or mimic the appearance of recently deceased people to lure victims.
- Ghouls are sometimes confused with vampires, but unlike vampires, they are more associated with graveyards and flesh consumption.
Suggestions for Scenes and Settings for Ghoul Drawings
- A ghoul emerging from an ancient, crumbling mausoleum at midnight, surrounded by mist and eerie gravestones.
- A pack of ghouls feasting in a haunted, overgrown cemetery under a crescent moon.
- A lone ghoul lurking in the shadows of a decrepit Victorian mansion, peering out through shattered windows.
- A ghoul rising from a shallow grave, skeletal hands clawing through the earth as startled crows scatter.
- A ghoul prowling desolate city streets during a blackout, illuminated only by flickering streetlights.
- A ghoul haunting the ruins of an abandoned cathedral, its torn robes trailing across the broken altar.
- A ghoul creeping along the edges of a foggy marsh, its reflection distorted in the murky water.
- A ghoul stalking a lost traveler through a labyrinthine catacomb, bones and skulls lining the walls.
- A ghoul crouched over a forgotten tomb, clutching a cursed artifact as ghostly spirits swirl around.
- A ghoul blending into a crowd during a spooky festival, its monstrous features hidden beneath a tattered cloak.