Welcome to this step-by-step guide on how to draw a funny face! Whether you’re a beginner or an experienced artist, this tutorial will help you bring out your inner humorist and create a hilarious cartoon-style depiction. So grab your pencils and let’s get started!
Materials Required
Before we dive into the drawing process, let’s make sure you have all the necessary materials:
- Paper: A blank sheet of paper will serve as your canvas.
- Pencils: Different grades of graphite pencils, ranging from light (H) to dark (B), will help you achieve various shades and textures.
- Eraser: A soft eraser like a kneaded eraser or a vinyl eraser will come in handy for correcting mistakes.
- Black pen: A fine-tipped pen can be used for outlining and adding details once your pencil sketch is complete.
- Colored pencils or markers (optional): If you want to add some color to your funny face, colored pencils or markers can be used to bring it to life.
Now that you have everything you need, let’s move on to the drawing process!
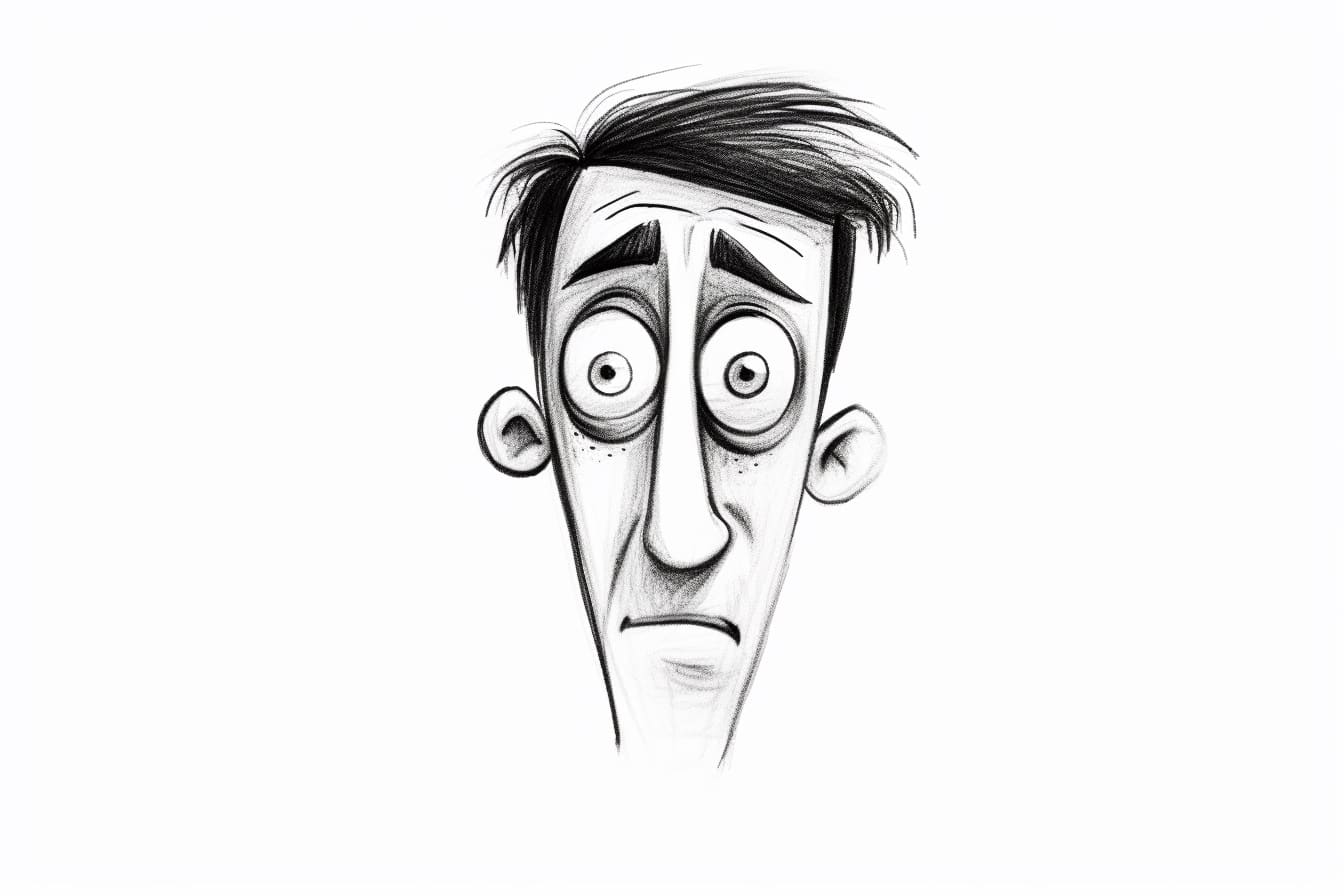
Step 1: Sketch the Basic Shape
Start by sketching a rough outline of the face using light pencil strokes. Funny faces can have exaggerated features, so don’t be afraid to make your shapes bold and distinctive. Begin with a circle for the head, and then add two vertical lines intersecting in the middle to mark the position of the eyes.
Step 2: Draw the Eyes and Eyebrows
With the basic shape in place, it’s time to add some goofy eyes and eyebrows. Draw two large circles within the eye area, making sure they overlap slightly with the outline of the head. Add a smaller circle inside each eye to represent the iris. Then, draw curved lines above each eye to create the eyebrows. Experiment with different shapes and expressions to achieve the desired humorous effect.
Step 3: Add the Nose and Mouth
Moving on, let’s give our funny face a unique nose and mouth. Draw a small oval or triangle-shaped nose in the center of the face, just below the eyes. Next, draw a wide smiley curve beneath the nose to form the mouth. To make it even funnier, consider adding some crooked teeth or an exaggerated tongue sticking out.
Step 4: Outline the Face
Now that the main features are in place, it’s time to refine your drawing. Using a darker pencil or a black pen, carefully outline the face, including the eyes, eyebrows, nose, and mouth. Pay attention to the details and make sure your lines are clean and bold. Feel free to add any extra elements or accessories to enhance the humor of your funny face.
Step 5: Add Some Hair
To complete your funny face, let’s give it some hair! Draw a hairstyle that suits the character you’ve created. It could be wild and messy, curly and tangled, or even completely bald. This step adds personality and adds to the overall comedic effect of your drawing.
Step 6: Color in (Optional)
If you want to take your funny face to the next level, grab some colored pencils or markers and add some vibrant hues. Experiment with different shades to make your character more visually appealing and lively. Don’t forget to color in the eyes, hair, and any other elements you added. However, if you prefer the simplicity of black and white, you can skip this step and maintain a classic cartoon style.
Conclusion
Congratulations! You have successfully learned how to draw a funny face. By following these step-by-step instructions, you can unleash your creativity and create countless amusing characters. Remember, there are no strict rules in humor, so feel free to experiment and have fun with your drawings. Keep practicing, and soon you’ll become a master of wit and hilarity!