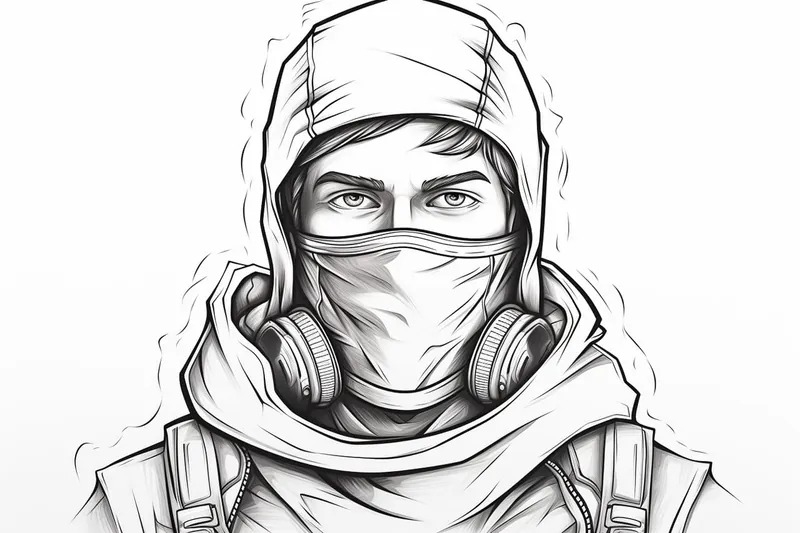
How to Draw a Fortnite Character
Learn how to draw your favorite Fortnite character with this step-by-step tutorial. Improve your drawing skills and create amazing Fortnite fan art with ease.
Materials You'll Need
- Pencil
- Paper
- Eraser
Welcome to this comprehensive step-by-step guide on how to draw a Fortnite character! Fortnite, developed by Epic Games, is known for its vibrant, dynamic characters that have captured the imaginations of millions worldwide. From iconic skins to creative outfits, Fortnite characters combine a unique blend of realism and cartoon-style art, making them exciting subjects for artists of all levels. Whether you are a dedicated fan of the game or an aspiring artist eager to sharpen your skills, learning how to draw a Fortnite character offers a fantastic opportunity to explore character design, anatomy, and stylized illustration.
Drawing a Fortnite character involves understanding proportions, dynamic poses, and the distinctive costume details that define each skin. This tutorial is designed to be approachable for beginners while still offering valuable techniques that intermediate artists will appreciate. You'll learn how to break down complex shapes into manageable parts, apply shading to bring your character to life, and add unique touches to make your drawing stand out. Whether you want to create fan art, practice character design, or simply enjoy the creative process, mastering how to draw a Fortnite character can be a rewarding and enjoyable artistic journey.
So, gather your drawing tools and prepare to dive into the exciting world of Fortnite art. With patience and practice, you'll soon be able to create your own vivid, detailed characters that reflect the energy and style of the game. Remember, every artist starts somewhere, and this tutorial will guide you every step of the way. Let's get started and bring your favorite Fortnite character to life!
Materials Required:
- Pencil
- Eraser
- Paper
- Colored pencils or markers (optional)
Step 1: Research and Inspiration
Before diving into the drawing process, it's essential to familiarize yourself with the different Fortnite characters available. Take some time to browse through the various skins and characters in the game to find the one you want to draw. Pay attention to their unique features, clothing, and any accessories they may have. This research will help you add accuracy and detail to your drawing.
Step 2: Basic Shapes and Pose
Start by sketching the basic shapes that make up the character's body. Use simple geometric shapes like circles, ovals, and rectangles to outline the head, torso, arms, and legs. Focus on capturing the overall pose and proportions of the character. Don't worry too much about details at this stage; it's all about getting the basic foundation right.
Step 3: Refine the Outline
Once you have a solid foundation with basic shapes, start refining the outline of the character. Begin with the head, adding more definition to the shape and sketching the facial features. Move on to the body, paying attention to the muscle structure if visible. Use light and loose strokes for this step, as you may need to make adjustments later on.
Step 4: Clothing and Accessories
Now it's time to add the details that make your Fortnite character recognizable. Focus on drawing the character's clothing, including any patterns or textures. Pay close attention to the finer details such as belts, pockets, and buttons. If your character has any accessories, like a backpack or weapon, be sure to include those as well.
Step 5: Facial Features and Expression
Next, let's bring your character to life by adding the facial features and expression. Use reference images or screenshots from the game to help you achieve accuracy. Start with the eyes, nose, and mouth, and then move on to the eyebrows and any facial hair. Experiment with different expressions to give your character personality and emotion.
Step 6: Shading and Highlights
To add depth and dimension to your drawing, it's time to incorporate shading and highlights. Determine the light source in your composition and imagine how it would cast shadows on your character. Use hatching or cross-hatching techniques to create shadows, and leave some areas lighter for highlights. Gradually build up the shading, starting with light strokes and gradually adding darker tones.
Step 7: Color (Optional)
If you prefer to add color to your artwork, now is the time to do so. Use colored pencils or markers to bring your character to life. Refer to the in-game reference images for accuracy when choosing the colors for the clothing and accessories. Consider the overall color scheme and use shading techniques to add depth and realism to your coloring.
Step 8: Final Touches and Details
Take a step back and assess your drawing so far. Are there any areas that need adjusting or refining? Pay attention to the smaller details such as wrinkles in clothing, texture on accessories, or any additional elements you want to include. Make any necessary adjustments or additions to bring your drawing to its final stage.
Conclusion
Congratulations on completing your Fortnite character drawing! By following these step-by-step instructions, you've successfully created your very own artwork. Remember to have fun and experiment with different styles and techniques along the way. With practice, you'll be able to draw a variety of Fortnite characters with ease. Keep honing your skills, and soon enough, you'll be creating amazing Fortnite fan art in no time!
Fun Facts About Fortnite Character
- The first Fortnite character skin was the default "Jonesy," who has become an iconic figure in the game's lore.
- Fortnite characters often feature crossover skins from popular franchises like Marvel, Star Wars, and DC Comics.
- Each Fortnite character skin can have multiple styles and color variants, allowing players to customize their appearance.
- Epic Games regularly releases new Fortnite characters tied to seasonal events and storylines, keeping the game fresh and engaging.
- Some Fortnite characters have unique emotes and animations that reflect their personality or backstory.
- Fortnite characters are designed with a blend of cartoonish and realistic art styles to appeal to a wide audience.
- The popularity of Fortnite characters has led to official merchandise, including action figures and apparel.
- Fortnite characters can be unlocked through battle passes, in-game purchases, or special promotions.
Suggestions for Scenes and Settings for Fortnite Character Drawings
- A Fortnite character landing from the Battle Bus, surrounded by glowing clouds and a vibrant sunrise.
- In the midst of a chaotic build battle, with walls and ramps rapidly constructed around the character.
- A character exploring a mysterious, futuristic cityscape with neon lights and holographic billboards.
- Posing heroically atop a mountain peak overlooking a lush, colorful Fortnite island landscape.
- Engaged in a stealthy nighttime mission, blending into shadows near a campfire or abandoned structure.
- Riding an in-game vehicle like an ATV or boat through dynamic terrain, with motion blur effects.
- In a celebratory dance emote surrounded by confetti and vibrant party decorations.
- Facing off against a massive boss monster or creature in an intense action scene.
- Custom character skins interacting with iconic Fortnite landmarks, such as Tilted Towers or Retail Row.
- Using a glider to soar over a dramatic storm with lightning and swirling clouds in the background.