How to Draw a Cupcake Step by Step
Learn how to draw a cupcake step by step in this easy-to-follow tutorial. Create mouthwatering cupcakes on paper with this art instruction guide.
Materials You'll Need
- Pencil
- Paper
- Eraser
Cupcakes are not just delightful treats—they're also a feast for the eyes, with their playful swirls of frosting, colorful sprinkles, and charming paper wrappers. Drawing a cupcake allows you to explore fun shapes and textures, from the soft, fluffy cake to the intricate details of the decorations on top. Whether you love baking or simply enjoy cute and whimsical art subjects, learning how to draw a cupcake is the perfect way to satisfy your creative cravings. Cupcakes are a popular theme in illustration, greeting cards, and digital art, making them a versatile subject for artists of all ages and interests.
This tutorial will show you how to draw a cupcake step by step, breaking down the process so that even beginners can follow along with ease. You'll learn about constructing basic shapes, adding dimension with shading, and bringing your cupcake to life with color and detail. Drawing a cupcake is a great opportunity to practice fundamental techniques such as symmetry, layering, and texture, while also allowing your imagination to run wild with different flavors and toppings. No matter your skill level, you'll find this guide approachable and rewarding.
So, gather your favorite drawing materials and get ready to add a touch of sweetness to your sketchbook! Remember, every artist starts somewhere, and with a bit of patience and creativity, you'll soon master how to draw a cupcake step by step. Let's dive in and create a delicious masterpiece together—don't worry about making it perfect, just enjoy the process and have fun!
Materials Required
Before we begin, make sure you have the following materials ready:
- A pencil
- Drawing paper
- Eraser
- Colored pencils or markers (optional)
Now that you have everything you need, let's dive into the wonderful world of cupcake drawing!
Step 1: Draw the Base
To start, draw a rectangle shape, slightly wider at the top than at the bottom, to represent the base of the cupcake. This will be the part that holds the yummy cake.
Step 2: Add the Wrapper
Next, draw a curved line at the top of the rectangle shape to create the wrapper of the cupcake. Make sure the line is uneven and wavy to add some texture and make it look more realistic.
Step 3: Sketch the Cake
Now it's time to draw the cake part of the cupcake. Start by sketching the top of the cake with a series of small curved lines. Imagine it as a fluffy and swirly mound of deliciousness!
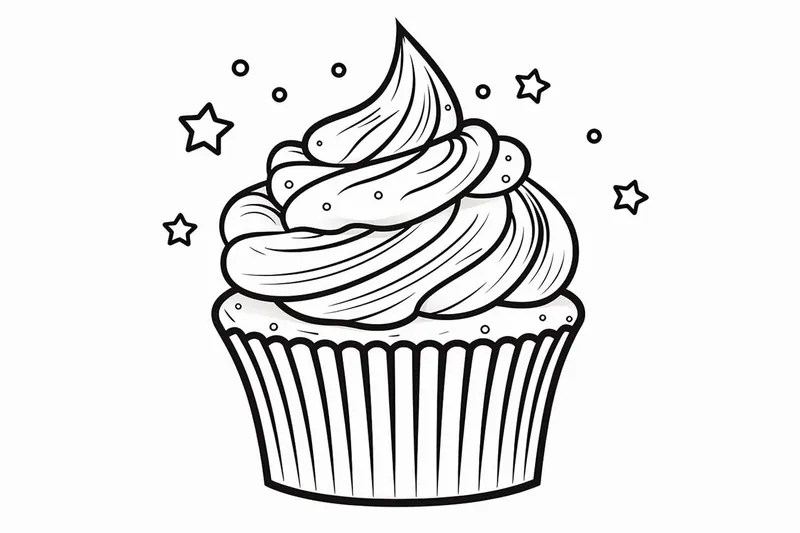
Step 4: Draw the Frosting
On top of the cake, draw another set of curved lines to represent the frosting. Cupcakes come in all sorts of flavors and designs, so feel free to get creative with the shape and texture of the frosting. You can make it smooth, swirly, or even add some decorations like sprinkles!
Step 5: Add Details
To make your cupcake look more appetizing, let's add some delicious details. Draw a cherry on top by creating a small circle with a stem. You can also add some sprinkles or other toppings to make your cupcake unique and mouthwatering.
Step 6: Clean Up Your Sketch
Now that you have the basic outline of your cupcake, it's time to clean up your sketch. Use your pencil eraser to remove any unnecessary lines and smudges. This will give your drawing a polished and professional look.
Step 7: Outline Your Drawing
Once you're satisfied with your sketch, go over the final lines with a pen or a darker pencil. This will make your cupcake stand out and give it a defined look. Be careful not to smudge your drawing as you go along.
Step 8: Color Your Cupcake
Now comes the fun part – coloring! Use colored pencils or markers to bring your cupcake to life. You can choose any color combination you like for the base, wrapper, cake, and frosting. Don't forget to add some shading and highlights to give it depth and dimension.
Step 9: Final Touches
Take a step back and admire your masterpiece. If there are any areas that need touch-ups or adjustments, now is the time to do it. It's all about adding those final details that will make your cupcake drawing pop.
Wild Inspiration: Imagine your cupcake as the grand stage for a miniature fantasy world—perhaps the frosting swirls up into a snowy mountain, dotted with candy cane trees and tiny marzipan climbers scaling the sugary peak. What if a dragon made of spun sugar is coiled protectively around the base, its scales sprinkled with edible glitter, while a fleet of gummy bear adventurers bravely approach? You could even give your cupcake an otherworldly twist by floating it through space, with planets made of macarons and shooting star sprinkles trailing behind. Let your creativity run wild and invent a scene that transforms your cupcake into an epic landscape or a home for fantastic creatures—there are no limits, only sweet possibilities!
Conclusion
Congratulations! You have successfully learned how to draw a delicious cupcake step by step. This tutorial has taken you through the process of sketching, outlining, and coloring your masterpiece. Whether you're a beginner or an experienced artist, drawing cupcakes can be a fun and rewarding experience.
Tip: As you draw your cupcake, don't hesitate to experiment with different shapes and sizes for the frosting and decorations; this will add unique character to your artwork. Try varying the thickness of your lines or incorporating different textures, such as swirls or peaks, to create visual interest. Additionally, consider using a reference image for inspiration, which can guide you in making your cupcake look even more mouthwatering and realistic!
So why not grab your drawing materials and start practicing? With a little bit of patience and creativity, you'll be able to create mouthwatering cupcakes on paper in no time. Happy drawing!
Fun Facts About Cupcake Step by Step
- The first known cupcake recipe appeared in 1796.
- Cupcakes are a popular subject in art tutorials because they help artists practice drawing symmetry and texture.
- The term "cupcake" originally referred to cakes baked in small cups.
- Decorating cupcakes with colorful frosting and sprinkles is inspired by real-life baking trends.
- Learning to draw cupcakes step by step is a common beginner project in art classes.
- Cupcake illustrations are widely used in greeting cards and digital stickers.
- Practicing cupcake drawings can improve your shading and layering skills.
- Cupcake art is often featured in children's books and educational materials.
- Artists often experiment with different "flavors" and toppings in their cupcake drawings, inspired by real recipes.
Suggestions for Scenes and Settings for Cupcake Step by Step Drawings
- Draw a cupcake on a fancy cake stand surrounded by confetti and party decorations.
- Illustrate a group of cupcakes with different flavors and toppings lined up in a bakery window.
- Create a scene where a cupcake is being decorated, with piping bags and sprinkles scattered around.
- Draw a cupcake picnic outdoors, with cupcakes sitting on a checkered blanket in the grass.
- Show a whimsical cupcake with a face and arms, celebrating its birthday with a tiny candle on top.
- [Sketch a cupcake alongside a cup of tea or coffee](https://yonderoo.com/how-to-draw-a-coffee-cup/) for a cozy café setting.
- Design a cupcake as the centerpiece of a festive holiday table, decorated with seasonal colors and motifs.
- Draw an imaginative cupcake planet in space, with frosting mountains and candy stars.
- Illustrate a cupcake in a child's lunchbox, surrounded by fruit and other snacks.
- Create a magical cupcake shop interior, with shelves full of unique and colorful cupcake designs.