How to Draw a Coffin
Learn how to draw a coffin with this step-by-step tutorial for beginner artists. Discover the art of sketching and create realistic coffin drawings.
Materials You'll Need
- Pencil
- Paper
- Eraser
Welcome to this comprehensive tutorial on how to draw a coffin, a subject that carries rich symbolism and intriguing shapes. Coffins have been depicted in art and culture for centuries, often representing themes of mortality, remembrance, and history. Whether you are interested in gothic art, creating spooky illustrations, or simply want to master geometric forms and perspective in your drawings, learning how to draw a coffin is a valuable skill. This tutorial will guide you through each step, helping you capture the coffin's distinct structure with accuracy and detail.Drawing a coffin might seem straightforward at first glance, but it involves a careful balance of perspective, shading, and proportion to make the final image realistic and engaging. This tutorial is designed for artists of all skill levels—from beginners who want to practice basic shapes to more advanced artists looking to refine their technique. You will learn how to construct the coffin's angular form, add depth using shading, and enhance the overall composition with subtle texturing. By the end of this lesson, you'll have a clear understanding of the techniques needed to bring this unique object to life on paper.So, whether you're creating artwork for Halloween, exploring symbolic drawings, or simply expanding your artistic repertoire, this step-by-step guide on how to draw a coffin will provide all the tools and confidence you need. Grab your pencil and paper, and get ready to embark on a creative journey that's both fun and rewarding. Let's dive in and start sketching!
Materials Required
Before we begin, let's gather the materials you will need for this drawing tutorial:
- Pencil: Start with a regular graphite pencil, preferably with an HB or 2B lead for smooth and light lines.
- Paper: Choose a clean sheet of sketching or drawing paper. A size of 9x12 inches or larger is recommended to have enough space for your drawing.
- Eraser: Have a kneaded or vinyl eraser handy to correct any mistakes or guide lines.
- Ruler: You'll need a ruler to create straight and accurate lines.
- Reference Image: While not necessary, having a reference image of a coffin can help you in understanding the shape and details.
Now that you have your materials ready, let's dive into the steps for drawing a coffin.
Tip: When drawing your coffin, remember to regularly step back and assess your work from a distance; this can help you better evaluate proportions and perspective. Additionally, consider using a light touch with your pencil during the initial sketching stages to allow for easy adjustments and erasures as you refine details and add shading.
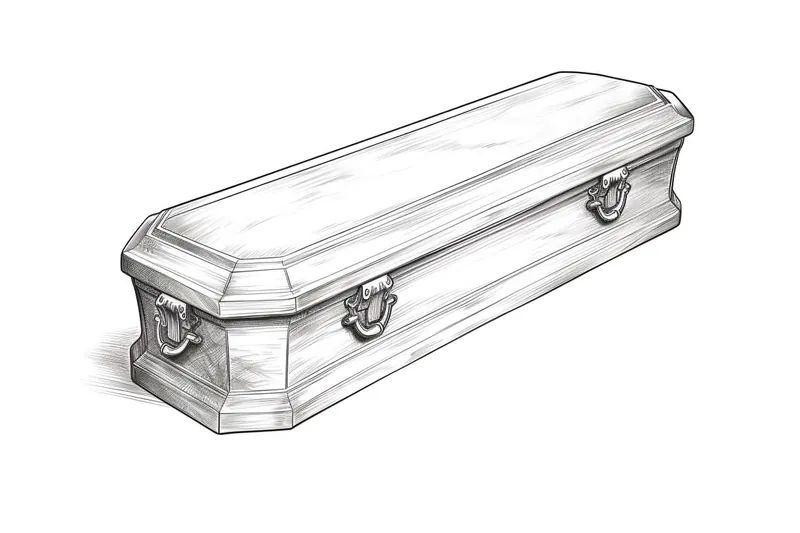
Step 1: Basic Shape
Start by drawing a rectangular shape in the center of your paper. This will serve as the base of the coffin. The length of the rectangle will determine the size of the coffin, so feel free to adjust it according to your preference. Keep the edges of the rectangle straight and parallel.
Step 2: Tapered Sides
To give the coffin a three-dimensional appearance, we will taper the sides. Draw two lines starting from the upper corners of the rectangle and slant them slightly inward as you move towards the top. These lines should converge near the top of the coffin, creating a narrower shape.
Step 3: Lid
Now, let's add the lid of the coffin. Extend two lines from the top corners of the rectangular base, slanting them slightly upward. Connect the ends of these lines with a curved line to create the lid's shape. Make sure the lid is slightly wider than the base of the coffin.
Step 4: Side Panels
To add more depth to your drawing, we'll create the side panels of the coffin. Draw two vertical lines from the top corners of the base, extending them beyond the lid. Connect the ends of these lines with two horizontal lines to complete the side panels.
Step 5: Handle
Next, we'll draw a handle on the lid of the coffin. Place a small rectangle in the center of the lid, near the top. Then, draw two curves connecting the upper corners of the rectangle to the sides of the lid. This will give the handle a curved and realistic look.
Step 6: Details
Now that we have the basic structure of the coffin, it's time to add some details. Draw a line near the bottom of the coffin to indicate the separation between the base and the lid. You can also add decorative trim or patterns to the sides and lid of the coffin, such as carved designs or metal accents.
Step 7: Shadows and Shading
To bring your drawing to life, add shadows and shading. Determine the direction of your light source and shade the areas accordingly. The bottom of the coffin and the area beneath the lid will be darker, while the top and sides will have lighter shading. Use your pencil to create smooth gradients and blend the shades together.
Step 8: Refine and Erase
Take a step back and evaluate your drawing. Adjust any lines or proportions that may not look quite right. Erase any unnecessary guide lines or mistakes with your eraser. Take your time with this step to ensure a polished and refined final result.
Conclusion
Congratulations! You have successfully learned how to draw a coffin from start to finish. Remember, drawing is all about practice, so be encouraged if your first attempt turns out differently than expected. With time and practice, you can create even more detailed and realistic drawings.
We hope you enjoyed this step-by-step tutorial on how to draw a coffin. By following these instructions and using your creativity, you can create stunning artwork. So, keep honing your skills, and soon you'll be able to draw various objects and scenes with confidence.
Fun Facts About Coffin
- The word "coffin" originates from the Greek word "kophinos," meaning a basket or box, which evolved over centuries to describe a burial container.
- In ancient Egypt, coffins were often elaborately decorated and shaped like the deceased to help guide their soul in the afterlife.
- The traditional Western coffin shape is hexagonal or octagonal, designed to fit the human body more closely than a rectangular box.
- In Victorian England, coffins were sometimes fitted with glass panels so mourners could view the deceased during wakes.
- Modern coffins can be made from sustainable materials like bamboo or cardboard to reduce environmental impact.
- The Guinness World Record for the largest coffin ever made measured over 10 feet long and was created in the UK.
- In some cultures, coffins are brightly painted and decorated to celebrate the life of the deceased rather than mourn death. National Geographic
- The phrase "putting someone in a coffin" has been used metaphorically in literature and speech to signify finality or defeat.
Suggestions for Scenes and Settings for Coffin Drawings
- [A gothic cemetery at twilight with ornate tombstones](https://yonderoo.com/how-to-draw-a-tombstone/) surrounding a detailed coffin resting on an ancient stone slab.
- A haunted mansion's dimly lit crypt featuring an open coffin with eerie mist rising from inside.
- A vintage Victorian parlor with a closed coffin draped in black velvet, surrounded by mourning flowers and candles.
- A futuristic sci-fi setting where a transparent coffin floats inside a high-tech laboratory, showing a suspended figure.
- A whimsical Halloween scene with a cartoonish coffin decorated with pumpkins, bats, and cobwebs.
- An archaeological dig site revealing an ancient, artifact-adorned coffin partially unearthed from the ground.
- A surreal dreamscape where the coffin is floating among clouds, surrounded by symbolic elements like clocks and butterflies.
- A nighttime forest clearing with a coffin resting on a bed of moss and illuminated by fireflies and moonlight.
- A pirate ship's cabin featuring a rugged wooden coffin with brass fittings, surrounded by treasure chests and maps.
- A steampunk workshop where a mechanical coffin is being assembled, complete with gears, pipes, and glowing tubes.