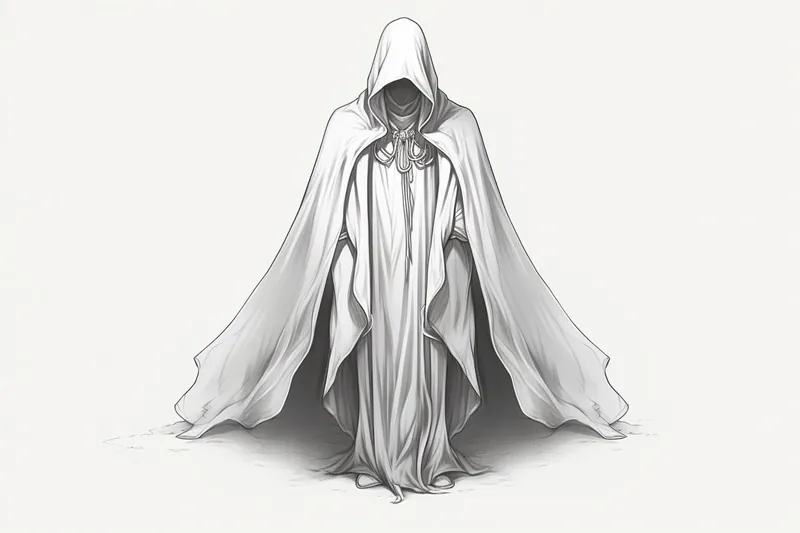
How to Draw a Cloak
Learn how to draw a cloak step by step with this detailed tutorial. Discover the techniques and materials required to create stunning cloak illustrations.
Materials You'll Need
- Pencil
- Paper
- Eraser
Cloaks have long been a symbol of mystery, adventure, and elegance throughout history and popular culture. From the flowing garments of ancient wizards to the heroic capes of fantasy adventurers, cloaks serve both practical and dramatic purposes in storytelling and character design. Learning how to draw a cloak opens up endless creative possibilities, whether you want to enhance your character illustrations, experiment with garment design, or simply add a touch of magic to your artwork. As you embark on this artistic journey, you'll find that cloaks are fascinating subjects, offering unique challenges with their graceful folds, sweeping lines, and the way they interact with light and shadow.
Many artists are drawn to cloaks because they offer an excellent opportunity to practice rendering fabric, drapery, and dynamic movement. Understanding how to draw a cloak will help you build foundational skills in depicting clothing and textures, which are essential for both beginner and advanced artists alike. This tutorial will guide you through each stage of the process, from sketching a basic outline to adding realistic details and shading. You'll learn techniques for capturing the flow of fabric, creating depth, and making your cloak look natural and believable. Whether you're working on fantasy art, comic book characters, or historical illustrations, mastering this subject will give you more confidence in your drawing abilities.
Don't worry if you're new to drawing draped fabrics—this guide is designed to be approachable for all skill levels, with clear steps and helpful tips along the way. Remember, every artist improves through practice and experimentation, so take your time and enjoy the process. Get ready to unleash your creativity and learn how to draw a cloak that will make your characters stand out and your artwork shine!
Materials Required
Before we dive into the drawing process, let's make sure we have all the necessary materials. To draw a cloak, you will need:
- Drawing paper: A smooth and sturdy surface is essential for creating detailed artwork. Choose a paper that suits your preferred medium, such as pencil, pen, or marker.
- Pencils: Different grades of pencils will allow you to achieve various shading effects. It's recommended to have a range from 2H (light) to 6B (dark).
- Eraser: A kneaded eraser or a soft eraser will be useful for correcting mistakes and adding highlights to your drawing.
- Blending tools: You can use a blending stump or a tortillon to create smooth transitions and gradients in your cloak drawing.
- Reference image: It's always helpful to have a reference image to guide you in terms of shape, folds, and overall appearance of the cloak. You can find reference images online or use your own.
Now that we have all the necessary materials, let's move on to the step-by-step process of drawing a cloak.
Tip: To enhance your cloak drawings, consider practicing with a variety of fabric textures and styles, as this will not only improve your ability to depict different materials but also inspire creativity in your character designs. Experimenting with different draping techniques and shading methods will help you understand how fabric behaves in motion, making your illustrations more dynamic and realistic.
Step 1: Outline the Shape
Start by lightly sketching the basic shape of the cloak on your drawing paper. Determine the position and size of the cloak, and then use light pencil strokes to outline its silhouette. Remember, this is just a rough guideline, so don't worry about making it perfect.
Step 2: Add Folds and Drape
Now, begin adding the folds and drape of the cloak. Cloaks are known for their loose and flowing nature, so make sure to create irregular and organic curves. Study your reference image closely to understand how the fabric falls and drapes over the body. Use varying pencil pressure to create depth and dimension in the folds.
Step 3: Define the Edges
Next, it's time to define the edges of the cloak. Start by darkening the outline you sketched earlier, using a darker pencil grade. Then, carefully add details to the edges, making sure they are clean and well-defined. Pay attention to any trim or decorative elements the cloak may have.
Step 4: Shading and Texturing
To give your cloak a realistic appearance, it's important to add shading and texturing. Begin by identifying the light source in your drawing and create shading accordingly. Use lighter pencil grades for the areas that receive more light and darker grades for the shadowed regions. Gradually build up the shading, paying close attention to the folds and creases.
To add texture to the cloak, consider using cross-hatching techniques. This involves drawing a series of intersecting lines to create the illusion of texture and depth. Experiment with different angles and spacing to achieve the desired effect.
Step 5: Refine and Add Details
Now that the basic structure is in place, it's time to refine your drawing and add additional details. Take a step back and assess your work so far. Are there any areas that need adjustment or further definition? Use your reference image to guide you in adding smaller folds, textures, and any other intricate elements that will bring your cloak to life.
Step 6: Blending and Highlights
To enhance the realism of your cloak drawing, use a blending tool such as a blending stump or tortillon to smooth out any harsh lines or transitions. This will help create a seamless appearance and soften the shading. Additionally, you can use an eraser to add highlights to certain areas, emphasizing the light source and giving the cloak a more polished look.
Conclusion
Congratulations! You have successfully learned how to draw a cloak step by step. By following these instructions and using your creativity, you can create stunning cloak illustrations. Remember to practice regularly and study different types of cloaks to expand your drawing skills. With persistence and dedication, you'll continue to improve. Happy drawing!
Fun Facts About Cloak
- The word "cloak" comes from the Latin "cloca," meaning a traveler's cape or outer garment.
- Cloaks have been worn since ancient times, with evidence of their use dating back to the Bronze Age.
- In medieval Europe, cloaks were a status symbol, often made from luxurious fabrics for the wealthy.
- The famous "invisibility cloak" in the Harry Potter series is inspired by legends and myths about magical garments.
- Cloaks are not just for warmth; they were also used for protection against rain and wind.
- Superheroes like Superman and Batman popularized the dramatic, flowing cloak in modern pop culture.
- The Roman "pallium" and Greek "himation" were early forms of cloaks worn by philosophers and statesmen.
- Cloaks are often used in fantasy art and literature to signify mystery, magic, or authority.
- Some traditional cloaks, like the Scottish "plaid," are still worn today.
Suggestions for Scenes and Settings for Cloak Drawings
- A mysterious traveler cloaked in shadow, standing at the entrance of an ancient forest illuminated by moonlight.
- A powerful mage casting a spell, their ornate cape billowing dramatically in a swirling magical vortex.
- A medieval market scene with a hooded figure weaving through a bustling crowd, their cloak concealing secret wares.
- An elven archer perched on a tree branch, their green cloak blending seamlessly with the forest foliage.
- A windswept mountaintop where a hero's cloak flutters fiercely against a stormy sky.
- A royal court where a noble displays a cape adorned with intricate embroidery and golden trim.
- A futuristic cityscape with a cyberpunk vigilante wearing a high-tech, luminous cloak.
- A group of adventurers gathered around a campfire, each with a uniquely styled cloak reflecting their personality.
- A dramatic duel between two warriors, their cloaks flowing and tangling as they clash swords.
- An enchanted woodland creature donning a magical, star-speckled cloak that glows softly in the twilight.