Drawing is a wonderful way to express your creativity and bring your imagination to life. In this step-by-step guide, you will learn how to draw a bonnet, a charming and elegant accessory that has been worn for centuries. Whether you are a beginner or an experienced artist, this tutorial will help you create a beautiful bonnet drawing. So grab your drawing materials and let’s get started!
Materials Required
To create a stunning bonnet drawing, you will need the following materials:
- A pencil
- Eraser
- Drawing paper
- Fine-tip pens or markers
- Colored pencils or watercolor paints (optional)
- Reference images of bonnets for inspiration
Now that you have all the necessary materials, let’s dive into the step-by-step process of drawing a bonnet.
Step 1: Basic Shape
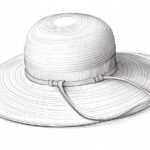
Start by drawing a horizontal line across the middle of your paper. This will serve as a guide for placing the bonnet on the head. Next, draw a large oval shape above the horizontal line. This oval will be the main body of the bonnet.
Step 2: Brim
Draw a slightly curved line extending from the bottom of the oval shape to create the brim of the bonnet. The brim can be narrow or wide, depending on the style you prefer. Play around with different shapes to create various bonnet designs.
Step 3: Side Panels
Now, draw two slightly curved lines extending from the sides of the oval shape, starting at the top and curving outward. These lines will form the side panels of the bonnet. The length of these lines will determine how far down the bonnet reaches on the head.
Step 4: Adding Details
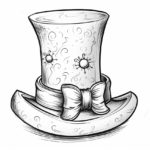
To give your bonnet more dimension, add some details. Draw a small decorative trim along the edge of the brim, such as lace or ribbons. You can also draw a bow or flowers on the side panels for an extra touch of elegance.
Step 5: Facial Features
If you want to add a face to your drawing, place two dots on the horizontal line you drew in Step 1. These dots will serve as guides for the eyes. Then, draw a curved line for the nose and a small curve for the mouth. Don’t forget to add some hair peeking out from underneath the bonnet.
Step 6: Outlining
Once you are satisfied with your sketch, go over the lines with a fine-tip pen or marker. This will make your bonnet drawing more defined and polished. Erase any unnecessary pencil lines.
Step 7: Coloring (optional)
If you prefer a colored drawing, now is the time to bring out your colored pencils or watercolor paints. Experiment with different shades to bring your bonnet to life. Use lighter colors for the bonnet itself and darker shades for the decorations and trim.
Conclusion
Drawing a bonnet allows you to explore your artistic abilities and create a beautiful fashion illustration. By following these step-by-step instructions, you can draw a detailed and realistic bonnet that will impress others with your artistic skills. Remember to practice regularly to improve your drawing technique. Have fun and enjoy the creative process!