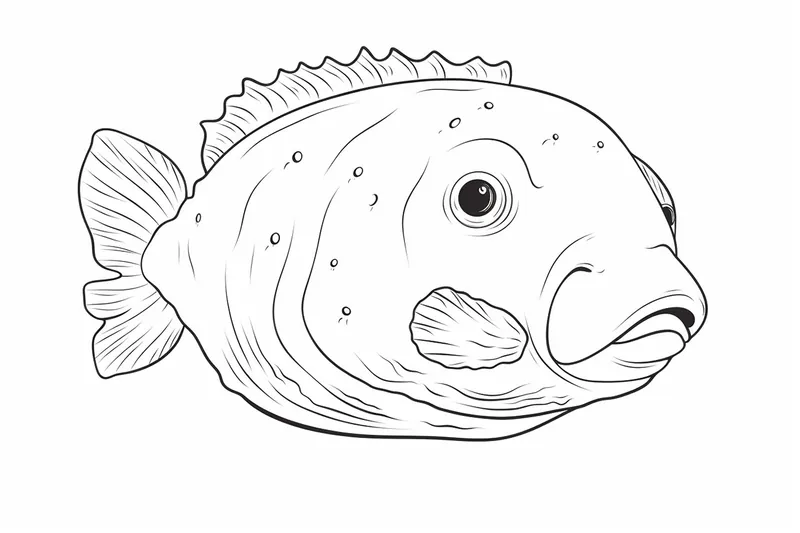
How to Draw a Blobfish
Learn how to draw a blobfish step-by-step with this easy-to-follow tutorial. Capture the unique features of this fascinating creature with pencil and ink.
Materials You'll Need
- Pencil
- Paper
- Eraser
The blobfish, with its famously squishy features and endearing, almost comical expression, has captured the imagination of artists and internet users alike. Native to the deep waters off the coasts of Australia and New Zealand, the blobfish's gelatinous form allows it to withstand the extreme pressures of its underwater habitat. Despite its unconventional looks—which have earned it the title of "world's ugliest animal"—the blobfish has become a beloved subject for art, cartoons, and memes. Learning how to draw a blobfish gives you the chance to bring this quirky creature to life on your own page, celebrating its unique charm and character.
Drawing a blobfish offers a fun opportunity to practice capturing soft forms, subtle shading, and expressive facial features. Whether you're a beginner looking for a simple project or an experienced artist wanting to add a touch of whimsy to your sketchbook, learning how to draw a blobfish is a rewarding exercise. You might want to draw a blobfish for a science project, as part of a marine life series, or simply as a playful addition to your art collection. Its exaggerated features—like the droopy nose and downturned mouth—make it an excellent subject for experimenting with stylization and cartooning techniques.
This tutorial is designed for artists of all skill levels. If you're new to drawing, you'll find that the blobfish's smooth, rounded shapes are forgiving and easy to replicate. For those with more experience, there's room to add creative details and practice blending and shading to capture the blobfish's jelly-like texture. We'll guide you through each step, from sketching the basic outline to refining the details and adding personality to your drawing. Along the way, you'll learn useful techniques that can be applied to drawing other animals and characters.
No matter your reason for picking up your pencil today, remember that the most important part of drawing is to enjoy the process and let your creativity shine. Don't worry about making your blobfish look perfect—every artist brings their own unique style to the table. So, gather your materials, clear some space, and get ready to dive into the delightful world of deep-sea drawing. Let's have some fun as we learn how to draw a blobfish together!
Materials Required
Before we begin, make sure you have the following materials ready:
- Drawing paper
- Pencil
- Eraser
- Fine-tipped markers or pens
- Colored pencils or markers (optional)
- Reference image of a blobfish (for guidance)
Now that you have all your materials prepared, let's dive into the step-by-step process of drawing a blobfish.
Step 1: Outline the Basic Shape
Start by lightly sketching an oval shape in the center of your paper. This will serve as the body of the blobfish. Keep in mind that blobfish often have a round body with a slightly tapered bottom, so adjust the shape accordingly.
Step 2: Add Facial Features
Now, let's add some facial features. Draw two small circular eyes near the top of the oval shape. Blobfish have tiny eyes, so keep them small. Then, draw a small, curved line just below the eyes to indicate the fish's mouth.
Step 3: Define the Body
Next, it's time to add some definition to the blobfish's body. Start by drawing a series of curved lines around the oval shape to give it a wrinkled and textured appearance. These lines should follow the contour of the body and be irregular in nature.
Step 4: Sketch the Fins
Blobfish have two pectoral fins on each side of their body. To draw these fins, start by adding a small curved line on each side, just below the blobfish's head. Then, draw two more curved lines extending from these initial lines, tapering towards the ends. These fins should be relatively short and rounded.
Step 5: Add Tail Details
Blobfish have a short and stubby tail. Draw a curved line at the bottom of the body, extending outwards. Then, add some texture to the tail by drawing short, curved lines along its length.
Step 6: Refine the Facial Features
Now it's time to refine the blobfish's facial features. Start by darkening the outline of the eyes and adding small pupils within them. You can also add some tiny dots or lines above the eyes to indicate eyebrows. For the mouth, darken the line and add a small curve at each end to give the impression of a smiling expression.
Step 7: Add Texture and Shadows
To add more depth and texture to your drawing, you can now start adding some shading. Use your pencil to lightly shade the areas where shadows would naturally fall, such as the bottom of the body, the folds, and the fins. This will give your drawing a three-dimensional look.
Step 8: Ink Your Drawing
Once you're satisfied with your pencil sketch, carefully go over the lines with a fine-tipped marker or pen. Start with the outline and then work your way through the details, such as the fins, facial features, and texture. Ink your drawing slowly and confidently, making sure to leave out any unwanted pencil lines.
Step 9: Color Your Blobfish (Optional)
Tip: As you work through the steps of drawing a blobfish, remember to take breaks to step back and evaluate your progress—this will help you see areas that may need refinement, such as the shape, facial features, or shading. Don't hesitate to experiment with different expressions or even incorporate your own style, as the blobfish's unique and whimsical nature invites creativity.
If you prefer to add some color to your drawing, now is the time to do so. Use colored pencils or markers to add a splash of vibrancy to your blobfish. Blobfish are generally a pale pink or gray color, but you can get creative and experiment with different hues and shades.
Did You Know?: Blobfish look so squishy and sad on land because they're actually deep-sea dwellers—at depths around 600 to 1,200 meters, the pressure is up to 120 times greater than at the surface! Down there, the blobfish's jelly-like body is perfectly adapted to help it float just above the ocean floor without expending energy, since it lacks the swim bladders most fish use for buoyancy. When brought to the surface, the drastic pressure change causes its body to lose shape, giving it that famously "melty" appearance. Knowing this, you can imagine your blobfish drawing as a deep-sea explorer in its natural, less-squishy environment, and experiment with underwater lighting or background details to reflect its true habitat.
Conclusion
Congratulations! You have successfully learned how to draw a blobfish. By following these step-by-step instructions, you were able to capture the unique features and essence of this fascinating creature. Remember to practice and have fun with your drawings. Keep exploring different techniques and styles to develop your own artistic skills. Enjoy your newfound ability to draw a blobfish!
Fun Facts About Blobfish
- The blobfish lives at depths between 600 and 1,200 meters off the coasts of Australia and New Zealand, where the pressure is dozens of times higher than at sea level.
- Blobfish appear squishy and "blobby" on land because their bodies are adapted to deep-sea pressure, not the surface.
- They were voted the "World's Ugliest Animal" in a 2013 poll by the Ugly Animal Preservation Society.
- Blobfish do not have a swim bladder like many other fish, which helps them avoid being crushed by deep-sea pressure.
- Despite their reputation, blobfish are rarely seen by humans because they live in such deep waters.
- Their gelatinous bodies are slightly less dense than water, allowing them to float just above the ocean floor with minimal energy.
- Blobfish feed mainly on small crustaceans and other edible matter that floats by in the deep sea.
Suggestions for Scenes and Settings for Blobfish Drawings
- Blobfish relaxing on a deep-sea throne surrounded by curious, glowing jellyfish.
- A group of blobfish having a tea party on the ocean floor with seashell cups and starfish plates.
- Blobfish dressed as an underwater superhero, cape floating in the current.
- A blobfish peeking out from behind a treasure chest in a sunken pirate ship.
- Cartoon blobfish floating in a bubble, drifting past colorful coral reefs and sea anemones.
- Blobfish celebrating its birthday underwater with party hats, seaweed streamers, and fish friends.
- A blobfish artist painting a self-portrait on an easel made of driftwood and shells.
- Blobfish exploring a kelp forest, befriending a curious octopus and shy seahorses.
- Blobfish in outer space, floating among the stars in a tiny fishbowl spaceship.
- A blobfish family portrait, capturing different expressions and personalities of each member.