How to Draw a Baby Yoda
Learn how to draw Baby Yoda from "The Mandalorian" with this step-by-step tutorial. Capture the irresistible cuteness of this beloved character on paper.
Materials You'll Need
- Pencil
- Paper
- Eraser
Welcome to this detailed tutorial on how to draw a baby yoda, one of the most adored characters from the hit series "The Mandalorian." Baby Yoda, officially known as Grogu, has captured the hearts of fans worldwide with his big expressive eyes, tiny hands, and endearing personality. Drawing this character allows artists to explore a blend of fantasy and cuteness, making it a rewarding subject for both beginners and experienced illustrators. Whether you want to create fan art, improve your character drawing skills, or simply enjoy the creative process, learning how to draw a baby yoda is a fantastic way to engage with this beloved character.
This tutorial is designed to guide you step-by-step through the process, focusing on the key features that make Baby Yoda so instantly recognizable. You'll practice fundamental drawing techniques such as sketching basic shapes, refining outlines, and adding details like his oversized ears and cozy robe. While the character's simple yet distinctive design makes it accessible for novices, it also offers opportunities to develop shading and proportion skills for more advanced artists. By following along, you'll not only capture Baby Yoda's charm on paper but also gain confidence in your ability to render expressive characters.
So grab your pencil and paper, and get ready to embark on a fun and inspiring artistic journey. Remember, drawing is all about practice and patience, and with this guide on how to draw a baby yoda, you're well on your way to creating a delightful piece of art that you can be proud of. Let's bring this little green friend to life together, one stroke at a time!
Materials Required
Before we begin, make sure you have the following materials ready:
- Pencil (preferably a mechanical pencil or a regular pencil with a sharp point)
- Eraser
- Drawing paper (preferably a sketchbook or a sheet of heavyweight paper)
- Fine-tip markers or pens (optional)
- Colored pencils or markers (optional)
Now that we have everything we need, let's dive into the drawing process!
Step 1: Basic Shapes
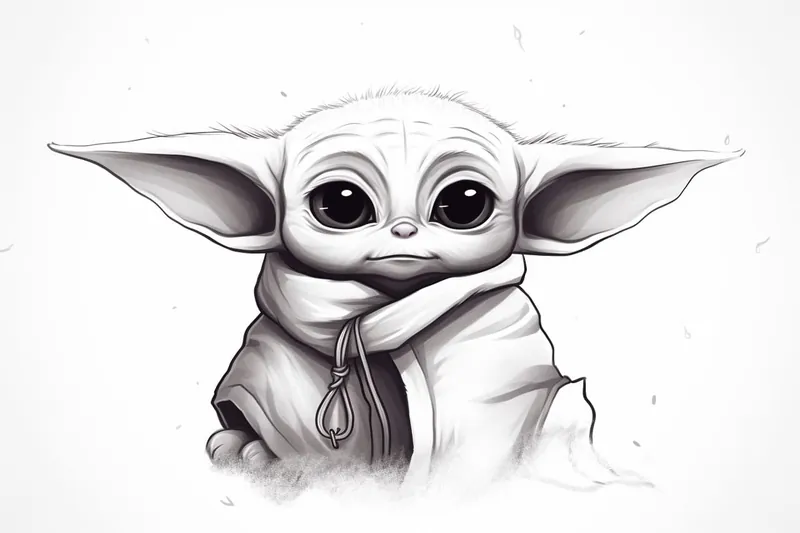
To start, let's break down Baby Yoda's head into basic shapes. Begin by drawing a large oval shape in the center of your paper. This will be the head. Underneath the oval, draw a small horizontal line for the neck.
Step 2: Eyes and Ears
Moving on to the face, draw two large oval shapes within the head for the eyes. Leave a small gap between them. Inside each eye, draw a smaller oval for the pupils. Add a curved line above each eye to create the eyelids.
Next, draw two elongated "U" shapes on either side of the head for Baby Yoda's ears. Make sure they align with the eyes and are pointing slightly outwards.
Step 3: Nose and Mouth
Now it's time to add some facial features. Draw a small, slightly flattened oval shape just below the center of the head for the nose. Just above the nose, add a curved line for the mouth. Baby Yoda has a small, almost smile-like mouth, so keep it subtle.
Step 4: Wrinkles and Detailing
Baby Yoda's face has some adorable wrinkles and detailing that we don't want to miss. Starting from the lower eyelids, draw a series of curved lines that extend downwards, creating a few small wrinkles. Add a few more small, random lines around the eyes, nose, and mouth to give the face some texture.
Step 5: Body
Let's move on to Baby Yoda's body. Draw two curved lines on either side of the neck, extending downwards. These will be the shoulders. Underneath the shoulders, draw a curved line that connects them and forms the base of the body. Baby Yoda has a robe-like outfit, so add some folds and creases by drawing a few curved lines across the body.
Step 6: Arms and Hands
Starting from the shoulders, draw two slightly curved lines on each side for the arms. At the end of each arm, add a small oval shape for the hands. Baby Yoda's hands are tiny, so keep them proportionate to the overall size of the body.
Step 7: Cloak and Details
To complete Baby Yoda's outfit, draw a large "U" shape around the body, extending downwards. This will be the cloak. Add some folds and creases to the cloak by drawing curved lines across it. You can also add some additional details to the robe, such as a small belt or robe fastening.
Step 8: Feet
Moving on to the feet, draw two small, curved lines extending downwards from the bottom of the body. These will be the legs. At the end of each leg, draw a small oval shape for the feet. Baby Yoda's feet are similar to his hands, so keep them proportionate and slightly smaller.
Step 9: Final Touches
Now that we have the basic structure and details in place, it's time to refine the drawing. Go over the pencil lines with a pen or marker, following the main outlines of Baby Yoda's features. You can also add some thin lines to emphasize the wrinkles, folds, and any other details you want to highlight.
Step 10: Coloring (Optional)
If you prefer a colored drawing, this is the time to bring out your colored pencils or markers. Baby Yoda has green skin, so lightly shade the entire head and body with a light green color. You can add some darker green tones to create depth and shadows. Use light strokes and layering to achieve a smooth and even color.
For Baby Yoda's cloak, choose a suitable color that complements the green skin tone. Add some shading and highlighting to give it dimension and make it look more realistic.
Conclusion
Congratulations! You have successfully drawn Baby Yoda from "The Mandalorian." I hope you enjoyed this step-by-step tutorial and found it helpful in bringing this adorable character to life on paper. Remember, practice makes perfect, so keep drawing and experimenting with different poses and expressions for Baby Yoda. May the Force be with you!
Fun Facts About Baby Yoda
- Baby Yoda's real name is Grogu, revealed in the second season of "The Mandalorian."
- Despite his infant appearance, Grogu is 50 years old, as explained by Lucasfilm.
- Baby Yoda belongs to the same mysterious species as Yoda, whose origins remain unknown in Star Wars lore.
- Grogu's adorable design was created to evoke empathy and mystery, as detailed by The Star Wars Show.
- Baby Yoda quickly became a cultural phenomenon, inspiring countless memes and merchandise, according to The New York Times.
- Grogu has demonstrated strong Force abilities, including telekinesis and healing, as seen in official Star Wars sources.
- The puppet used to portray Baby Yoda on set was operated by multiple puppeteers, making it one of the most complex puppets in recent TV history, explained by Vanity Fair.
- Grogu's popularity helped boost Disney+ subscriptions significantly after "The Mandalorian" premiered, as reported by The New York Times.
Suggestions for Scenes and Settings for Baby Yoda Drawings
- Baby Yoda exploring a mystical alien forest with glowing plants and curious creatures.
- Grogu sitting peacefully inside his floating pod, gazing at the stars in a serene night sky.
- Baby Yoda playfully using the Force to levitate small objects around a cozy spaceship interior.
- Grogu bundled up warmly in his robe, nestled beside a campfire on a desert planet.
- Baby Yoda interacting with a friendly droid companion in a bustling spaceport market.
- Grogu perched on a rock, watching a sunset over a distant galaxy filled with colorful nebulae.
- Baby Yoda curiously peeking out from inside a large crate filled with shiny Mandalorian armor pieces.
- Grogu wrapped in his cloak, peacefully napping under the shade of a giant tree on a tranquil planet.
- Baby Yoda playfully reaching out to catch falling leaves in an autumn-themed setting.
- Grogu standing bravely on a cliff edge, with a starship flying in the background, ready for adventure.