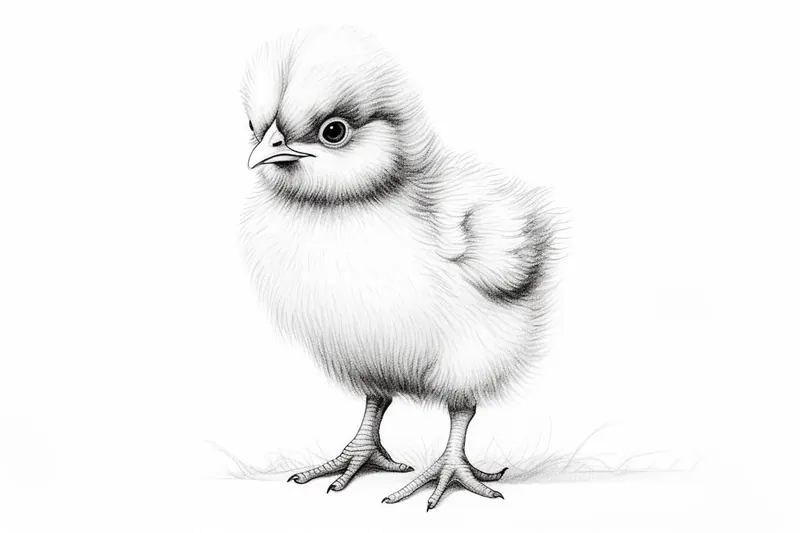
How to Draw a Baby Chick
Learn how to draw a baby chick with this step-by-step tutorial. Perfect for beginners and experienced artists alike. Get creative and have fun!
Materials You'll Need
- Pencil
- Paper
- Eraser
Welcome to this detailed step-by-step tutorial on how to draw a baby chick! Baby chicks, with their soft downy feathers and innocent expressions, have long been a favorite subject for artists seeking to capture the charm of nature's early life stages. Drawing a baby chick is not only a delightful artistic endeavor but also a wonderful way to practice capturing texture, shape, and subtle details that bring an illustration to life. Whether you want to create a cute card, add a whimsical touch to your sketchbook, or simply enjoy the process of drawing a beloved animal, this guide will provide you with all the tools and techniques needed to succeed.In this tutorial, we will break down the drawing process into simple, manageable steps suitable for artists of all skill levels. Whether you're a complete beginner or have some experience, you'll find value in learning how to observe the chick's unique features—like its rounded body, tiny beak, and fluffy feathers—and translate them onto paper. We'll cover fundamental skills such as basic shapes, shading for depth, and adding texture to emulate the softness of the chick's down. By the end, you'll have not just a cute baby chick sketch, but also improved confidence in your ability to depict animals with realism and charm.So, if you've ever wondered how to draw a baby chick that looks both adorable and lifelike, you're in the right place! Grab your favorite drawing tools, prepare your paper, and get ready to embark on a fun and rewarding artistic journey. Remember, every great drawing starts with practice and patience—so don't hesitate to experiment and enjoy the process. Let's bring this little chick to life together!
Materials Required
Before we dive into the drawing process, let's gather the materials you will need:
- Pencil (HB or 2B recommended)
- Eraser
- Paper (preferably a sketchpad)
- Colored pencils or markers (optional)
Now that you have everything you need, let's begin!
How to Draw a Baby Chick Step-by-Step
Step 1: Basic Shapes
Tip: As you draw your baby chick, take time to observe real chicks or reference photos to capture the nuances of their shapes and textures more accurately. Pay attention to the way light interacts with their feathers; using varying pencil pressures and techniques for shading can enhance the fluffiness and dimension of your drawing, making it more lifelike. Don't hesitate to experiment with different materials, such as blending colored pencils or using markers, to achieve the desired softness and color effects in your illustration.
To start, let's create a simple framework for our baby chick. Begin by drawing a large oval shape for the body. This will serve as the foundation for our drawing.
Next, draw a smaller circle on top of the oval shape. This will be the chick's head. Position it slightly towards the left side of the oval.
Step 2: Beak and Eyes
Now, let's add some facial features to our baby chick. Draw a small triangular shape emerging from the bottom of the head circle for the beak. Make it slightly curved to give it a soft and cute appearance.
Next, towards the upper area of the head circle, draw two small oval shapes for the eyes. Leave a small gap between the eyes for the chick's forehead.
Step 3: Wings and Tail
Moving on, we'll add the wings and tail to our baby chick. Starting from the left side of the oval body, draw a slightly curved line extending outward. Repeat this on the right side to create the wings. Keep the curvature gentle to maintain a cute and fluffy look.
For the tail, draw a small, curved triangle shape at the bottom of the oval body, pointing downwards.
Step 4: Feet and Legs
Now it's time to give our baby chick some legs to stand on! Draw two short, curved lines extending from the bottom of the oval body. These will serve as the legs.
Next, at the end of each leg, draw a small oval shape to create the feet of the chick. To make it extra adorable, add a small curved line on each foot to represent the chick's toes.
Step 5: Feather Details
Let's add some detail to our baby chick's feathers. Use curved lines to create a pattern on the oval body. These lines should follow the shape of the body and give the impression of soft, fluffy feathers.
Repeat this pattern on the wings as well, following the curve of each wing.
Step 6: Facial Details
Now it's time to bring our baby chick to life by adding some facial details. Begin by drawing small circles inside each eye to represent the pupils. Leave a small, unshaded area within the pupils to create a reflection effect.
Next, draw a small, curved line above each eye to define the chick's eyebrows. This will give the chick a more expressive and endearing look.
Step 7: Beak and Feet Details
Let's make our chick's beak and feet more defined. Draw a small, curved line inside the beak to create the mouth and give it some dimension.
For the feet, add two small, curved lines on each leg to represent the joints. This will make them look more realistic.
Step 8: Color (Optional)
If you'd like to add some color to your drawing, now is the time! Baby chicks are often yellow, but feel free to get creative with different shades and patterns. Use colored pencils or markers to bring your chick to life. Remember to add light shades and highlights to give the feathers a fluffy appearance.
Conclusion
Congratulations on completing your adorable baby chick drawing! We hope you enjoyed this step-by-step tutorial and found it helpful in creating your fluffy little friend. Remember, practice makes perfect, so don't be afraid to try drawing different poses and expressions for your chick. Keep honing your skills and embrace your artistic journey!
Fun Facts About Baby Chicks
- Baby chicks are covered in soft down feathers that keep them warm until their adult feathers grow in.
- Chicks can recognize their mother's voice and imprint on her shortly after hatching.
- They start pecking and exploring their environment within hours of hatching.
- Baby chicks communicate with soft peeping sounds to express hunger, comfort, or distress.
- Chicks grow rapidly and can double their weight in just a week.
- They have a special egg tooth on their beak to help break out of the eggshell during hatching.
- Baby chicks rely on warmth from a heat source or their mother to regulate their body temperature.
- Chicks have excellent vision and can see in color shortly after hatching.
Suggestions for Scenes and Settings for Baby Chick Drawings
- A baby chick exploring a sunny garden with blooming flowers and butterflies fluttering around.
- A cozy nest scene with a baby chick nestled among soft straw and surrounded by eggshell fragments.
- A playful baby chick chasing after a colorful ladybug on a grassy patch.
- A group of baby chicks huddled together under the warm glow of a sunrise on a farmyard fence.
- A baby chick taking its first steps beside a gentle mother hen, with a barn in the background.
- A whimsical forest clearing where a baby chick meets friendly woodland creatures like rabbits and squirrels.
- A rainy day scene with a baby chick sheltering under a large leaf, surrounded by raindrops and puddles.
- A festive springtime setting with baby chicks among decorated Easter eggs and blossoming tulips.
- A baby chick perched curiously on a wooden wheelbarrow filled with gardening tools and fresh soil.
- A nighttime scene where a baby chick gazes up at twinkling stars and a glowing moon in the sky.