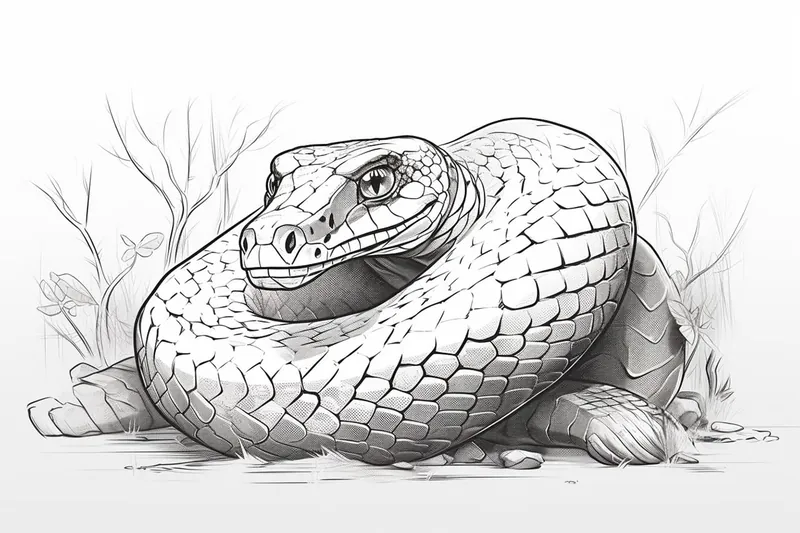
How to Draw an Anaconda
Learn how to draw an anaconda in this step-by-step tutorial. Discover helpful tips and techniques to create a realistic and captivating drawing of this impressive creature.
Materials You'll Need
- Pencil
- Paper
- Eraser
Anacondas are among the largest and most powerful snakes in the world, native to the swamps and rivers of South America. Known for their immense size, muscular bodies, and striking patterns, these fascinating reptiles have captured the imagination of artists and wildlife enthusiasts alike. Their unique appearance makes them an exciting and challenging subject to draw, offering a wonderful opportunity to practice rendering form, texture, and intricate details. Understanding how to draw an anaconda can also help you appreciate its anatomy and the beauty of its natural habitat.
Drawing an anaconda can appeal to a wide range of artists, from beginners eager to improve their skills to more advanced artists looking to take on a new challenge. Whether you're interested in wildlife illustration, want to enhance your portfolio with exotic animals, or simply enjoy sketching creatures with dynamic poses, learning how to draw an anaconda will expand your artistic abilities. This tutorial will guide you through breaking down the anaconda's complex form into manageable steps, focusing on proportion, curves, and pattern work that bring your drawing to life.
No matter your experience level, you'll find that patience and attention to detail are key when tackling this subject. Throughout this guide, you'll pick up tips on shading, creating realistic textures, and capturing the essence of this remarkable snake. Remember, every artist improves with practice, so don't be afraid to make mistakes and experiment with your technique. Grab your drawing tools and get ready to discover how to draw an anaconda with confidence and creativity!
Materials Required
Before we begin, let's gather the materials you will need for this drawing:
- Drawing paper: Choose a sturdy paper that is suitable for your chosen medium, such as pencil or charcoal.
- Drawing pencils: A set of pencils ranging from B (soft) to H (hard) will allow you to achieve a range of tones in your drawing.
- Eraser: Ensure you have a good quality eraser that can cleanly remove any mistakes or unwanted lines.
- Charcoal (optional): If you prefer to add depth and texture to your drawing, charcoal can be a great medium to experiment with.
- Blending tools (optional): Blending stumps or tortillions can help you achieve smooth and seamless transitions between different tones.
Now that we have everything we need, let's dive into the steps for drawing an anaconda!
Tip: When drawing an anaconda, consider using reference images to study the snake's anatomy and natural behavior; this will help you understand its proportions and movement. Pay particular attention to how the body tapers from the thick midsection to the more slender tail, capturing the muscle definition and curves. Experiment with different angles in your sketches to convey the snake's dynamic form, and don't hesitate to incorporate textures and shading techniques to bring your drawing to life.
Step 1: Sketch the Basic Shapes
Start by lightly sketching the basic shapes of the anaconda using a pencil. Begin with a long, curved line for the body. Next, add a smaller circle towards one end of the body for the head. Position the head at an angle so that it appears slightly turned. Finally, sketch a longer oval shape towards the other end of the body for the tail.
Step 2: Refine the Head
Using the initial circle as a guide, refine the shape of the anaconda's head. Add a curved line for the mouth and a small circle for the eye. Anacondas have a distinctively shaped head, so pay attention to the details such as the placement of the nostrils and the curve of the jawline. Once you are satisfied with the overall shape, darken the outline of the head.
Step 3: Add the Body Details
Next, add the body details of the anaconda. Begin by drawing smooth, curved lines to outline the body. Anacondas have a muscular appearance, so pay attention to the contours and curves of the body. Add a few rounded bumps along the body to represent the scales. Take your time with this step to ensure the proportions and shapes are accurate.
Step 4: Draw the Tail
Refine the shape of the tail by adding more rounded bumps to represent the scales. Anaconda tails taper towards the end, so be sure to gradually reduce the size of the bumps as you approach the tip of the tail. Remember to keep a consistent style and stroke direction throughout the drawing.
Step 5: Add the Details of the Face
Now it's time to add the details of the anaconda's face. Start by drawing the mouth, taking care to capture its distinctive shape and curves. Add the nostrils and refine the shape of the eye, adding any necessary shading or reflections to make it more realistic. Don't forget to darken the outline of the head to make it stand out.
Step 6: Shade the Body and Tail
To give the anaconda a three-dimensional appearance, it's important to add shading. Start by lightly shading the body and tail using either a pencil or charcoal. Pay attention to the direction of the light source and add darker shades on the side opposite of where the light is hitting. Use smooth, even strokes to create a seamless transition between the different tones.
Step 7: Refine the Details
Take a step back and assess your drawing. This is an opportunity to refine any areas that may need improvement. Pay attention to the placement and size of the scales, ensuring they are consistent throughout the body. Add any necessary shading or highlights to enhance the depth and texture of the drawing.
Step 8: Add Final Touches
At this point, your anaconda drawing is nearly complete! Take a moment to add any final touches and make any necessary adjustments. Erase any stray lines or marks, ensuring the drawing looks clean and polished. If desired, use blending tools to smooth out any harsh lines or create subtle gradients.
Mistake Alert: A common pitfall when drawing an anaconda is accidentally making its body too uniform in width from head to tail. This often happens because beginners focus on the snake's length and curves, but overlook its powerful anatomy—real anacondas have thick, muscular midsections that gradually taper toward the tail and neck. To avoid this, pay close attention to reference images and sketch the body as a series of overlapping, slightly varying ovals that get smaller at both ends. This approach will help you capture the snake's impressive bulk and natural flow, resulting in a more lifelike and dynamic drawing. Remember, emphasizing those subtle changes in width makes your anaconda look strong and realistic!
Conclusion
Congratulations on completing your drawing of an anaconda! By following these step-by-step instructions, you have learned how to capture the beauty and power of this incredible creature. Remember, practice makes perfect, so don't be afraid to keep exploring and experimenting with your artistic skills. We hope you enjoyed this tutorial and found it helpful. Happy drawing!
Fun Facts About Anacondas
- The green anaconda is the heaviest and one of the longest snakes in the world, with some individuals reaching over 30 feet in length.
- Anacondas are native to the swamps, marshes, and slow-moving streams of the Amazon and Orinoco basins in South America.
- Unlike many snakes, anacondas spend most of their time in water, where their eyes and nostrils are positioned on top of their heads for easy breathing and sight.
- Anacondas are non-venomous constrictors, meaning they subdue their prey by coiling around it and squeezing until it suffocates.
- [They can eat prey as large as deer, capybaras, caimans, and even jaguars, thanks to their incredibly flexible jaws](https://animals.howstuffworks.com/snakes/largest-anaconda.htm).
- Female anacondas are significantly larger than males, sometimes weighing up to five times more (Wikipedia).
- Anacondas give birth to live young, with litters ranging from 20 to 40 babies at a time.
Suggestions for Scenes and Settings for an Anaconda Drawings
- An anaconda gliding silently through murky Amazon river waters, partially submerged with only its head and part of its body visible above the surface.
- A dramatic coiled pose of an anaconda resting on a moss-covered tree branch, emphasizing its muscular form and patterned scales.
- An anaconda camouflaged among lush jungle foliage, with dappled sunlight filtering through the leaves.
- A close-up study of an anaconda's head, focusing on its eyes, jaw, and the intricate details of its facial features.
- An underwater view showing the anaconda swimming, with fish and aquatic plants surrounding its sinuous body.
- An anaconda in the midst of constricting its prey, such as a capybara or caiman, capturing the power and motion of the moment.
- Two anacondas entwined during the breeding season, illustrating the complexity of their movements and interactions.
- A juvenile anaconda curled up on a riverbank, highlighting the difference in scale and texture between young and adult snakes.
- An anaconda slithering across a muddy path after rainfall, leaving a visible trail behind it.
- An imaginative scene where the anaconda is depicted as a mythical guardian of the rainforest, surrounded by vibrant flora and fauna.