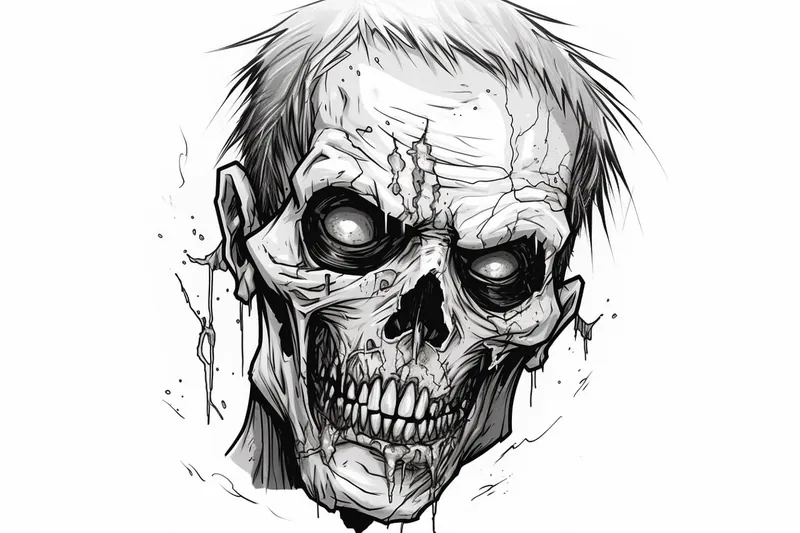
How to Draw a Zombie Head
Learn how to draw a spooky and realistic zombie head with this step-by-step drawing tutorial. Perfect for Halloween or horror art enthusiasts.
Materials You'll Need
- Pencil
- Paper
- Eraser
Welcome to this step-by-step tutorial on how to draw a zombie head! Zombies have captured the imagination of artists and storytellers for generations, symbolizing everything from spooky tales to thrilling adventures in movies, games, and comic books. Drawing a zombie head offers a fantastic opportunity to explore dramatic facial expressions, eerie features, and unique textures like decaying skin and exposed bone. Whether you're a fan of horror art, creating illustrations for Halloween, or simply want to expand your character design skills, learning how to draw a zombie head is both a fun and rewarding challenge.
This tutorial is designed for artists of all skill levels, from beginners eager to experiment with creepy characters to intermediate artists looking to refine their shading and detailing techniques. We'll break down the process step by step, covering essential methods such as sketching rough outlines, emphasizing key facial features, and adding depth through shading and texture. You'll learn how to create convincing scars, exaggerated expressions, and the signature sunken eyes that make zombie heads so compelling. Don't worry if you're new to drawing monsters—each step is explained clearly, so you can follow along and build your confidence as you go.
So grab your pencil and paper, and get ready to unleash your creativity! With a little practice and patience, you'll discover just how much fun it can be to bring a zombie head to life on the page. Remember, every artist starts somewhere, and every drawing is a step closer to mastering your craft. Let's dive in and learn how to draw a zombie head together—you might be surprised at what you can create!
Materials Required
To complete this drawing, you will need the following materials:
- Pencil: Choose a medium or soft graphite pencil for the initial sketching.
- Paper: Use a good quality drawing paper that can withstand erasing and shading.
- Eraser: Have a kneaded eraser or a soft rubber eraser on hand for corrections.
- Blending stump or cotton swab: This will help you achieve smooth and seamless shading.
- Reference image: It's always helpful to have a reference image or drawing of a zombie head to guide you throughout the process.
Now that you have your materials ready, let's dive into the steps to create your zombie head drawing.
Step 1: Basic Outline
Start by lightly sketching a basic oval shape for the head. Remember that zombies are often depicted with distorted and uneven features, so feel free to experiment with the shape and proportions. Use light, loose lines to ensure easy adjustments later on.
Step 2: Facial Features
Next, add the facial features of the zombie. Begin with two circles for the eyes, placing them slightly below the center of the oval. Then, sketch the nose and a wide open mouth, complete with sharp, decaying teeth. Zombies often have sunken cheeks and a gaunt appearance, so keep that in mind as you sketch.
Step 3: Refine the Features
Now, it's time to refine the facial features. Use more defined lines to outline the eyes, giving them a hollow, sunken look. Add depth to the nose by sketching its shape more precisely, and add details to the mouth, such as cracks and missing chunks of flesh. Take your time to capture the creepy essence of a zombie in these details.
Step 4: Shadows and Shading
To add depth and volume to your zombie head drawing, start shading the different areas. Begin by applying a light layer of shading on the entire head, using gentle strokes in the direction of the contours. Then, gradually build up the shadows around the eyes, nose, and mouth to create a more three-dimensional effect. Use your blending stump or cotton swab to blend the shading and create a smoother transition between light and dark areas.
Step 5: Texture and Details
Now, let's focus on adding texture and details to make your zombie head drawing more realistic. Add wrinkles, folds, and bumpy skin texture to the forehead, cheeks, and neck. Keep in mind that zombies have decomposing flesh, so you can incorporate elements like exposed bones or patches of torn skin. This is where your reference image will come in handy to guide you in capturing these gruesome details accurately.
Step 6: Finishing Touches
As you near the completion of your drawing, take a step back and assess the overall composition. Make any necessary adjustments to balance the shadows, highlights, and details. Darken the areas that require more depth, and emphasize the highlights to create a contrast. Don't be afraid to experiment and make your zombie head drawing as creepy as you desire!
And there you have it – a spooky and realistic zombie head drawing! With practice and patience, you can continue to refine your skills and create more intricate and unique zombie artworks.
Tip: For capturing the eerie essence of a zombie head, start by using a soft pencil, like a 2B or 4B, for your initial sketch. This allows you to create smooth, flowing lines that can easily be adjusted as you refine your drawing. Focus on the proportions of the skull and facial features—exaggerate the cheekbones and jawline to emphasize decay and give a more grotesque appearance. Once you've established the basic shape, switch to a harder pencil, such as an H or 2H, for adding details like scars and texture to the skin; this contrast will help create a more realistic, aged look. Lastly, consider incorporating a blending stump or tissue to soften your shading around the eyes and mouth, enhancing that haunting, lifeless expression that's characteristic of zombies!
Conclusion
In conclusion, drawing a zombie head can be both challenging and fun. By following these step-by-step instructions and using the right materials, you can create a chilling and impressive zombie head drawing. Remember to start with a basic outline, refine the facial features, add shadows and shading, incorporate texture and details, and finish with finesse. So grab your pencil, paper, and let your imagination run wild as you bring your very own zombie head to life!
Fun Facts About Zombie Head
- The concept of the zombie head originates from Haitian folklore, where zombies are reanimated corpses controlled by magic.
- Zombies with exposed brains or skulls, a common feature in zombie head art, became popular through movies like Return of the Living Dead.
- The decaying look of a zombie head is often inspired by real-life forensic studies of decomposition.
- Sunken eyes and missing flesh are signature features of zombie heads, influenced by classic horror comics such as Tales from the Crypt.
- In video games like Minecraft, the zombie head is a collectible item that players can use for decoration or disguise.
- The first on-screen depiction of a zombie head being severed appeared in George A. Romero's Night of the Living Dead (1968).
- Zombie heads are a popular subject for Halloween decorations and costumes.
- Artists often exaggerate the features of a zombie head, such as gaping mouths and jagged teeth, to evoke fear and fascination, a technique discussed by Creative Bloq.
- The fascination with zombie heads has led to their appearance in everything from comic books to collectible toys, as explored by NPR.
Suggestions for Scenes and Settings for Zombie Head Drawings
- A zombie head emerging from the ground in a foggy graveyard, surrounded by crumbling tombstones and twisted trees.
- A close-up of a zombie head peering through a shattered window, with rain streaking down the glass and lightning flashing in the background.
- An underwater zombie head with seaweed tangled in its hair and barnacles growing on its decayed skin.
- A zombie head wearing a tattered old-fashioned hat, hinting at a Victorian-era backstory.
- A zombie head in profile, silhouetted against a full moon, with bats flying overhead and a haunted house in the distance.
- A futuristic zombie head with cybernetic implants and glowing LED eyes, set against a ruined cityscape.
- A zombie head adorned with tribal paint and bone piercings, suggesting a post-apocalyptic survivor-turned-monster.
- A zombie head tangled in overgrown vines and flowers, blending eerie decay with elements of nature reclaiming the body.
- A cartoon-style zombie head with exaggerated, expressive features and bright, playful colors for a less gruesome approach.
- A zombie head displayed as a trophy on a wall, surrounded by dark wooden panels and cobwebs, hinting at a monster hunter's lair.