How to Draw a Zombie Face
Learn how to draw a zombie face in this step-by-step tutorial. Create a terrifying and realistic undead masterpiece with this easy-to-follow guide.
Materials You'll Need
- Pencil
- Paper
- Eraser
Zombies have captured the imagination of artists and storytellers alike, becoming iconic figures in modern pop culture. Their haunting, decayed features often symbolize the unknown and the eerie, making them a favorite subject for those who enjoy horror and fantasy genres. Whether seen shambling through blockbuster movies, creeping across the pages of graphic novels, or starring in popular video games, zombies are instantly recognizable and endlessly fascinating to draw. By focusing on their distinctive facial features—sunken eyes, torn flesh, and unsettling expressions—you can create artwork that is both chilling and captivating.
Learning how to draw a zombie face is a fantastic way to challenge your artistic skills while exploring themes of anatomy, texture, and expression. This subject provides an excellent opportunity to practice rendering lifelike details such as wrinkled skin, exposed bone, and ragged wounds, all while experimenting with creative shading and dramatic contrasts. Drawing zombies is especially rewarding for those interested in character design, Halloween projects, or simply expanding their portfolio with something unique and eye-catching. The process can be enjoyed by artists at various skill levels, as you can adjust the complexity to suit your experience—from simple cartoon-style zombies to highly detailed, realistic depictions.
In this step-by-step tutorial, you'll learn how to draw a zombie face by breaking down the process into manageable stages, starting with the basic shapes and gradually adding ghoulish details. Whether you're a beginner looking to expand your drawing skills or an intermediate artist seeking fresh inspiration, this guide will help you achieve a terrifying and realistic zombie look. All you need are some basic drawing materials and a little creativity. So gather your supplies, unleash your imagination, and let's dive into the world of undead art together—your perfect zombie masterpiece awaits!
Materials Required
To complete this drawing, you will need the following materials:
- Pencil: Use a pencil with a soft lead (such as a 2B or 4B) to create light and dark shading easily. You can also use a mechanical pencil if you prefer.
- Eraser: Have a good quality eraser handy to correct any mistakes or lighten areas too dark.
- Paper: Use a smooth and sturdy paper, such as drawing paper or bristol board, to give your drawing a polished look.
- Reference Image: Find a reference image of a zombie face that you like. You can search online or use a zombie character from a movie or TV show as inspiration.
Now that you have your materials ready, let's dive into the step-by-step process of drawing a zombie face!
Step 1: Sketch the Basic Shape
Start by lightly sketching the basic shape of the head using simple shapes like ovals or circles. Zombies often have distorted and decayed features, so don't worry about making it look perfect. Use light lines to keep it loose and easy to adjust.
Step 2: Add Facial Features
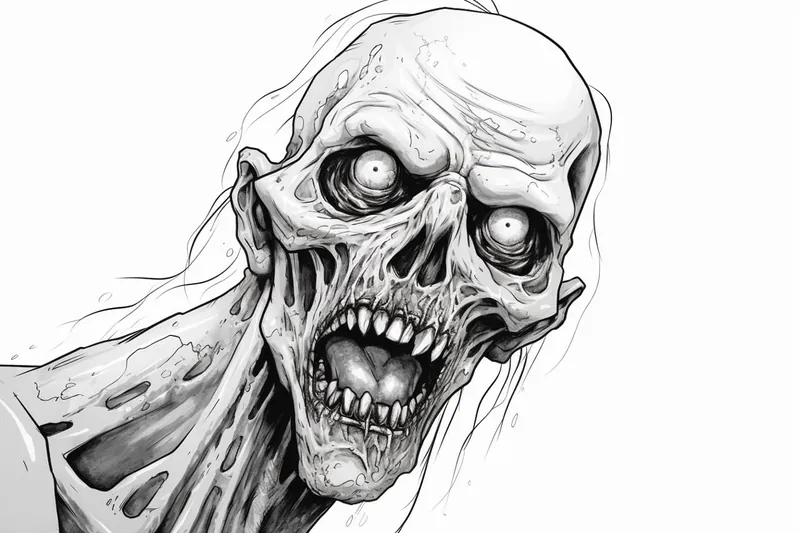
Next, add the facial features of the zombie. Start with the eyes, keeping in mind that zombies typically have sunken and bloodshot eyes. Add some wrinkles, scars, or other details around the eyes to enhance the zombie look. Then, sketch the nose, which can be rotting or missing parts. Finally, draw the mouth, giving it a wide and menacing grin with sharp or missing teeth.
Step 3: Create Depth with Shadows
You need to add shadows to make your zombie face look more three-dimensional. Start by identifying the main light source in your reference image. Then, shade the areas that are away from the light source, such as under the eyes, around the nose, and in the mouth. Use a darker pencil or apply more pressure to create darker shadows. Gradually build up the shading, keeping it lighter in areas closer to the light source.
Step 4: Bring out the Decay
Zombies are known for their decaying appearance, so let's bring that to life in your drawing. Sketch some cracks or peeling skin on the face, especially around the forehead, cheeks, and chin. You can also add some exposed bone or missing flesh to give it a more gruesome look. Be creative and don't be afraid to experiment with different textures and levels of decay.
Step 5: Detail the Features
Tip: To enhance the eerie effect of your zombie face drawing, consider incorporating unexpected textures and elements like dripping blood or insects crawling on the skin. This not only adds depth and interest to your piece but also amplifies the horror aspect, making your artwork more visually striking and engaging. Experiment with layering these details as you refine your drawing to create a truly memorable undead character.
Now it's time to add more details to your zombie face. Look closely at your reference image and add any additional features such as scars, stitches, or patches of exposed muscle. Pay attention to the texture and make your lines and shading match the underlying structure. Remember, the more details you add, the more realistic and terrifying your zombie face will become.
Step 6: Refine and Adjust
Take a step back and look at your drawing as a whole. Assess the proportions, shapes, and details. Make any necessary adjustments to ensure that everything looks balanced and realistic. You can use your eraser to lighten any areas that are too dark or correct any mistakes that you notice.
Challenge: For an extra creative twist, try drawing your zombie face as part of a dramatic scene—perhaps emerging from the shadows of a moonlit graveyard, or peering hungrily through a shattered window. Challenge yourself to include at least one other character, such as a terrified survivor or a fellow zombie, and use their interactions to tell a story. Pay special attention to how lighting and background elements can heighten the atmosphere and mood of your drawing. This is a great way to practice composition and storytelling, all while making your zombie creation even more memorable!
Conclusion
Drawing a zombie face may seem challenging at first, but with some practice and patience, you can create a terrifying and realistic masterpiece. Remember to start with a basic shape, add facial features and shadows, bring out the decay, detail the features, and refine your drawing. Keep experimenting and adding your unique touch to make your zombie face truly stand out. Happy drawing, and enjoy bringing your undead creation to life!
Fun Facts About Zombie Face
- The classic zombie face, with sunken eyes and decaying flesh, was popularized by George A. Romero's film Night of the Living Dead.
- Zombie faces often feature exposed bone and torn skin, inspired by real-life forensic pathology and scientific studies of decomposition.
- In Haitian folklore, the word "zombie" comes from the West African word "nzambi," meaning "spirit of a dead person."
- Makeup artists use latex, tissue paper, and fake blood to create realistic zombie faces for movies and TV.
- The signature "blank stare" of a zombie face is based on neurological symptoms of certain brain disorders.
- Zombie faces are a popular subject for Halloween costumes and have inspired countless makeup tutorials on YouTube.
- Video games like Resident Evil and The Last of Us have set new standards for terrifyingly detailed zombie faces.
- Artists often exaggerate features like missing noses or jagged teeth to make zombie faces more unsettling, a technique discussed by Creative Bloq.
- Zombie face designs can range from cartoonish to hyper-realistic, making them a versatile subject for artists at any skill level, as noted by Creative Bloq.
Suggestions for Scenes and Settings for Zombie Face Drawings
- A zombie peering through a broken window on a stormy night, rain streaking its decayed face.
- A close-up of a zombie emerging from the misty woods at dawn, with tangled branches framing its face.
- A zombie face illuminated by the flickering glow of a campfire, shadows exaggerating its gruesome features.
- An underwater zombie, with algae and aquatic plants tangled in its hair and water bubbles escaping its mouth.
- A zombie wearing remnants of a tattered carnival mask, blending horror with eerie festivity.
- A zombie trapped behind cracked glass, its hands and face pressed desperately against the surface.
- A futuristic cyber-zombie with exposed circuitry and glowing eyes, blending decay with technology.
- A child zombie clutching a broken toy, innocence twisted by the haunting expression on its face.
- A zombie soldier in a ruined battlefield, helmet askew and mud caked on its decomposing skin.
- A zombie face half-lit by moonlight in an abandoned graveyard, with gravestones and fog in the background.