How to Draw a Zombie
Learn how to draw a zombie step-by-step with this clear and concise tutorial. Discover the materials needed and unleash your inner artist in this thrilling drawing adventure.
Materials You'll Need
- Pencil
- Paper
- Eraser
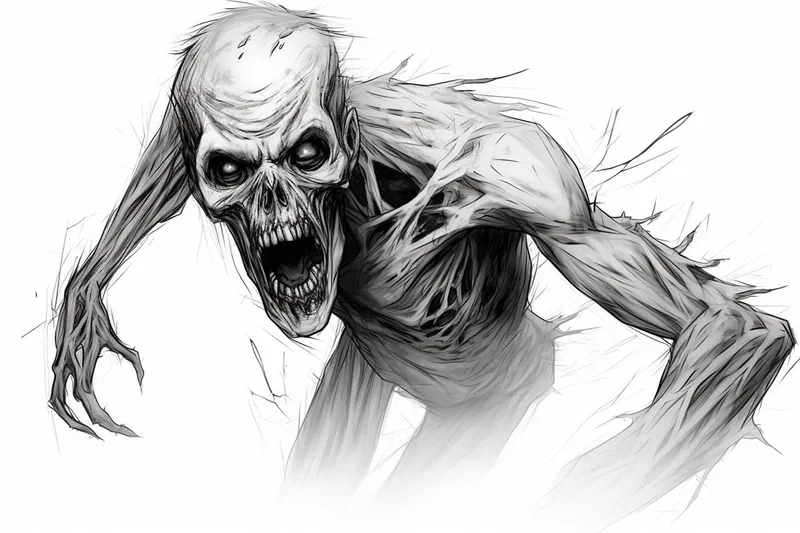
Zombies have captured the imagination of artists and storytellers for generations, shambling onto the scene in comics, movies, television shows, and video games. These undead creatures are often depicted with decaying features, torn clothing, and haunting expressions, making them a fascinating and versatile subject to draw. Whether you're a fan of horror, enjoy Halloween themes, or simply love exploring the darker side of art, learning how to draw a zombie gives you the chance to play with eerie details and experiment with creative character design.
Many artists are drawn to depicting zombies because they offer a unique opportunity to practice anatomy, facial expressions, and textures—especially those that convey decay and age. Drawing a zombie allows you to push the boundaries of realism and exaggeration, inventing your own version of what the undead might look like. This tutorial on how to draw a zombie is designed for artists of all skill levels. Beginners will benefit from the step-by-step breakdown of basic shapes, while more advanced artists can focus on refining gruesome details like sunken eyes, ragged wounds, and tattered clothing. You'll also get tips on shading and adding depth to enhance the creepy effect.
As you embark on this artistic adventure, remember that there's no one right way to create a zombie—every artist's interpretation is unique. Don't be afraid to experiment with different features, poses, or levels of grotesqueness. With some practice and imagination, you'll soon find yourself bringing your own undead creations to life on the page. Let's dive into the world of zombies and see how much fun it can be to draw something that's delightfully spooky!
Materials Required
To embark on this zombie-drawing journey, you will need the following materials:
- Pencil: A medium-soft pencil, such as a 2B or 4B, will free you to create dark lines and easily erase any mistakes.
- Eraser: Choose a kneaded eraser or a soft gum eraser to remove unwanted lines and smudges gently.
- Paper: Opt for a smooth-surfaced paper that can handle pencil shading, such as drawing paper or sketch paper.
- Reference Image: Find a clear reference image of a zombie to help you grasp the facial features and overall appearance.
With these materials at hand, let's begin drawing our undead creation!
Step 1: Basic Guidelines
Start by lightly sketching a circle to create the head of your zombie. Then, draw a horizontal line across the middle of the circle and another vertical line down the center. These guidelines will assist you in placing the facial features accurately.
Step 2: Facial Features
Next, outline the eye sockets by drawing two oval shapes within the upper area of the circle. Position them slightly above the horizontal guideline. Add another oval below each eye socket to indicate the cheekbones.
For the nose, draw a small triangle protruding from the vertical guideline. Place it between the eye sockets, slightly lower than the horizontal guideline. You can make the triangle asymmetrical or jagged to give your zombie a more menacing look.
Now, let's tackle the mouth. Sketch a horizontal line on the lower half of the circle, intersecting the vertical guideline. Then, draw a curved line below the horizontal guideline, connecting the two sides of the mouth. Add some uneven, crooked teeth by sketching small triangles along the curved line.
Step 3: Facial Details
To enhance the undead look of your zombie, it's time to add some details. Begin with the eyes by drawing two small circles within the eye sockets. Leave small space at the bottom of each eye for the iris and pupil.
Next, give your zombie some spooky eyebrows. Draw irregular, messy lines above each eye socket, creating a chaotic and unruly appearance. You can also add some wrinkles and creases on the forehead and around the eyes to emphasize the decaying nature of the zombie.
Step 4: Hair and Ears
To give your zombie some hair, start by sketching rough shapes around the top and sides of the head. Zombies often have disheveled and matted hair, so don't worry about perfecting the strands at this stage. Add some random lines and texture to imply unkempt hair.
Moving on to the ears, draw two uneven, torn shapes on each side of the head. Make them look ragged and damaged to match the overall zombie aesthetic. For extra detail, you can sketch some exposed skull or flesh within the ear cavities.
Step 5: Neck and Body
Tip: To enhance your zombie drawing, consider incorporating dynamic poses and varied expressions to convey movement and emotion, making your undead character more lifelike and engaging. Experiment with different angles, such as a side view or a three-quarters perspective, and play with the intensity of the facial features—like deep-set eyes or gaping mouths—to evoke a stronger reaction from your audience. This will bring an extra layer of depth and interest to your artwork.
Extend two lines downwards from the sides of the head to create the neck. Zombies typically have a hunched and distorted posture, so make the neck slightly bent. Connect the neck to the chest area by drawing a curved line.
For the body, sketch a rough shape beneath the chest. Zombies are often depicted with tattered clothing or exposed bones and organs, so you have the freedom to embrace your imagination and create a suitably macabre design.
Step 6: Shading and Detailing
Now that you've sketched the basic structure of your zombie, it's time to add shading and finer details. Use your pencil to shade areas that should appear darker, such as the eye sockets, beneath the cheekbones, and around the mouth. This shading will give your zombie a more three-dimensional and realistic appearance.
Add texture and depth to the skin by lightly sketching some lines and wrinkles around the face, neck, and exposed body areas. Pay attention to the reference image to ensure your zombie looks appropriately decayed and gruesome.
For a finishing touch, darken the hair and add some texture and shading to make it look more realistic and tangled.
Wild Inspiration: Imagine a zombie that's fused with a celestial phenomenon—picture an undead astronaut floating through space, with cosmic gas and stardust swirling through the holes in its tattered suit, and glowing nebulae leaking from open wounds instead of blood. Its empty eye sockets could shine with the eerie light of distant galaxies, while fragments of meteorite and satellite debris are embedded in its decaying flesh. Instead of a traditional graveyard, set your scene on the surface of a mysterious planet or the cold expanse of a space station, adding floating bones and zero-gravity "shambles." Combining the macabre with the majestic vastness of space will push your creativity to new worlds and make for a truly unforgettable zombie drawing!
Conclusion
Congratulations, you've successfully learned how to draw a zombie! You can create unique and terrifying undead creatures by following these step-by-step instructions and using your imagination. Remember to practice regularly and experiment with different variations to develop your skills further. Now go forth and unleash your monstrous artistic talents!
Fun Facts About Zombie
- The word "zombie" is believed to have originated from Haitian folklore, where it describes a reanimated corpse controlled by magic.
- The modern image of zombies as flesh-eating undead was popularized by George A. Romero's 1968 film Night of the Living Dead.
- In Haitian culture, zombies are linked to the practice of Vodou, and some believe that real-life cases of zombification have occurred.
- The Centers for Disease Control and Prevention (CDC) once used a zombie apocalypse scenario to promote emergency preparedness, detailed in their Zombie Preparedness Guide.
- Zombies have become a staple in video games, with franchises like Resident Evil helping to define the survival horror genre.
- The concept of a zombie virus has been explored by scientists, with some pointing to real-life examples of mind-controlling parasites, as discussed by Scientific American.
- World Zombie Day is celebrated annually in October, with fans participating in zombie walks around the globe.
- The Guinness World Record for the largest gathering of zombies was set in 2014 in Minneapolis, with over 15,000 participants, according to Guinness World Records.
Suggestions for Scenes and Settings for Zombie Drawings
- Zombies staggering through an abandoned city street, with crumbling buildings and flickering streetlights in the background.
- An undead horde emerging from a misty graveyard at midnight, with tombstones and twisted trees casting eerie shadows.
- A single zombie reaching out from beneath a broken wooden floor inside an old, haunted house.
- A group of zombies clawing at the windows of a barricaded farmhouse during a thunderstorm.
- A zombie rising out of a swamp, draped in algae and tangled in water plants, with glowing eyes piercing the darkness.
- Post-apocalyptic survivors facing off against zombies in a deserted shopping mall, with overturned carts and scattered supplies.
- A zombie lurking in a fog-filled alleyway, partially hidden by trash cans and discarded newspapers.
- A humorous scene of zombies at a Halloween party, mingling with humans in costumes.
- An ancient mummy-like zombie stumbling through a ruined temple, surrounded by relics and crumbling statues.
- A close-up portrait of a zombie with exaggerated features—sunken eyes, torn lips, and exposed bone—set against a stark, moonlit background.