How to Draw a Yorkshire Terrier
Learn how to draw a Yorkshire Terrier with this step-by-step tutorial. Capture the essence of this adorable breed in your artwork. Perfect for beginners and experienced artists alike.
Materials You'll Need
- Pencil
- Paper
- Eraser
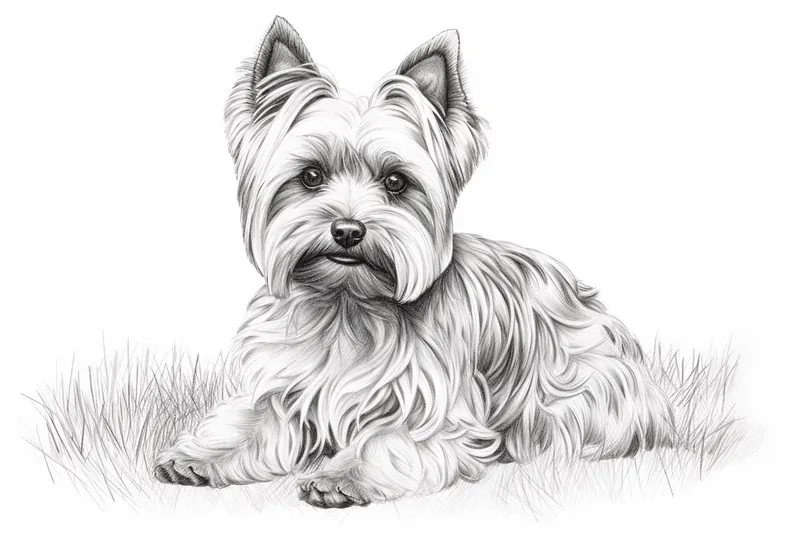
The Yorkshire Terrier, affectionately known as the Yorkie, is a small but spirited dog breed beloved for its luxurious, silky coat and confident personality. With their expressive eyes, perky ears, and flowing fur, Yorkies have captured the hearts of dog lovers around the world. Drawing a Yorkshire Terrier allows you to appreciate and study the unique characteristics that make this breed so charming—whether it's the intricate texture of their hair or the lively sparkle in their gaze.
If you've ever wondered how to draw a Yorkshire Terrier, this tutorial is the perfect place to start. Artists are often drawn to Yorkies because their detailed coat and adorable features present both a delightful challenge and an opportunity to refine techniques like layering, shading, and capturing texture. Whether you're creating a portrait of your own pet, working on building your animal drawing skills, or simply looking for an engaging subject, learning to draw a Yorkie can be both fun and rewarding. This guide is suitable for all skill levels, offering clear, step-by-step instructions to help you break down the process and achieve a lifelike result.
Don't worry if you're new to drawing or haven't tackled animal portraits before—patience and practice are key! By following along, you'll not only improve your technical abilities but also enjoy the satisfaction of bringing this beloved breed to life on paper. Grab your materials, get comfortable, and let's embark on this creative journey together!
Materials Required
To begin your Yorkshire Terrier drawing, ensure you have the following materials:
- Drawing paper
- Pencils (HB, 2B, and 4B)
- Eraser
- Fine-tip markers or pens (optional)
- Colored pencils or markers (optional)
- Reference image of a Yorkshire Terrier
Now that you have your materials ready, let's move on to the step-by-step instructions.
Step 1: Outline the Head and Ears
Start by drawing a circle near the top of your paper. This will serve as the head of your Yorkshire Terrier. Next, add two pointy ears on either side of the head, keeping them relatively small and close to the head. Remember, Yorkshire Terriers have upright ears, so make sure to capture that characteristic in your sketch.
Step 2: Sketch the Body and Legs
Tip: When drawing your Yorkshire Terrier, take frequent breaks to step back and evaluate your work from a distance; this will help you see any proportion or detail issues that may not be obvious up close. Additionally, use a variety of pencil pressures to create depth in the fur, layering lighter strokes for highlights and darker ones for shadows to mimic the silky texture of their coat effectively.
Step 3: Detail the Face
At the center of the head, draw two small circles for the eyes. Leave a small white highlight in each eye to add a touch of life. Just below the eyes, draw a small triangle for the nose. Add a curved line underneath the nose for the mouth. Don't forget to include the characteristic tuft of fur on the head by drawing a few short, curved lines.
Step 4: Define the Features
Now it's time to bring your Yorkshire Terrier to life by adding some details. Use short, curved lines to create the fur texture on the body and ears. Add a few strokes to define the outline of the face and body. Don't worry about making individual hairs at this stage; we'll add more details later.
Step 5: Refine the Eyes and Nose
To make the eyes appear more realistic, add shading around the edges of the iris. This will give them depth and dimension. Next, darken the pupil, leaving a small white highlight for added realism. Use short, light strokes to create a furry texture on the muzzle and around the nose. Add some shading around the nose and mouth to enhance the three-dimensional effect.
Step 6: Add Details to the Ears and Fur
Now, focus on the ears by adding gentle curves and strokes to give them a fluffy appearance. Pay attention to the direction of the fur and mimic it in your drawing. For the body, use short, feathery strokes to define the contours and texture of the fur. Take your time with this step, as the fur is a distinctive feature of Yorkshire Terriers.
Step 7: Define the Body and Legs
Add more definition to the body by using darker pencil strokes to indicate the shadows and areas of fur overlap. This will give your drawing depth and make it more realistic. Pay attention to the shape and size of the legs, ensuring they are proportionate to the body. Use curved lines to suggest the flow of fur on the legs.
Step 8: Finalize the Drawing
Now that you have established the basic structure and details of your Yorkshire Terrier, take a step back and evaluate your drawing. Make any necessary adjustments to the proportions or the placement of features. Once you're satisfied with the overall result, go over your drawing with a darker pencil or a fine-tip pen to accentuate the lines and details. Erase any unnecessary guidelines or stray marks.
Mistake Alert: A frequent mistake when drawing Yorkshire Terriers is making their fur look stiff or uniform, rather than capturing its signature silky, flowing texture. This often happens because beginners tend to use short, repetitive strokes all in the same direction, which can flatten the drawing and make the coat appear unnatural. To avoid this, observe photo references closely and notice how the hair overlaps, changes direction, and varies in length—especially around the face, ears, and chest. Use longer, sweeping pencil strokes and layer them with lighter and darker values to build up a sense of depth and movement in the fur. Remember, a Yorkie's coat has both structure and softness, so take your time layering and blending to achieve a lively, realistic look!
Conclusion
Congratulations on completing your Yorkshire Terrier drawing! By following these step-by-step instructions, you've captured the charm and elegance of this beloved breed. Remember, practice is key to improving your drawing skills, so don't be discouraged if your first attempt doesn't turn out as expected. Keep refining your technique and experimenting with different styles and mediums. With time and dedication, you'll be able to create stunning artwork of Yorkshire Terriers and other subjects.
Fun Facts About Yorkshire Terrier
- The Yorkshire Terrier was originally bred in England to catch rats in textile mills.
- Despite their small size, Yorkies are known for their bold and confident personalities.
- Yorkshire Terriers have a fine, silky coat that is more similar to human hair than to fur.
- The breed typically weighs only 4 to 7 pounds, making them one of the smallest dog breeds.
- Yorkies are hypoallergenic and shed very little.
- Their signature blue and tan coat color develops as they mature.
- Yorkshire Terriers are known for their loyalty and often form strong bonds with their owners.
- They are highly intelligent and excel in dog sports like agility and obedience.
- Yorkies have a long lifespan, often living 12 to 15 years.
- Smoky, a Yorkshire Terrier, became famous as a World War II hero and is considered the first therapy dog.
- Show Yorkies must wear center-parted hair secured with bows according to breed standards.
- Many owners keep their Yorkies in short puppy cuts for easier grooming.
Suggestions for Scenes and Settings for Yorkshire Terrier Drawings
- A Yorkshire Terrier prancing through a flower-filled garden, its silky coat flowing in the breeze.
- A playful Yorkie with a bow in its hair, peeking out of a designer handbag.
- A Yorkie sitting proudly on a vintage armchair, surrounded by elegant home decor.
- A pair of Yorkshire Terriers chasing butterflies in a sunny park.
- A Yorkie wrapped in a cozy blanket, snuggled up by a fireplace on a rainy day.
- A Yorkshire Terrier exploring a city street, with bustling shops and people in the background.
- A Yorkie wearing a raincoat and boots, splashing through puddles during a spring shower.
- A whimsical scene of a Yorkie dressed as a royal, sitting on an ornate pillow in a palace setting.
- A close-up portrait focusing on the expressive eyes and intricate fur texture of a Yorkshire Terrier.
- A Yorkie playing with its favorite toy in a sunlit backyard.