How to Draw a Yin Yang
Learn how to draw a Yin Yang symbol with this step-by-step guide. Create a balanced and harmonious artwork using these easy instructions.
Materials You'll Need
- Pencil
- Paper
- Eraser
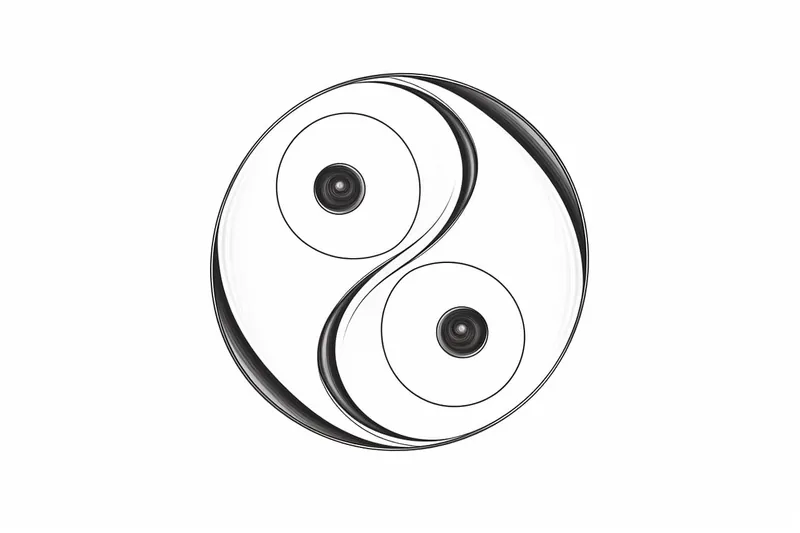
The Yin Yang symbol, also known as Taijitu, is one of the most recognizable icons in Eastern philosophy. Originating in ancient Chinese culture, it represents the concept of duality—how seemingly opposite or contrary forces are actually interconnected and complementary. The symbol features a perfect circle divided by a flowing S-shaped line into a dark and a light half, each containing a small dot of the opposing color. This timeless motif can be found in everything from artwork and jewelry to tattoos and home decor, making it a powerful emblem of balance, unity, and the cyclical nature of life.
Learning how to draw a yin yang is an excellent exercise for artists of all skill levels. For beginners, it's a great way to practice drawing smooth curves, achieving symmetry, and working with contrasting values. For more experienced artists, the yin yang serves as a perfect canvas for creative embellishments or exploring new materials and shading techniques. You might want to draw this symbol to bring a sense of peace and harmony to your artwork, to incorporate meaningful symbolism into your projects, or simply to develop your technical drawing abilities. No matter your reason, mastering the yin yang is both rewarding and enjoyable.
In this step-by-step guide, we'll show you exactly how to draw a yin yang, from sketching the basic outline to refining the details and adding your own creative touch. Whether you're picking up a pencil for the first time or looking to add a classic symbol to your portfolio, you'll find helpful tips and encouragement along the way. Grab your drawing materials, embrace the spirit of balance, and let's begin this artistic journey together!
Materials Required
Before we begin, let's gather the materials you will need to draw a Yin Yang:
- [Drawing paper or a sketchbook](https://yonderoo.com/best-sketchbooks-for-artists/)
- Pencils (preferably a range of softness, such as 2B, 4B, and 6B)
- Eraser
- Compass or round object for tracing circles (optional)
- Ruler (optional)
Now that you have all your materials ready, let's move on to the steps of drawing a Yin Yang.
Step 1: Draw a Circle
Start by drawing a large circle in the center of your paper. You can use a compass to create a perfect circle, or simply trace around a round object such as a lid or a glass. This circle will serve as the overall shape of your Yin Yang symbol.
Step 2: Divide the Circle
Now, use your ruler or a steady hand to draw a vertical line across the center of the circle, dividing it into two equal halves. This line will act as a guideline for the placement of the Yin Yang's contrasting colors.
Step 3: Draw Two Small Circles
Within the upper half of the circle, draw a smaller circle near the top. This circle should be about one-third the size of the overall circle. Repeat the same step within the lower half of the circle, drawing another small circle near the bottom. Make sure these two smaller circles are of the same size.
Step 4: Add the Contrasting Colors
In this step, you will be filling in the Yin Yang's contrasting colors. Begin by shading the top half of the larger circle with a dark color such as black or deep gray. This represents the Yin, which symbolizes darkness, femininity, and passivity.
Next, shade the bottom half of the larger circle with a light color such as white or a light gray. This represents the Yang, which symbolizes lightness, masculinity, and activity. Make sure to leave the smaller circles within each half unshaded.
Step 5: Add the First Curve
To create the interlocking effect of the Yin Yang, draw a curved line that starts from the bottom left of the circle and ends at the top right. This curve should pass through the center of the two smaller circles you drew earlier. The curve should touch the dark and light colors at the points where they meet the larger circle.
Step 6: Add the Second Curve
Now, draw a symmetrical curved line that mirrors the first curve. This curve should start from the bottom right of the circle and end at the top left, also passing through the center of the two smaller circles. Again, make sure the curve touches the dark and light colors where they intersect with the larger circle.
Step 7: Refine and Adjust
Take a moment to review your Yin Yang drawing and make any necessary adjustments. Ensure that the curves intersect the larger circle at the correct points and that the contrasting colors are evenly balanced. Use an eraser to remove any unnecessary guidelines or stray pencil marks.
Step 8: Finalize and Enhance
Once you are satisfied with the basic structure of your Yin Yang, you can choose to further enhance your drawing. You may want to darken the outer lines of the Yin Yang for a bolder look or add shading to create depth and dimension. Experiment with different techniques and styles to make your Yin Yang unique.
Tip: To create a perfectly balanced Yin Yang symbol, start by drawing a light pencil circle as your base, ensuring it's as round as possible—using a compass can help with this. Next, gently sketch the S-shaped line that divides the circle; aim for a smooth, flowing curve that connects the two halves without any sharp angles. Once you're satisfied with the outline, use an eraser to clean up any unnecessary pencil lines, and then carefully fill in one half with black and the other with white, leaving a small dot of the opposite color in each section. For added precision, consider using a fine-tipped pen or marker to trace over your lines after inking the fill, ensuring clean edges that enhance the symbol's harmony. Remember, practice makes perfect, so don't hesitate to try multiple versions until you achieve a look that resonates with you!
Conclusion
Drawing a Yin Yang can be a rewarding artistic endeavor, allowing you to express the balance and interconnectedness of life through a simple yet powerful symbol. By following these step-by-step instructions and using your creativity, you can create a beautiful Yin Yang drawing. Remember to have fun and enjoy the process! Happy drawing!
Fun Facts About Yin Yang
- The Taijitu symbol is a central icon in Chinese philosophy.
- Yin represents darkness, femininity, and passivity, while Yang stands for light, masculinity, and activity.
- The small dots in each half of the symbol show that each force contains the seed of its opposite.
- The concept of Yin and Yang dates back to at least the 3rd century BCE.
- Yin Yang is foundational to traditional Chinese medicine, influencing ideas about health and balance.
- The flowing S-shaped line in the symbol represents the constant movement and transformation between Yin and Yang.
- Yin Yang philosophy is also reflected in martial arts like Tai Chi, which emphasizes harmony and balance.
- The symbol is used worldwide in art, jewelry, and tattoos as a sign of unity and balance, as seen in The Met Museum collections.
- Yin and Yang are not static opposites but are interdependent and constantly interacting.
Suggestions for Scenes and Settings for Yin Yang Drawings
- Depict a Yin Yang symbol formed by the silhouettes of a sun and a crescent moon, blending day and night within the circle.
- Create a scene where a pair of koi fish, one dark and one light, swim in a swirling motion that forms the classic Yin Yang shape.
- Illustrate the Yin Yang using intertwined tree branches and roots, with one side lush and blooming and the other bare and wintry.
- Design a landscape where a mountain range (Yang) and a calm lake (Yin) merge together in the form of the Taijitu.
- Imagine two dragons, one representing fire and the other water, curling around each other to compose the Yin Yang.
- Draw the symbol using contrasting textures, such as smooth stones and flowing water, to represent harmony between elements.
- Portray a cityscape on one half and a serene natural scene on the other, fused together within the Yin Yang.
- Visualize the symbol with floral patterns on one side and geometric designs on the other to show unity in diversity.
- Show a pair of human hands, one shaded dark and the other light, gently cupping together to form a Yin Yang in negative space.
- Represent the cycle of the four seasons, with spring and summer on one half and autumn and winter on the other, flowing together in the Yin Yang circle.