How to Draw a Tennis Ball
Learn how to draw a tennis ball step-by-step in this beginner-friendly tutorial. Bring your tennis-themed art to life with realistic and vibrant details.
Materials You'll Need
- Pencil
- Paper
- Eraser
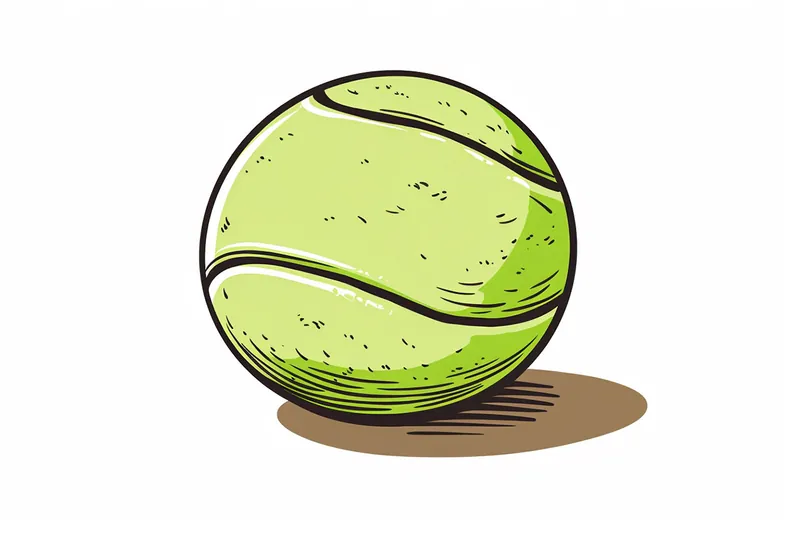
The tennis ball is one of the most recognizable objects in the world of sports, known for its bright neon color and distinctive curved seams. Its simple yet iconic design makes it a fantastic subject for artists of all levels. Drawing a tennis ball may seem straightforward at first glance, but capturing its unique texture, vibrant hue, and subtle shading presents an engaging artistic challenge. Whether you're a fan of the game or just looking to practice your drawing techniques, learning how to draw a tennis ball can be both fun and rewarding.
Many artists choose to draw everyday objects to hone their observational skills and attention to detail, and the tennis ball is an excellent example. You might want to draw a tennis ball for a sports illustration, a themed poster, or simply as a way to add a touch of realism to your sketchbook. Its round shape, combined with the gentle curves of the seams, encourages you to practice drawing smooth lines and creating three-dimensional forms using shading and highlights. Mastering how to draw a tennis ball will not only improve your ability to render spherical objects, but also boost your confidence in tackling other sports equipment or rounded forms in your artwork.
This tutorial is designed to be approachable for artists of all skill levels, from beginners who are picking up a pencil for the first time to more experienced artists seeking to refine their technique. We'll explore basic construction lines to get the proportions right, then delve into adding details such as texture and shadow to make the ball appear lifelike and dynamic. You'll learn essential techniques like blending and layering, which are valuable skills for any drawing project. By the end of this guide, you'll have a clear understanding of how to draw a tennis ball that looks realistic and visually appealing.
So, gather your materials and get ready to bring this classic sports symbol to life on paper. Remember, every drawing is a journey of discovery, and each step you take will help you grow as an artist. Don't worry about making your tennis ball perfect on the first try—practice makes progress! Let's dive in and have some creative fun as you master how to draw a tennis ball.
Materials Required
Before we begin, it's essential to gather the necessary materials. Here's a list of what you'll need:
- Drawing paper or sketchbook
- Pencil (preferably HB or 2B)
- Eraser
- Black pen or fine-tipped marker (optional, for outline and details)
- Colored pencils or markers (optional, for adding color)
Ensure you have all these materials handy before we dive into the drawing process.
Step 1: Draw a Circle
To start, draw a medium-sized circle in the center of your paper. You can use a compass for a precise circle or try drawing it freehand. Don't worry about making it perfect; slight imperfections can add character to the final artwork.
Step 2: Add Dividing Lines
Next, draw two perpendicular lines that intersect at the center of the circle. These lines will help us establish the position of the ball's seams later on. Make sure the lines extend beyond the circumference of the circle.
Step 3: Outline the Seams
Using the intersecting lines as a reference, draw two curved lines on opposite sides of the circle. These lines should start at the top of the circle and extend slightly beyond the bottom. Repeat this process on the other side, creating a mirrored set of curved lines. These lines represent the ball's seams and will add depth and realism to your drawing.
Step 4: Draw the Additional Seams
To add more detail to the tennis ball, draw two additional sets of curved lines, each set positioned between the existing seams. These lines should be shorter in length compared to the main seams but follow a similar curved pattern. Including these additional seams will make your tennis ball drawing more accurate and lifelike.
Step 5: Shade the Ball's Base Color
Now it's time to add some shading to our tennis ball. Begin by lightly shading the entire circle using your pencil. Keep in mind that the ball is not entirely white; it has a slightly yellowish or off-white color. So, avoid pure white and opt for a light shade of cream or off-white. Apply the shading evenly, leaving the highlighted areas, particularly along the seams and the top portion of the ball.
Step 6: Add Contrast and Shadows
To create depth and realism, we need to add contrast and shadows to our drawing. Observe the light source in your reference or imagine one if you don't have a specific reference. Generally, a top-left light source is a good starting point.
Using a darker shade of pencil, start adding shadows to the areas that are away from the light source. Concentrate on the lower portions of the ball, near the seams, and the parts that are not directly hit by the light. Gradually build up the shading, adding more layers to achieve a realistic effect. Remember to blend the shadows with the base color to create a smooth transition.
Step 7: Refine the Seams and Details
Tip: As you progress through the drawing steps, take the time to observe a real tennis ball or reference images closely to capture its unique texture and color accurately. Pay special attention to how the light interacts with the surface, as this will help you create more realistic highlights and shadows. Incorporating these details will enhance the three-dimensionality of your drawing and make it more visually appealing.
Now, let's work on enhancing the seams and adding more intricate details to our tennis ball drawing. Using a fine-tipped pen or marker, carefully trace over the main seams and the additional curved lines. Make these lines more defined, thicker, and slightly darker than the ball's shading.
You can also add some subtle texture to the ball by lightly shading tiny, irregular dots or lines within the shaded areas. This mimics the texture of a real tennis ball and adds an extra touch of realism to your artwork.
Step 8: Optional - Color the Ball
If you prefer to add some color to your drawing, this is the step for you. Choose a light shade of green for the ball's felt covering and carefully color the entire surface. Leave the areas along the seams and the highlighted areas untouched, allowing the base color to show through. Layer the color gradually, building up the intensity until you achieve the desired effect.
Mistake Alert: A common pitfall when drawing a tennis ball is making the curved seams too straight or stiff, which can flatten the ball's appearance and make it look less realistic. This often happens because it's tempting to rush through the seam lines or draw them from memory instead of carefully observing their actual flow around the sphere. To avoid this, lightly sketch the ball's basic round shape and then use reference images to study how the seams gently curve and wrap around the surface. Take your time to draw the seams with smooth, confident strokes that follow the ball's three-dimensional form—imagine them as ribbons gracefully bending over a sphere. This careful approach will help your tennis ball look dynamic, believable, and full of life!
Conclusion
Congratulations! You have successfully drawn a realistic tennis ball. Whether you choose to leave it black and white or add a touch of color, your artwork is a testament to your artistic skills. Keep practicing and experimenting with different techniques, and soon you'll be able to tackle more complex subjects with confidence. Remember, drawing is a journey, and every stroke brings you closer to becoming the artist you aspire to be.
Thank you for following along with this tutorial on how to draw a tennis ball. We hope you found it helpful and enjoyable. Keep creating, and until next time, happy drawing!
Fun Facts About Tennis Ball
- The iconic neon yellow color of the tennis ball was introduced in 1972 to make it more visible on television.
- Modern tennis balls are pressurized and filled with air to give them their signature bounce.
- The fuzzy felt covering on tennis balls helps increase friction and control during play.
- Wimbledon used only white tennis balls until 1986, when it switched to yellow for better visibility.
- A standard tennis ball must have a diameter between 6.54 and 6.86 centimeters, as regulated by the International Tennis Federation.
- Tennis balls are tested for bounce by dropping them from 100 inches; they must rebound between 53 and 58 inches.
- Over 54,000 tennis balls are used during the Wimbledon Championships each year.
- Recycled tennis balls are used in various ways, including as a shock-absorbing layer in playgrounds.
Suggestions for Scenes and Settings for Tennis Ball Drawings
- A close-up of a tennis ball caught mid-bounce on a clay court, with tiny dust particles flying around it.
- A tennis ball resting on the baseline with a blurred racquet and player in the background, capturing the anticipation before a serve.
- A dynamic motion study of a tennis ball being struck by a racquet, showing the ball's distortion and energy.
- A whimsical scene of a group of tennis balls having a "conversation" on a locker room bench after a match.
- A detailed still life featuring a worn tennis ball beside a pair of vintage tennis shoes and an old racquet.
- A tennis ball partially submerged in a puddle on a rainy court, reflecting the sky and surrounding lines.
- An imaginative landscape where tennis balls replace the sun or moon in a surreal, dreamlike sky.
- A close-up of a tennis ball tangled in the net, with sunlight illuminating its fuzzy texture.
- A tennis ball sitting atop a trophy pedestal, spotlighted as the "star" of a championship victory.
- A playful illustration of a curious dog or cat pawing at a bright tennis ball on a living room rug.