How to Draw a Surfboard
Learn how to draw a surfboard step-by-step with this clear and concise guide. Express your passion for surfing through art and create your own surfboard masterpiece in no time!
Materials You'll Need
- Pencil
- Paper
- Eraser
The surfboard is an iconic symbol of adventure, freedom, and the exhilarating world of surfing. Sleek and streamlined, surfboards are expertly designed to glide across the water and harness the power of the ocean's waves. Whether you're a seasoned surfer or simply drawn to the vibrant surf culture, capturing a surfboard on paper can be a wonderful way to celebrate your connection to the sea and the spirit of the sport. Drawing a surfboard also provides a unique opportunity to explore its elegant shape, colorful patterns, and distinctive features like fins and rails, allowing you to express your own creativity and imagination.
Learning how to draw a surfboard is a rewarding project for artists of all levels. Beginners will appreciate the simple, clean lines and basic shapes that form the foundation of the surfboard, while more advanced artists can challenge themselves by adding intricate designs, realistic shading, or even a dynamic ocean background. This subject is perfect for practicing proportion, symmetry, and smooth line work, essential skills that will benefit your overall drawing abilities. Whether you are designing a surfboard for a character, creating wall art, or just want to improve your sketching skills, mastering this object can open up a wave of new creative possibilities.
In this step-by-step tutorial, you will discover how to draw a surfboard with confidence, from outlining its classic silhouette to adding your own personal flair with patterns and details. No matter your experience level, this guide will help you break down the process into manageable steps so you can enjoy the journey and watch your surfboard take shape on the page. So grab your pencils, let your imagination ride the wave, and remember—every great artist starts with a single line. Let's dive in and create a surfboard that's uniquely yours!
Materials Required
Before we begin, let's gather all the materials you will need for this drawing:
- Drawing paper or sketchbook
- Pencils (HB, 2B, and 4B)
- Eraser
- Ruler
- Compass or circular object (to create curves)
- Reference image of a surfboard (optional, but helpful for accuracy)
Now that you have all your materials ready, let's move on to the first step!
Step 1: Draw the Outline
To start, draw a long oval shape on your paper. This will be the basic outline of your surfboard. Use light pencil marks to create the shape, as we will be refining it later on. Remember, surfboards come in various shapes and sizes, so feel free to adjust the proportions and make it your own.
Step 2: Add the Nose and Tail
Using your reference image or imagination, determine the shape of the nose and tail of your surfboard. The nose is usually more rounded, while the tail can be either rounded or pointed. Add these details to the ends of your oval shape. Again, don't worry too much about perfection at this stage, as we will be refining the details later on.
Step 3: Define the Rails
The rails of a surfboard refer to the edges that run along the sides of the board. They can be either sharp or rounded, depending on the design. Start by drawing a line along the top and bottom edges of the surfboard. These lines will indicate the thickness of the board. Then, connect the nose and tail to the rails with gentle curves. Take your time to ensure the curves are smooth and even.
Step 4: Create the Rocker
Tip: As you work through the steps of drawing your surfboard, don't hesitate to experiment with different shapes and designs; consider incorporating unique elements like patterns or textures that reflect your personal style or the vibrant surf culture. Using a reference image can help guide your proportions, but allow your imagination to influence the final details, ensuring your artwork is not only technically sound but also a true expression of your creativity.
The rocker of a surfboard refers to the curve along the bottom of the board from nose to tail. It helps with maneuverability and control while riding waves. To create the rocker, draw a curved line along the bottom of your surfboard, starting from the nose and ending at the tail. The curve can be subtle or more pronounced, depending on your preference.
Step 5: Add Fins
Fins play a crucial role in stabilizing and steering the surfboard. Start by drawing three lines vertically along the bottom of your surfboard, near the tail. These lines will represent the fins. You can choose to draw either a single center fin or a thruster setup with two smaller side fins. Take your time to ensure the lines are parallel and evenly spaced.
Step 6: Refine the Details
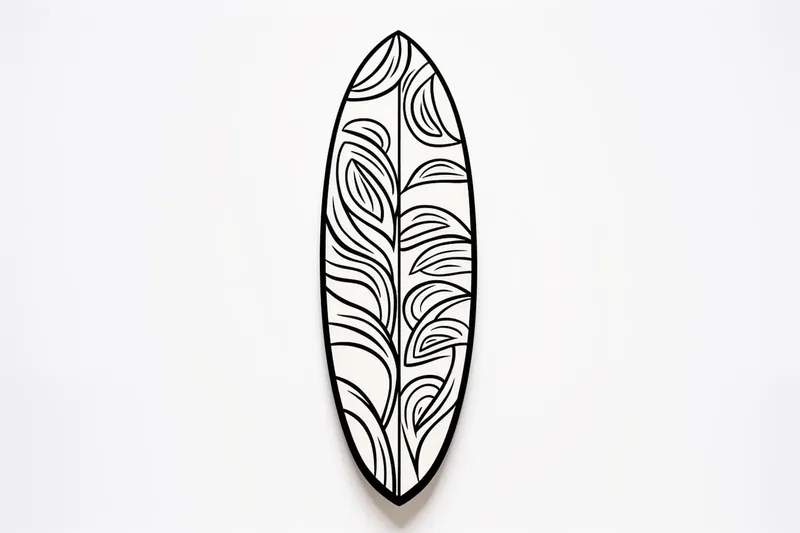
Now that you have the basic structure of your surfboard, it's time to refine the details. Use a darker pencil (2B or 4B) to define the outline of the board, making it more prominent. Pay attention to the curves and edges, ensuring they are smooth and clean. You can also add some decorative elements such as stripes or patterns to make your surfboard unique.
Step 7: Shade and Add Texture
To give your surfboard a three-dimensional look, it's important to add shading and texture. Start by identifying the primary light source, which will determine where the shadows fall. Use your pencils to add shading to the areas that would be in shadow, such as the underside of the board and the indented parts, like the rocker and rails. Gradually build up the layers of shading to create depth and dimension.
Wild Inspiration: Imagine a surfboard that's not just for riding waves, but is actually a living creature—perhaps a vibrant, bioluminescent sea turtle whose shell forms the sleek deck of the board, with its flippers acting as the fins underneath. Picture swirling coral patterns and tiny fish swimming along the rails, or barnacles and seaweed woven into the waxed surface. Maybe this magical board glows softly in the moonlight, leaving a shimmering trail in its wake, or has elements that transform as it glides over the water—like unfurling wings, or a tail that splashes rainbows into the surf. Let your imagination run wild by combining natural ocean textures and unexpected fantasy elements, creating a surfboard that's truly one-of-a-kind and ready to ride the tides of a dream world!
Conclusion
Congratulations, you have successfully drawn a surfboard! Drawing a surfboard allows you to appreciate the craftsmanship and design that goes into creating this essential tool for surfers. Now that you have mastered the technique, feel free to experiment with different shapes, designs, and color schemes. Let your creativity flow as you explore the exciting world of surfboard art!
Remember, practice makes perfect. So grab your pencils whenever you can and keep honing your drawing skills. Happy surfing and happy drawing!
Fun Facts About Surfboards
- The oldest known surfboards date back to ancient Hawaii, where they were called olo boards.
- Modern surfboards are typically made from polyurethane or polystyrene foam covered with fiberglass and resin.
- The world's largest surfboard, measuring over 42 feet, set a Guinness World Record in 2015.
- Surfboard fins, which help with stability and control, were first added in the 1930s by Tom Blake.
- There are many types of surfboards, including longboards, shortboards, and fish, each designed for different wave conditions.
- Surfboard art and custom designs are a celebrated part of surf culture worldwide.
- The "rocker" of a surfboard, or its bottom curve, greatly affects how the board handles on waves.
- Professional surfboard shapers are known as shapers and often handcraft boards to suit individual surfers.
- Eco-friendly surfboards are now being made from sustainable materials, reducing environmental impact.
Suggestions for Scenes and Settings for Surfboard Drawings
- A lone surfboard standing upright in the sand at sunrise, with gentle waves in the background and footprints leading into the water.
- Several surfboards of different shapes and colorful patterns stacked together by a weathered beach shack, surrounded by tropical plants.
- A surfboard in the process of being shaped and painted in a surfboard workshop, with tools, paint cans, and wood shavings scattered around.
- A dramatic action scene of a surfer riding a giant wave, with the surfboard slicing through the water and sea spray all around.
- Two surfboards resting side by side under a palm tree, with a distant view of surfers catching waves on a bright summer day.
- A close-up of a surfboard's tail and fins as it cuts through a crystal-clear wave, capturing water droplets and motion lines.
- An overhead view of a beach, with surfboards arranged in a circle for a surf lesson, surrounded by students and an instructor.
- A whimsical scene of a surfboard decorated with intricate, fantasy-inspired patterns and surrounded by sea creatures like turtles and dolphins.
- A vintage surfboard leaning against a classic van, with surf stickers, beach towels, and a sunset in the background.
- A surfboard floating on still water at dusk, reflecting the colorful sky and silhouetted by distant cliffs.