How to Draw a Stormtrooper Helmet
Learn how to draw a Stormtrooper helmet in this step-by-step drawing tutorial. Follow along with expert artist instructions to create your own Star Wars masterpiece.
Materials You'll Need
- Pencil
- Paper
- Eraser
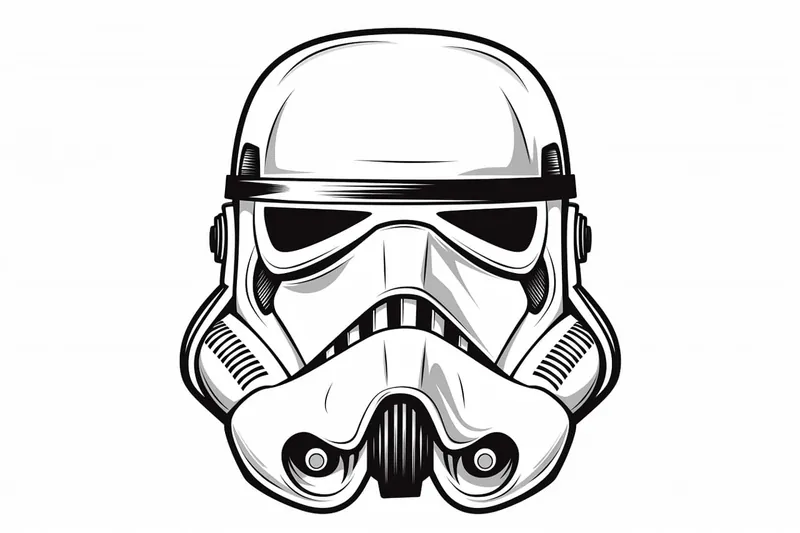
The Stormtrooper helmet is one of the most recognizable symbols in science fiction, instantly evoking the thrilling universe of Star Wars. Its bold, futuristic contours and stark black-and-white palette have captivated audiences for decades, making it a favorite subject for artists and fans alike. Drawing this helmet is not just about replicating a piece of pop culture; it's also an opportunity to engage with its unique design elements, such as the symmetrical visor, distinct mouthpiece, and carefully structured curves that convey both uniformity and menace. Whether you admire Star Wars for its epic storytelling or are fascinated by its visual artistry, learning how to draw a stormtrooper helmet connects you directly to the legacy of this iconic series.
Tackling this subject can be both fun and educational, regardless of your artistic experience. For beginners, the helmet's geometric shapes offer excellent practice in constructing basic forms and improving your line accuracy. More advanced artists can challenge themselves by focusing on precise proportions, subtle shading, and capturing the helmet's reflective surfaces. This tutorial on how to draw a stormtrooper helmet will guide you step-by-step, from laying down the initial framework to refining the small details that bring the design to life. All you need is some paper, a pencil, and your enthusiasm to begin your creative journey. Remember, every artist develops their skills with practice—so don't be afraid to make mistakes and enjoy the process as you bring this galactic icon to your sketchbook!
Materials Required
Before we dive into the steps of drawing a Stormtrooper helmet, let's make sure you have all the necessary materials. Here's what you'll need:
- Drawing paper: A blank sheet of paper is essential for your drawing.
- Pencil: Choose a pencil with a soft lead, such as a 2B or 4B, for easier shading and sketching.
- Eraser: A kneaded eraser or a soft plastic eraser will help you correct any mistakes and clean up your drawing.
- Ruler: A straight edge ruler will come in handy for drawing precise lines and measuring proportions.
- Compass or circular objects: To draw the circular shapes of the helmet, you can use a compass or any circular objects of different sizes.
Now that you have all your materials ready, let's begin the drawing process.
Step 1: Basic Construction Lines
Start by sketching the basic construction lines to establish the shape and proportions of the Stormtrooper helmet. Begin with a vertical line that represents the center of the helmet. Then, draw a horizontal line crossing the vertical one, slightly above the center. These intersecting lines will serve as your guiding framework.
Step 2: Outline the Head Shape
Using the construction lines as a reference, sketch the outline of the helmet's head shape. Start from the top, curving the lines outward to create the round shape of the helmet. Pay attention to the angles and curves, taking your time to get the shape just right.
Step 3: Add the Faceplate
Next, draw a horizontal line across the bottom part of the head shape, slightly above the horizontal construction line. This will serve as the guide for the faceplate of the helmet. From this line, draw two vertical lines extending downward to create the sides of the faceplate. Then, connect the sides with a curved line at the bottom to complete the faceplate shape.
Step 4: Draw the Eye Openings
Now it's time to draw the eye openings on the faceplate. Start by sketching two horizontal lines that are parallel to the top edge of the faceplate. These lines should be evenly spaced and located near the upper portion of the faceplate. Then, draw two vertical lines connecting the horizontal lines to form rectangles. These rectangles will serve as the eye openings.
Step 5: Refine the Details
With the basic structure in place, it's time to refine the details of the Stormtrooper helmet. Add small circles on either side of the faceplate to represent the earpieces. Then, sketch a horizontal line above the eye openings to create the brow of the helmet. Add another curved line below the faceplate to define the chin area. Take your time to carefully observe the reference image or helmet prop to capture the distinct features of the helmet.
Step 6: Shading and Texture
To give your drawing depth and realism, it's important to add shading and texture. Start by identifying the areas of shadow on the helmet, such as the sides, bottom, and the areas under the brow and chin. Use your pencil to gently shade these areas, gradually building up the darkness. Pay attention to the subtle variations in value and shading, as this will bring your drawing to life. Use your eraser to lighten certain areas, creating highlights and adding texture to the helmet's surface.
Step 7: Final Touches
Lastly, take a step back and evaluate your drawing. Look for any areas that need refinement or adjustment. Make any necessary corrections and add any final details to enhance the overall appearance of the Stormtrooper helmet. Take your time with this step and don't be afraid to experiment and make changes as needed.
And there you have it! You've successfully drawn a Stormtrooper helmet. With practice, your drawing skills will continue to improve, allowing you to tackle more complex subjects and create impressive artwork.
Remember, drawing is all about practice and patience. Don't be discouraged if your first attempt doesn't turn out exactly as you envisioned. Keep practicing, experimenting, and refining your skills, and you will see progress over time.
I hope you've enjoyed this tutorial on how to draw a Stormtrooper helmet. May the Force be with you as you continue your artistic journey!
Tip: When starting your Stormtrooper helmet drawing, use a light pencil to sketch the basic shapes first, focusing on the proportions and symmetry. Begin with an oval for the main helmet shape and add guidelines for the visor and mouthpiece, ensuring everything is aligned. Once you're satisfied with the basic outline, switch to a firmer pencil to refine the edges and add details, like the contours around the visor and the mouth vent. To create depth, consider using a blending stump or your finger to gently smudge areas for a soft shadow effect, especially around the curves of the helmet. Lastly, don't forget to step back occasionally to check that your helmet looks balanced and true to the iconic design—this will help you catch any disproportionate elements early on!
Conclusion
In this step-by-step tutorial, we explored the process of drawing a Stormtrooper helmet. By following these steps, you can create a detailed and realistic representation of this iconic Star Wars symbol. Remember to practice regularly and be patient with yourself as you develop your artistic skills. With time and dedication, you'll be able to create impressive drawings of not only Stormtrooper helmets but also a wide range of subjects. So keep that pencil moving and may the creativity be with you!
Gallery of Stormtrooper Helmet Drawings
Fun Facts About Stormtrooper Helmet
- The original Stormtrooper helmet design was created by Andrew Ainsworth using vacuum-formed HDPE plastic after Nick Pemberton's clay model was approved by George Lucas in early 1976.
- Ainsworth pioneered vacuum-forming techniques to produce lightweight, durable helmets, overcoming challenges like plastic shrinkage and undercut molding.
- Ainsworth faced lawsuits from Lucasfilm in the 2000s over replica helmet sales, with courts ruling partially in his favor regarding design ownership.
- Original molds collapsed during Return of the Jedi production, resulting in thinner, asymmetrical helmets held together by visible screws.
- Early helmets used unpaintable HDPE plastic, requiring later fiberglass hero helmets for close-up scenes.
- Actors reported severely restricted vision due to the helmet's narrow eye lenses.
- Screen-used helmets from the original trilogy remain highly sought after by collectors.
- RotJ helmets differed visibly from ANH versions due to mold degradation and rushed production.
Suggestions for Scenes and Settings for Stormtrooper Helmet Drawings
- Helmet in a rainstorm, with water droplets and reflections on the surface.
- Stormtrooper helmet lying half-buried in Tatooine sand, with twin suns setting in the background.
- Close-up of the helmet reflecting the fiery glow of a distant battle.
- Helmet integrated into a futuristic cityscape mural, blending sci-fi and urban elements.
- Stormtrooper helmet covered in vibrant graffiti, symbolizing rebellion or resistance.
- Helmet surrounded by lush Endor forest foliage, partially camouflaged by leaves and shadows.
- Stormtrooper helmet as a still life, placed on a table with art supplies, books, and Star Wars memorabilia.
- Helmet underwater, with bubbles and light rays filtering through the surface above.
- Stormtrooper helmet cracked and overgrown with moss, as if reclaimed by nature on a forgotten planet.
- [Helmet reflecting the starry expanse of space, with faint silhouettes of starships](https://yonderoo.com/how-to-draw-a-spaceship/) in the visor.