How to Draw a Stop Sign
Learn how to draw a stop sign with this step-by-step guide. Improve your drawing skills and create a realistic and visually appealing stop sign with ease.
Materials You'll Need
- Pencil
- Paper
- Eraser
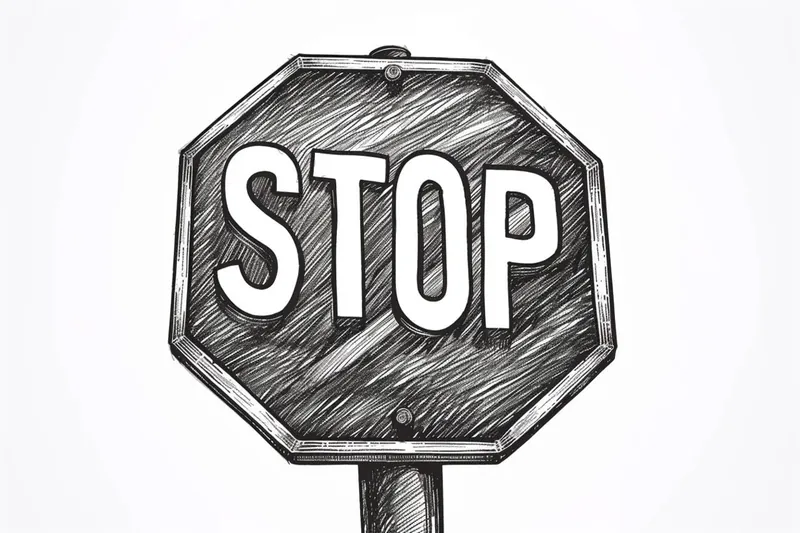
The stop sign is one of the most recognizable road symbols around the world, instantly communicating an important message of safety and caution to drivers and pedestrians alike. Its bold red color, distinctive octagonal shape, and clear white lettering make it a perfect subject for practicing geometric drawing, symmetry, and working with contrasting colors. Learning how to draw a stop sign is not only a fun artistic exercise but also a great way to sharpen your observation and technical skills, as it requires attention to the proportions and placement of each element for the sign to look authentic.
Artists of all levels might find value in mastering this classic symbol. Beginners can benefit from the simple shapes and lines involved, making it an accessible project that helps build confidence in drawing straight edges and consistent angles. More experienced artists can use this opportunity to perfect clean, crisp lines, learn about color application, and experiment with perspective or shading to make the sign look three-dimensional. Whether you are working on a cityscape, designing educational materials, or simply adding to your sketchbook, knowing how to draw a stop sign can add realism and detail to your artwork.
In this tutorial, you'll receive clear, step-by-step instructions that will guide you through the process, from sketching the basic octagonal outline to refining the letters and adding color. Take your time, pay close attention to each stage, and remember that practice is key to improvement. With patience and focus, you'll soon be able to draw a stop sign that is both accurate and visually striking. Let's get started and bring this iconic symbol to life on your page!
Materials Required
Before we begin, let's gather the materials you will need to complete this drawing:
- Paper: Choose a smooth and sturdy paper that is suitable for drawing. A standard drawing paper or sketchbook will work well.
- Pencil: Opt for a medium-soft graphite pencil that allows for smooth shading and precise line work. It's also helpful to have an eraser nearby.
- Ruler: A straight edge ruler is essential for creating accurate straight lines.
- Red Marker or Colored Pencil: To add color to your stop sign, you will need a red marker or colored pencil. Make sure it's a shade of red that closely resembles the color of a stop sign.
- Black Marker or Colored Pencil: This will be used to outline the stop sign and add any necessary details.
Now that you have all the necessary materials, let's dive into the step-by-step process of drawing a stop sign.
Step 1: Draw a Circle
Start by drawing a perfect circle in the center of your paper. Use your ruler to ensure the circle is symmetrical and well-proportioned. This circle will serve as the outline for your stop sign.
Step 2: Add the Octagon Shape
Tip: To enhance your drawing of a stop sign, consider using a lightbox or tracing paper to help maintain symmetry and precision, especially for the octagonal shape and letters. This technique can help you achieve cleaner lines and more professional results, allowing you to focus on adding details like shadows and highlights once the basic structure is complete.
Inside the circle, draw an octagon shape. Begin by drawing a horizontal line that cuts through the center of the circle. Then, draw two diagonal lines that intersect at the center of the circle. Connect the ends of these lines with straight lines to create the octagon shape. Take your time to make sure the lines are straight and evenly spaced.
Step 3: Outline the Stop Sign
Using a black marker or colored pencil, outline the octagon shape. Start with the corners of the octagon and connect them with straight lines. Make sure the lines are bold and well-defined, as they will give your stop sign a clear and recognizable shape.
Step 4: Add the Letters "S" and "T"
Inside the octagon, draw the letters "S" and "T" to complete the word "STOP." Start with the letter "S" by drawing a vertical line in the center of the octagon. Then, curve the line to form the top and bottom parts of the letter. Repeat the same process for the letter "T," making sure it is positioned next to the letter "S" and is visually balanced.
Step 5: Draw the Border
Draw a thick border around the entire stop sign using a black marker or colored pencil. This will make the sign more prominent and add a finished look to your drawing. Ensure that the border is even on all sides and follows the shape of the octagon.
Step 6: Erase Unnecessary Guidelines
Take your eraser and carefully remove any unnecessary guidelines, such as the circle and the diagonal lines used to create the octagon. This will leave you with a clean and clear stop sign outline.
Step 7: Color the Sign
Now it's time to bring your stop sign to life with color. Use a red marker or colored pencil to fill in the entire interior of the sign. Ensure that the color is vibrant and evenly applied. Take your time to avoid smudging the color outside the borders.
Step 8: Add Shadows and Highlights
To make your stop sign look more realistic, add shading to create shadows and highlights. With a black marker or colored pencil, darken the bottom and right sides of each letter, as well as the right side of the octagon. This will give the sign a three-dimensional appearance. Use your pencil to lightly shade the left side of each letter and the left side of the octagon to create a subtle highlight effect.
Step 9: Final Details
Inspect your drawing for any final touch-ups or details that may be missing. Make sure all lines are bold and well-defined, and the colors are vibrant. Add any necessary adjustments to ensure your stop sign looks polished and professional.
Conclusion
Drawing a stop sign requires attention to detail and precision, but by following these step-by-step instructions, you can create a realistic and visually appealing sign. Remember to gather the necessary materials before you begin and take your time with each step. With practice, you will be able to draw stop signs with ease and confidence. So grab your paper and pencil, and let's start drawing!
Fun Facts About Stop Signs
- The stop sign's iconic red color was standardized in the United States in 1954 to improve visibility and consistency across the country.
- Stop signs are always octagonal, a unique shape chosen so drivers can recognize them from a distance and even from the back.
- The first stop signs, introduced in Detroit in 1915, were actually black letters on a white background, not red.
- Internationally, the word "STOP" is used on stop signs in many countries, regardless of the local language.
- In Canada, some stop signs are bilingual, displaying both "STOP" and "ARRÊT" in French-speaking regions.
- The octagonal shape of the stop sign is reserved exclusively for stop signs in most countries, making it illegal to use for other types of road signs.
- Some rural areas in the United States still have vintage yellow stop signs, which were phased out in favor of red in the mid-20th century.
- Stop signs are designed to be retroreflective, meaning they reflect headlights at night to remain visible in low-light conditions.
Suggestions for Scenes and Settings for Stop Sign Drawings
- A quiet suburban street corner with trees and houses in the background, featuring a stop sign at the intersection.
- A bustling city crosswalk with pedestrians, cars, and a prominently placed stop sign in the foreground.
- A rural road with open fields and a distant barn, with an old, weathered stop sign by the roadside.
- A rainy day scene where the stop sign reflects in puddles on the pavement and cloudy skies above.
- A night-time drawing with a stop sign illuminated by a streetlamp, casting dramatic shadows and highlights.
- A cartoon-style scene with exaggerated vehicles and characters stopping at a bright, oversized stop sign.
- An educational poster layout showing a close-up of a stop sign with labeled parts and fun facts.
- [A snowy winter setting with a stop sign partially covered in snow, surrounded by frosty trees](https://yonderoo.com/how-to-draw-a-winter-landscape/) and a snow-covered road.
- A vintage or retro-inspired street scene with an old-fashioned car stopped at a classic stop sign.
- A creative perspective, such as viewing the stop sign from the point of view of a driver approaching the intersection.