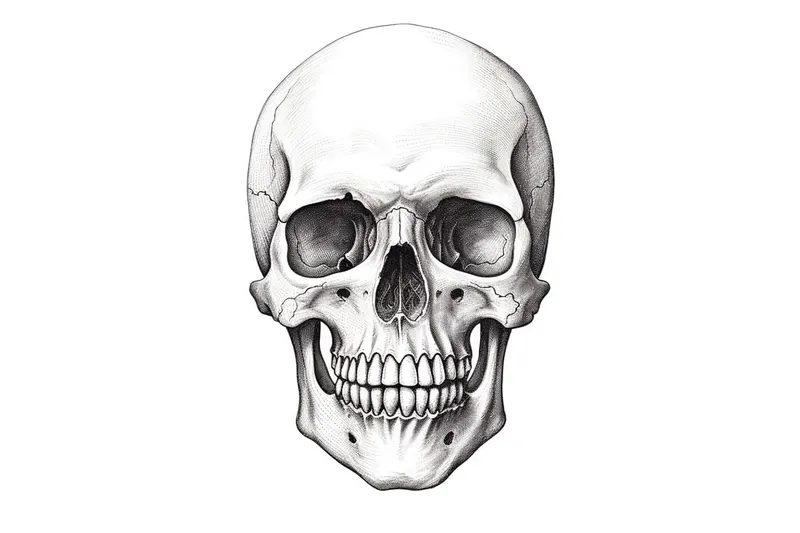
How to Draw a Skull
Learn how to draw a skull with this step-by-step tutorial. Perfect for beginners, this art guide will teach you the basics of skull drawing.
Materials You'll Need
- Pencil
- Paper
- Eraser
The human skull is not only a central element in the study of anatomy, but it has also become an enduring symbol in art, representing everything from mortality and mystery to strength and wisdom. Artists throughout history have been fascinated by the skull's intricate structure and expressive contours, making it a popular subject in various artistic styles, from classical paintings to modern tattoo designs. Learning how to draw a skull can help you better understand human proportions and anatomy, which are essential skills for figure drawing and portraiture.
Whether you're interested in realistic anatomy, gothic art, or simply want to add a touch of edginess to your sketchbook, mastering how to draw a skull will open up new creative possibilities. This subject allows you to explore shading, form, and perspective, while challenging you to capture both the delicate and bold features that make the skull unique. Drawing a skull is a great exercise for beginners who want to improve their observation skills, as well as for more advanced artists seeking to refine their technique or experiment with stylization.
This step-by-step tutorial is designed to guide you through the process, breaking down the skull into simple shapes and gradually building up detail. All you need are basic drawing materials and a willingness to practice. Remember, every artist starts somewhere, and with patience and persistence, you'll find that drawing a skull becomes an enjoyable and rewarding challenge. So, let's dive in together and discover just how achievable—and fun—creating this iconic image can be!
Materials Required
Before we begin, make sure you have the following materials:
- Pencils: You'll need a range of pencils with different lead hardness, such as an HB, 2B, and 4B.
- Erasers: A kneaded eraser and a regular pencil eraser will come in handy.
- Paper: Use a sketchpad or drawing paper that is thick enough to withstand erasing and smudging.
- Reference Images: It's helpful to have skull reference images for guidance. You can find them online or use a printed reference.
Now that you have your materials ready, let's dive into the step-by-step process of drawing a skull.
Step 1: Basic Shape
Start by lightly sketching a simple oval shape in the center of your paper. This will serve as the basic structure of the skull. Don't worry about making it perfect since we'll be refining the shape in later steps.
Step 2: Eye Sockets
Add two small, almond-shaped circles in the upper portion of the oval. These will represent the eye sockets. Place them symmetrically on both sides of the vertical center line of the oval.
Step 3: Nose Socket
Tip: As you progress through each step of drawing the skull, take frequent breaks to step back and assess your work from a distance; this will help you better evaluate proportions, symmetry, and overall composition. Additionally, consider using a mirror to reflect your drawing, which can provide a fresh perspective and highlight areas for improvement that you might not notice up close.
Below the eye sockets, draw a curved line that connects the two sides of the oval. This will form the nose socket. Keep in mind that the nose socket should be slightly wider than the eye sockets.
Step 4: Jawline
Extend two curved lines from the bottom of the oval to create the jawline of the skull. The jawline should gradually taper towards the chin, forming a triangular shape. Make sure both sides of the jawline are symmetrical.
Step 5: Teeth
Divide the jawline into three equal sections. Starting from the center of each section, draw a series of small rectangular shapes to represent the teeth. Make the teeth slightly curved and pointed to give them a more realistic look.
Step 6: Eye and Nose Details
Add more definition to the eye and nose sockets. Refine the shape of the eye sockets by softly curving the top and bottom lines. For the nose socket, draw a small triangular shape with rounded corners in the center.
Step 7: Eye and Nose Shadows
Darken the areas around the eye and nose sockets to create shadows. This will give the skull a more three-dimensional appearance. Use a softer pencil, such as a 4B, and shade lightly at first, gradually building up the darkness.
Step 8: Teeth and Jaw Shadows
Add shadows to the teeth and jawline to enhance depth. Shade the areas between the teeth and along the sides of the jawline using hatching or cross-hatching techniques. Remember to keep the shading consistent with the light source you envision.
Step 9: Fine Details
Take a closer look at your skull drawing and refine any areas that need improvement. Pay attention to the shape and proportions of the eye and nose sockets, as well as the teeth and jawline. Erase any unnecessary lines and adjust the shading if needed.
Step 10: Final Shading
To give your skull drawing a more finished look, add overall shading to create contrast and depth. Use various pencil pressures and shading techniques to achieve a realistic effect. Pay attention to the areas of the skull that would naturally cast shadows, such as the eye sockets and under the jawline.
Mistake Alert: A common mistake when drawing skulls is making the cranium (the top part of the skull) too small in proportion to the face, which can result in a distorted or cartoonish look. This often happens because beginners focus intently on the eye sockets, nose cavity, and teeth, underestimating how much space the rounded dome of the skull actually occupies above these features. To avoid this, start your sketch with a large, oval shape for the cranium, and only then map out the facial features within the lower portion. Regularly check your proportions by comparing the height of the cranium to the jaw—remember, the cranium should be noticeably taller than the facial area below. Taking a moment to block in the major shapes before adding details will help you build a more accurate, realistic skull every time.
Conclusion
Congratulations! You have successfully learned how to draw a skull. Remember, the key to improving your drawing skills is practice. Don't be discouraged if your first attempt isn't perfect. Keep practicing and experimenting with different techniques, and you'll soon be able to create stunning skull illustrations. Now go grab your pencils and unleash your creativity!
Fun Facts About Skull
- The human skull is made up of 22 bones that are fused together, forming the cranium and facial skeleton.
- The skull protects the brain, one of the most vital organs in the body, from injury.
- Infants are born with soft spots called fontanelles in their skulls, which allow for brain growth and easier childbirth.
- The human skull has two main parts: the neurocranium (protects the brain) and the viscerocranium (forms the face).
- Teeth are considered part of the skull, but they are not counted as bones.
- The largest bone in the human skull is the mandible, or lower jaw, which is also the only movable skull bone.
- Skulls have been used as symbols of mortality and power in art and culture for thousands of years.
- Some animals, like sharks, have skulls made entirely of cartilage instead of bone.
- The foramen magnum is a large opening...
Suggestions for Scenes and Settings for Skull Drawings
- A skull surrounded by blooming flowers to symbolize the cycle of life and death.
- An anatomical skull on an old wooden desk, with scattered anatomy books and drawing tools.
- A gothic-style skull with ornate, baroque patterns carved into the bone.
- A pirate's skull with a cracked jaw, an eyepatch, and a vintage map in the background.
- A surreal composition of a skull dissolving into smoke or butterflies.
- A skull half-buried in sand, with ancient ruins or artifacts nearby, hinting at a lost civilization.
- A stylized sugar skull decorated with vibrant patterns and colors for a Day of the Dead theme.
- A skull wearing headphones and surrounded by musical notes, blending anatomy and modern culture.
- A dramatic lighting study of a skull illuminated by candlelight in a dark, moody room.
- A transparent skull showing a glowing brain or swirling galaxies inside, merging science and fantasy.