How to Draw a Sign
Learn how to draw a sign step-by-step with this expert guide. From planning your design to adding color, create stunning signs for any purpose.
Materials You'll Need
- Pencil
- Paper
- Eraser
Signs are all around us, serving as important tools for communication, direction, and expression. From welcoming signs at the entrance of a home to eye-catching advertisements for local businesses, signs play a vital role in our daily lives. Learning how to draw a sign can be both a fun and practical skill, allowing you to design your own custom messages, create unique art pieces, or even enhance your graphic design projects. Whether you're inspired by vintage shop signs, whimsical garden markers, or bold street art, mastering the basics of sign drawing opens up a world of creative possibilities.
This tutorial on how to draw a sign is perfect for artists of all experience levels. Beginners will find the step-by-step approach approachable, while more advanced artists can use these techniques to refine their lettering and composition skills. You'll learn how to plan your layout, sketch the basic shapes, add decorative elements, and carefully craft the lettering that makes each sign unique. Along the way, we'll explore tips for achieving balanced proportions, selecting the right materials, and adding personal flair to your finished piece. By the end of this guide, you'll have the confidence and knowledge needed to design signs that are not only visually appealing but also effective in delivering your message.
So, gather your drawing tools and let your creativity lead the way. Whether you're aiming for a professional look or a more playful style, remember that practice is key. With patience and experimentation, you'll soon discover your own unique approach to sign design. Let's dive in and explore how to draw a sign together!
Materials Required
To draw a sign, you will need the following materials:
- Paper: Choose a sheet of paper that is suitable for your desired size of the sign. A thicker paper, such as a Bristol board or cardstock, is recommended for durability.
- Pencil: A regular graphite pencil will work fine for sketching and creating the initial outline of the sign.
- Eraser: It's always handy to have an eraser to correct any mistakes or remove unwanted lines.
- Black ink pen: A fine-point black ink pen is essential for tracing and outlining the finalized design of the sign.
- Colored markers or pencils: If you wish to add color to your sign, have some colored markers or pencils ready.
Now that you have gathered all the necessary materials, let's dive into the step-by-step process of drawing a sign!
Step 1: Plan Your Design
Before starting to draw, it's important to have a clear idea of what you want your sign to look like. Consider the purpose of the sign, the message or image you want to convey, and any specific style or theme you wish to incorporate. Sketch out a rough layout and experiment with different font styles and design elements until you are satisfied with your concept.
Step 2: Sketch the Outline
Using a pencil, lightly sketch the outline of your sign on the chosen paper. Begin with basic shapes and lines to establish the overall structure. Pay attention to proportions and ensure that your sign fits nicely within the dimensions of the paper. Don't worry about details at this stage; focus on capturing the general form.
Step 3: Add Details and Typography
Now it's time to add details and typography to your sign. Start by refining the shapes and lines of your design, adding any decorative elements or borders you desire. If your sign includes text, carefully draw each letter, ensuring consistency in size and spacing. Experiment with different fonts to find the one that best complements your sign's style and message.
Step 4: Trace with Ink
Once you are satisfied with your pencil sketch, use a black ink pen to trace over the final design. Emphasize the outlines and important details of your sign, and confidently fill in any typography or decorative elements. Take your time and be patient, as neat and precise lines will elevate the overall appearance of your sign.
Step 5: Erase Guidelines
After the ink has dried, gently erase any visible pencil guidelines. Take care not to smudge the ink or damage the paper. This step will ensure that your sign appears clean and professional.
Step 6: Add Color (Optional)
If you prefer a colorful sign, use colored markers or pencils to bring your design to life. Select colors that complement each other and enhance the overall visual impact. Be mindful of color combinations and remember that simplicity can often be more effective than excessive color usage. Apply color evenly, paying attention to shading and highlighting for added depth.
Step 7: Final Touches
Take a step back and evaluate your completed sign. Make any necessary adjustments or touch-ups to ensure that it meets your vision. Address any areas that may require additional details or refinements. This is your opportunity to add those finishing touches that will make your sign stand out!
Tip: When drawing a sign, start by lightly sketching your lettering and borders with a hard pencil (like an H or 2H) so you can make easy adjustments before committing to ink or darker lines. Use a ruler or straightedge to keep edges and baselines crisp and parallel—this helps your sign look polished and professional. If your sign features curved or decorative shapes, try using French curves or trace around circular objects for smooth, consistent curves. Take a step back occasionally to check the overall balance and spacing; signs are meant to be eye-catching and easy to read, so clarity is key!
Conclusion
Congratulations on completing your sign! By following this step-by-step guide, you have learned how to draw a sign from start to finish. Remember to start with a clear plan, sketch the outline, add details and typography, trace with ink, erase guidelines, add color if desired, and apply final touches. Whether you use your newfound skills for business or personal purposes, the ability to create your own signs adds a touch of creativity and uniqueness to any setting.
Now it's time to grab your drawing supplies and get started on your own sign-drawing journey. Happy drawing!
Fun Facts About Sign
- The earliest known signs date back to ancient Rome, where shopkeepers used stone or terracotta signs to advertise their businesses.
- Modern road signs use a system of colors and shapes standardized by the Manual on Uniform Traffic Control Devices in the United States.
- Signage is a key element in branding, with companies like Coca-Cola using iconic signs for over a century.
- Neon signs, first introduced in 1910, revolutionized advertising and are now considered cultural icons in cities like Las Vegas.
- Sign language, a visual form of communication, is recognized as an official language in many countries, including American Sign Language (ASL) in the United States.
- Wayfinding signs in public spaces are designed using principles from environmental graphic design to help people navigate complex environments.
- Digital signs, or electronic displays, are rapidly replacing traditional signs in retail and transportation, as noted by the digital signage industry statistics.
- Some of the world's oldest surviving painted signs can be found in the ruins of Pompeii, preserved by volcanic ash since 79 AD.
- Color psychology plays a major role in sign design, affecting how signs attract attention and convey messages effectively to viewers.
Suggestions for Scenes and Settings for Sign Drawings
- An old-fashioned wooden welcome sign hanging from a garden gate, surrounded by blooming flowers.
- A vibrant neon sign glowing above a cozy city café at night, with reflections on the wet pavement.
- A playful hand-painted sign marking the entrance to a children's playground, decorated with cartoon animals.
- A rustic chalkboard menu sign propped outside a bakery, with artistic lettering and doodles of pastries.
- An ornate vintage shop sign with decorative scrollwork and gold accents, suspended from a wrought iron bracket.
- A weathered street sign on a busy intersection, partially covered in ivy and stickers, with bustling city life around it.
- A whimsical garden marker for herbs or vegetables, featuring playful fonts and small illustrations of plants.
- A hand-lettered protest sign held high in a crowd, with bold colors and an inspiring message.
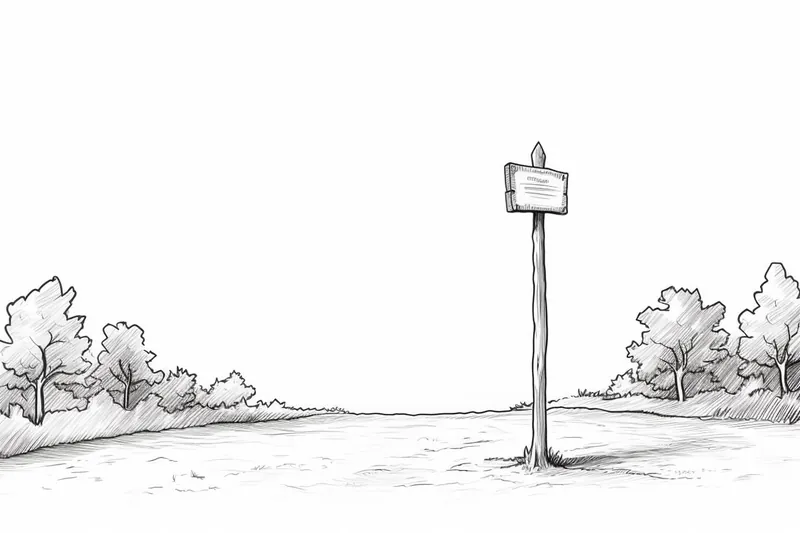
- A wooden signpost at a crossroads, with arrows pointing in different directions and creative place names.
- A beachside surfboard sign advertising lessons, with waves and palm trees in the background.