How to Draw a Santa Hat
Learn how to draw a Santa hat with this step-by-step tutorial. Get ready to add a touch of festive cheer to your artwork with this classic symbol of the holiday season.
Materials You'll Need
- Pencil
- Paper
- Eraser
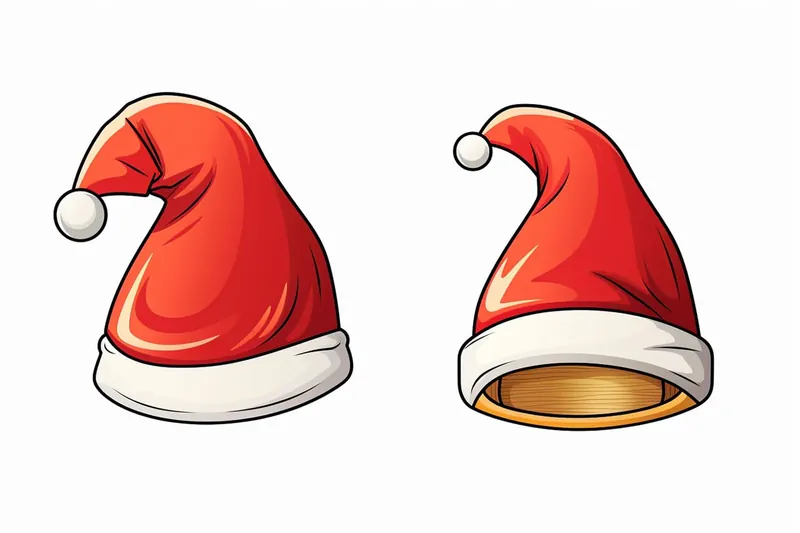
The Santa hat, with its fluffy white trim and bright red body, is one of the most recognizable icons of the holiday season. This cheerful accessory is synonymous with Santa Claus himself and instantly brings to mind images of gift-giving, festive gatherings, and winter wonder. You'll often see Santa hats featured in holiday cards, party decorations, and even as a fun touch in family photos. Learning how to draw a Santa hat can be a delightful way to capture that festive spirit in your own artwork, whether you're designing seasonal greeting cards, creating holiday crafts, or just looking to add some holiday cheer to your sketchbook.
Drawing a Santa hat is an excellent project for artists of all skill levels. The simple yet expressive shapes make it approachable for beginners, while those with more experience can experiment with adding details like shading, texture, and highlights for a realistic effect. This tutorial on how to draw a Santa hat will guide you through each step, from outlining the classic curved shape to capturing the soft, fluffy textures that make the hat so cozy. Along the way, you'll get to practice basic drawing techniques and learn tips for making your illustration truly stand out. So gather your favorite art supplies and get ready to create a piece of festive art you'll be proud to share. Remember, every artist adds their own unique touch—so have fun and let your creativity shine!
Materials Required
Before we begin, gather the following materials:
- Drawing paper
- Pencil
- Eraser
- Black marker or pen
- Red and white colored pencils or markers
Step 1: Draw the Brim
Start by drawing the brim of the Santa hat. Begin at the bottom of the paper with a slightly curved line. Make sure the curve is a bit wider towards the sides and gradually narrows as it goes up.
Step 2: Create the Fold
From the endpoint of the first line, draw another curved line that forms the fold of the hat. This line should curve upwards, mirroring the shape of the brim but slightly shorter in length.
Step 3: Shape the Cone
At the endpoint of the fold, draw a long, curved line that forms the cone of the Santa hat. This line starts from the edge of the fold and curves inward towards the top. The shape resembles a triangle, but with a rounded tip.
Step 4: Add the Fur Trim
Now it's time to give the Santa hat some fluffy fur trim. Start at the bottom of the brim and draw a series of small, zigzag lines that form the appearance of fur. Continue this pattern all the way around the brim of the hat and the fold, making sure to leave some spaces between the zigzags.
Step 5: Define the Fur Trim
To make the fur trim more defined, carefully go over the zigzag lines with a black marker or pen. This will make the fur texture more prominent and stand out against the rest of the drawing.
Step 6: Shade the Cone
Using a red colored pencil or marker, fill in the cone of the hat with a solid color. Apply the color evenly, making sure not to go outside the lines. This will be the base color for the Santa hat.
Step 7: Create Highlights
To add dimension to the Santa hat, use a white colored pencil or marker to create highlight lines on the cone. Draw curved lines along the surface of the cone, focusing on the areas that catch the most light. This will give the hat a three-dimensional appearance.
Step 8: Add a Pom-Pom
Near the top of the hat, draw a circle or oval shape to represent the fluffy pom-pom. Place it slightly to the side of the tip of the hat. Fill in the shape with white and add a few curved lines to indicate the texture.
Step 9: Finalize the Outline
To complete the Santa hat, carefully go over the entire drawing with a black marker or pen. This will help define the shape and make your drawing stand out. Pay attention to the lines of the brim, fold, cone, and the fur trim, making them more prominent and crisp.
Tip: When drawing the Santa hat's fluffy trim and pom-pom, try using short, curved pencil strokes that radiate outward from the edges—this technique mimics the soft, uneven look of fur. For extra dimension, lightly shade the areas where the hat curves or overlaps, especially under the brim and on one side of the pom-pom, while keeping some sections bright to suggest fluffiness and highlight. If you're working in color, layering a touch of cool blue or light gray beneath the white will make the trim look softer and more three-dimensional. Don't worry about making every line perfect—the charm of a Santa hat often comes from its slightly rumpled, playful appearance!
Conclusion
And there you have it – your beautifully drawn Santa hat! By following these step-by-step instructions, you can create a festive and fun addition to your artwork or crafts. Remember to practice and experiment, making each drawing your own unique creation. Happy drawing!
Fun Facts About Santa Hats
- The classic red and white Santa hat is inspired by the traditional headwear of Saint Nicholas, a 4th-century bishop known for his generosity.
- Santa hats are often called "stocking caps" or "nightcaps" in reference to similar winter hats worn for warmth in Europe.
- The fluffy white trim and pom-pom on a Santa hat symbolize snow and winter, adding to its festive appeal.
- Santa hats became widely popular in the 19th century thanks to illustrations by artists like Thomas Nast.
- Wearing a Santa hat is a common tradition at holiday parties and events around the world.
- In Japan, Santa hats are often worn by couples and friends during Christmas as a symbol of joy and togetherness.
- The red color of the Santa hat is associated with warmth, happiness, and the spirit of giving.
- Santa hats are a popular accessory for pets during the holiday season, with many stores offering special versions for animals.
Suggestions for Scenes and Settings for Santa Hat Drawings
- Draw a playful kitten or puppy tangled in Christmas lights and wearing an oversized Santa hat.
- Sketch a group of snowmen having a snowball fight, each sporting a Santa hat in a different style.
- Illustrate Santa Claus hanging his hat on a cozy fireplace mantel, surrounded by stockings and garlands.
- Create a scene of woodland animals—like foxes, rabbits, and owls—all gathered around a tree, each with a tiny Santa hat.
- Imagine a penguin sliding down an icy hill, its Santa hat flapping in the wind.
- Depict a family of gingerbread cookies dressed up for the holidays, with the tallest cookie wearing a Santa hat.
- Draw a steaming mug of hot cocoa topped with whipped cream and a Santa hat resting beside it.
- Illustrate a group of friends taking a silly holiday selfie, all wearing Santa hats with unique patterns.
- Design a magical Christmas night sky, with a Santa hat perched on the crescent moon.
- Create a stack of wrapped gifts, with a Santa hat sitting playfully on top of the pile.