How to Draw a Saddle
Learn how to draw a saddle in this step-by-step guide. Discover useful tips and tricks to create a realistic representation of a saddle in your artwork.
Materials You'll Need
- Pencil
- Paper
- Eraser
The saddle is an iconic piece of equestrian equipment, instantly recognizable for its unique shape and functional design. Found in horseback riding disciplines around the world, saddles serve as a comfortable and secure seat for the rider and are often beautifully crafted from leather with intricate details. Whether you are interested in Western, English, or even fantasy art, learning to render a saddle accurately can add an extra layer of authenticity and visual interest to your artwork. Understanding how to draw a saddle is especially useful for artists who enjoy drawing horses, riding scenes, or want to bring Western or historical themes to life in their illustrations.
Drawing a saddle may seem challenging at first, given its complex curves, straps, and decorative elements, but it's a fantastic exercise for developing your observation and rendering skills. This tutorial is designed for artists of all levels, from beginners eager to expand their repertoire to more experienced illustrators looking to refine their technique. Throughout this lesson, you'll learn how to break down the saddle into basic shapes, add realistic details, and use shading to give your drawing depth and dimension. By following our step-by-step guide on how to draw a saddle, you'll not only enhance your ability to capture realistic objects but also gain confidence in tackling more intricate subjects.
Remember, every artist starts somewhere, and practice is the key to improvement. Don't be discouraged if your first attempt isn't perfect—each drawing is a valuable step on your artistic journey. Grab your pencils and drawing paper, and let's explore the fascinating world of saddles together. With patience and creativity, you'll soon master the art of drawing this essential equestrian accessory!
Materials Required:
To draw a saddle, you will need the following materials:
- Graphite pencils (HB, 2B, 4B, and 6B)
- Drawing paper
- Eraser
- Ruler
- Reference image of a saddle (optional)
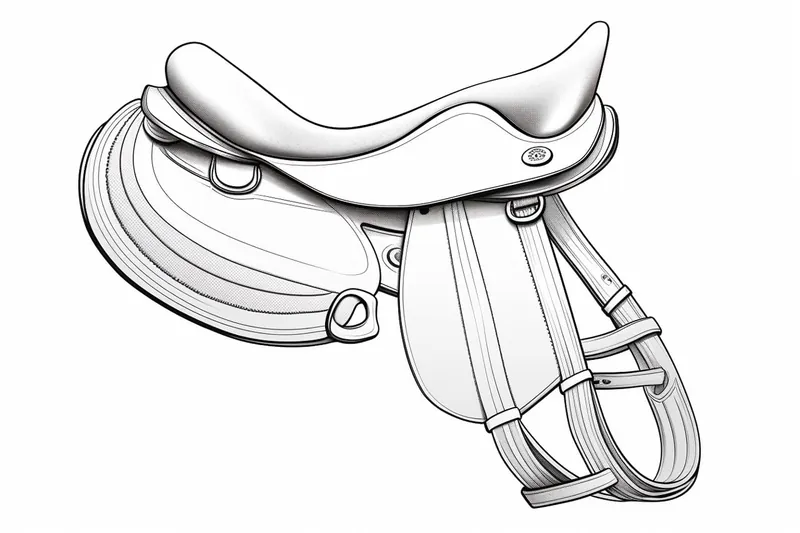
Step 1: Sketch the Basic Shape
Start by lightly sketching a rectangle on your drawing paper. This shape will represent the seat of the saddle. Use a ruler to ensure straight lines and maintain proportion. Remember, the size of your rectangle may vary depending on the desired dimensions of your saddle.
Step 2: Add the Flaps
Extend two lines downward from the bottom corners of the rectangle to create the flaps of the saddle. These lines should slant slightly inward to maintain the correct shape. At the ends of these lines, sketch another smaller rectangle, which will represent the saddle flaps.
Step 3: Outline the Pommel and Cantle
At the front of the rectangle, draw a slightly curved line to represent the pommel of the saddle, which is the raised portion at the front. At the back of the rectangle, draw another curved line to represent the cantle, which is the raised portion at the back. These lines should mirror each other and follow the contour of the saddle seat.
Step 4: Refine the Shape
Using more definitive lines, refine the shape of the saddle by tracing over your initial sketch. Pay attention to the curves and angles of the various components, ensuring that they flow naturally. Take your time and make adjustments as needed to achieve the desired overall shape.
Step 5: Add Details
Now it's time to add the finer details that will give your saddle a realistic look. Begin by drawing a line across the seat of the saddle, parallel to the shorter sides of the rectangle. This line represents the stitching that holds the seat and flaps together.
Step 6: Draw the Stirrup Bars
On each side of the saddle, near the pommel, draw two small rectangular shapes. These are the stirrup bars, which allow the rider to attach stirrups securely.
Step 7: Sketch the Stirrups
Beneath the stirrup bars, draw the stirrups themselves. These can vary in shape and style, but a common design is an elongated oval with an open bottom. Make sure both stirrups are symmetrical and aligned properly with the stirrup bars.
Step 8: Define the Floral Tooling
Many saddles feature intricate floral tooling patterns that add decorative elements. To draw these patterns, lightly sketch flowing curves and shapes along the saddle flaps and seat. Once you're satisfied with the layout, darken the lines to create the illusion of depth and dimension.
Step 9: Shade and Add Shadows
Tip: When drawing a saddle, consider using a reference image to guide your proportions and details, especially for complex elements like the floral tooling and stitching. This will help you capture the nuances and accuracy of the saddle's design, making your artwork more realistic. Additionally, take breaks to step back and assess your work from a distance, allowing you to notice areas that may need adjustment or refinement.
To give your saddle a realistic appearance, it's important to add shading and shadows. Use a range of pencils, from HB to 6B, to create various shades and tones. Pay attention to the light source and shade accordingly, making areas closer to the edges or underneath the saddle darker.
Step 10: Finalize Your Drawing
Once you are satisfied with your shading and overall look, carefully erase any remaining guidelines. Take a step back and assess your drawing. Make any necessary adjustments or additions to ensure a polished and finished saddle drawing.
Conclusion
Drawing a saddle may seem challenging at first, but with the right guidance and practice, you can create a realistic and detailed representation. By following the step-by-step instructions outlined in this guide, you will gradually develop your skills and produce drawings that showcase your artistic abilities. So grab your materials and start drawing your very own saddle today!
Fun Facts About Saddle
- The oldest known saddle dates back to around 700 BC and was used by the Scythians.
- There are two main types of saddles: English and Western, each designed for different riding styles.
- Western saddles are heavier and have a horn for roping cattle.
- English saddles are lighter and allow closer contact with the horse.
- High-quality saddles are often handmade from leather and can take over 40 hours to craft.
- The word "saddle" comes from the Old English "sadol," meaning a seat or chair.
- Proper saddle fit is crucial for a horse's comfort and health.
- Some saddles feature intricate tooling and silver decorations, especially in Western riding.
- Modern synthetic saddles are lighter and easier to maintain than traditional leather ones.
Suggestions for Scenes and Settings for Saddle Drawings
- A close-up study of a Western saddle resting on a rustic wooden fence, with sunlight highlighting its intricate tooling.
- An English saddle draped over a stable door, with riding boots and a helmet nearby, capturing a quiet moment before a ride.
- A fantasy-inspired saddle adorned with gemstones and unusual shapes, designed for a mythical creature such as a dragon or unicorn.
- A weathered, vintage saddle displayed in an old barn, surrounded by straw, lantern light, and antique farm tools.
- A dynamic action scene with a rider mounting a horse mid-gallop, the saddle straps and stirrups in motion.
- A detailed study of a side-saddle, elegantly decorated with lace and embroidery, set against a Victorian backdrop.
- A group of different saddles from various cultures (Western, English, Australian, Mongolian) arranged for a comparative still life.
- A saddle resting on a wooden saddle stand, surrounded by grooming supplies and tack, in a cozy tack room.
- A parade scene featuring a highly decorative show saddle covered in silver accents and bright colors.
- A close-up of hands polishing or adjusting the straps and buckles of a leather saddle, focusing on craftsmanship and detail.