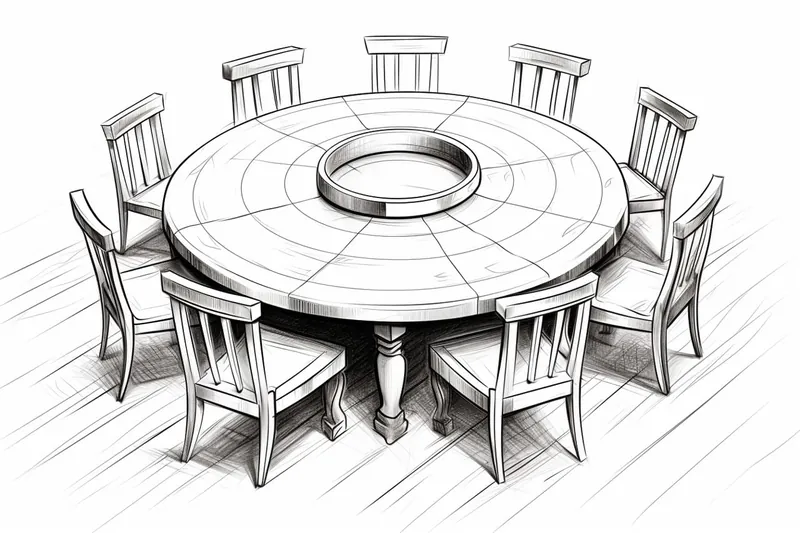
How to Draw a Round Table
Learn how to draw a round table step-by-step with this helpful guide. Whether you're a beginner or an experienced artist, you'll find the instructions easy to follow.
Materials You'll Need
- Pencil
- Paper
- Eraser
When you learn how to draw a round table, you develop an eye for proportion and spatial relationships. The circular shape challenges you to accurately depict curves and ellipses, which are essential skills in drawing three-dimensional objects on a flat surface. This guide will introduce you to techniques such as constructing the table using simple geometric shapes, applying perspective to create depth, and adding shading to convey texture and lighting. Whether you're sketching with pencil or working digitally, these methods will help you build confidence and refine your artistic abilities.
Materials Required
Before we begin, let's gather the materials you will need to draw a round table:
- Drawing paper
- Pencils (HB, 2B, 4B)
- Eraser
- Ruler
- Compass
- Protractor
- Optional: Colored pencils or markers for adding color to your drawing
Now that we have all our materials ready, let's move on to the steps!
Step 1: Determine the Size and Position
Step 2: Draw the Tabletop
Using your compass, draw a perfect circle for the tabletop. Place the compass at the center of your intended table and then rotate it to create the outline of the circle. Make sure the circle is smooth and evenly shaped. If you're new to using a compass, it may take a few tries to get it just right, but practice makes perfect!
Step 3: Add the Table Legs
To create the illusion of depth, we need to add table legs. Start by drawing two straight lines from the bottom edge of the tabletop, extending downwards. These lines will act as guides for the table legs. Next, draw a rectangle shape at the bottom of each line to represent the table leg. Make sure the legs are evenly spaced and aligned with the tabletop.
Step 4: Refine the Table Legs
Now it's time to refine the shape of the table legs. Use your ruler to straighten and adjust any uneven lines. Round the edges of the table legs to give them a more polished and realistic look. Remember to maintain perspective by ensuring that the legs on the far side of the table appear slightly shorter than the ones on the near side.
Step 5: Add Details
To make your round table look more realistic, add some details to the tabletop and legs. For the tabletop, draw a smaller circle inside the larger one to represent the table's edge. You can add texture or patterns to the tabletop if desired. For the legs, you can draw intersecting lines or curves to simulate design elements or joinery.
Step 6: Erase Unnecessary Guidelines
At this point, you should have a well-defined round table. Take your eraser and carefully remove any unnecessary guidelines or construction lines that you no longer need. Be gentle to avoid smudging your drawing, especially if you intend to add color or shading later on.
Step 7: Color or Shade Your Drawing (Optional)
If you want to take your drawing to the next level, consider adding color or shading to your round table. Use colored pencils or markers to add depth and dimension to the various elements. Pay attention to the light source and add shadows accordingly, which will further enhance the realism of your drawing.
Conclusion
Drawing a round table may seem challenging at first, but with the right techniques and a little practice, you can achieve impressive results. By following the step-by-step instructions in this guide, you'll be able to create a realistic round table drawing that can be used in various artistic projects or simply as a fun exercise. So go ahead, grab your pencils, and let your creativity flow!
Fun Facts About Round Tables
- The concept of the Round Table is famously associated with King Arthur and his knights, symbolizing equality and unity among them.
- Round tables have no head, which encourages open discussion and collaboration, making them popular in modern meeting rooms.
- The original Round Table from Arthurian legend was said to seat 150 knights, emphasizing the scale of King Arthur's court.
- In furniture design, round tables are often preferred in small spaces because they allow for more flexible seating arrangements.
- Drawing a round table helps artists practice perspective and ellipses, which are key skills for rendering three-dimensional objects on a flat surface.
- Round tables have been used historically in diplomatic settings to symbolize fairness and equal voice among participants.
- The famous Round Table in Winchester, England, is a medieval artifact painted during the reign of King Henry VIII, not from Arthurian times.
Suggestions for Scenes and Settings for Round Table Drawings
- A cozy kitchen nook with a round table set for breakfast, featuring a teapot, cups, and a vase of flowers.
- A medieval round table in a castle setting, complete with knights' helmets and scrolls scattered around.
- A modern office meeting room with a sleek round table surrounded by chairs, laptops, and coffee mugs.
- A garden picnic scene with a round wooden table holding fresh fruits, a picnic basket, and a checkered cloth.
- An artist's studio featuring a round table cluttered with sketchpads, pencils, paintbrushes, and color palettes.
- A café terrace with a round metal table, a steaming cup of coffee, sunglasses, and a newspaper.
- A futuristic setting where a round table is part of a spaceship's control room, glowing with holographic displays.
- A rustic cabin interior showcasing a round log table with handmade pottery and a flickering candle.
- A children's playroom with a round table covered in colorful toys, building blocks, and drawing supplies.
- A library reading corner featuring a round table piled with open books, reading glasses, and a small lamp.