How to Draw a Puli
Learn how to draw a Puli with this step-by-step tutorial. Capture the unique features of this dog breed in a realistic drawing. Perfect for artists of all skill levels.
Materials You'll Need
- Pencil
- Paper
- Eraser
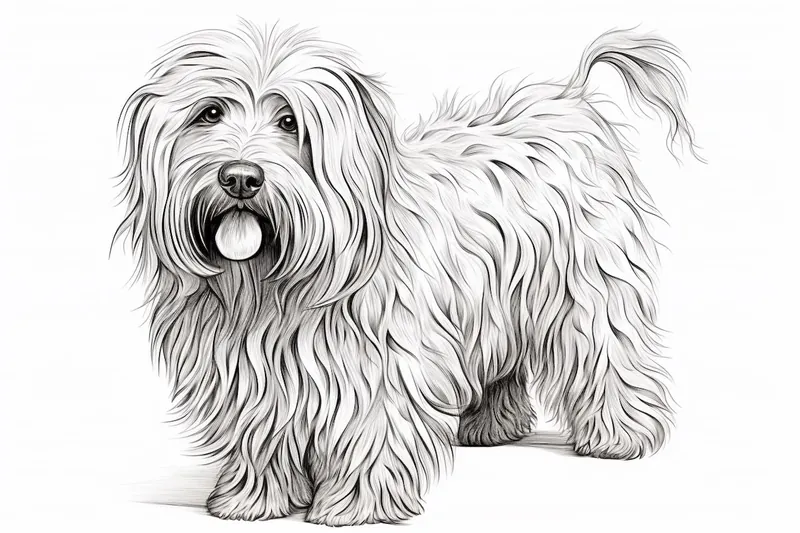
The Puli is a fascinating dog breed, instantly recognizable by its long, corded coat that resembles thick, woolly dreadlocks. Originally bred as a herding dog in Hungary, the Puli is known not only for its striking appearance but also for its intelligence, agility, and playful spirit. These energetic dogs have a lively personality and a unique silhouette, making them a favorite subject among artists and dog enthusiasts alike. Capturing the Puli's distinctive fur texture and spirited expression in your artwork is both a fun challenge and a chance to celebrate this remarkable breed's quirky charm.
Learning how to draw a puli can help artists build their skills in rendering texture, movement, and character. Whether you are looking to expand your portfolio with more animal portraits or simply want to practice drawing different types of fur, the Puli offers a wonderful opportunity. This tutorial is designed for all skill levels: beginners will find the clear, step-by-step instructions approachable, while more advanced artists can experiment with techniques for illustrating the dog's signature corded coat. Throughout the lesson, we'll focus on careful observation, layering, and attention to detail—all essential skills for any artist.
Don't worry if drawing such a unique dog seems intimidating at first—every artist starts somewhere, and each attempt brings improvement. By following this guide, you'll gain confidence in your ability to capture the essence of the Puli, from its mop-like fur to its expressive face. So grab your favorite drawing tools, settle into your creative space, and let's explore how to draw a puli together. With a bit of patience and practice, you'll soon have a delightful portrait of this extraordinary dog to be proud of!
Materials Required
Before we begin, let's gather the materials you'll need to create your Puli drawing:
- Drawing paper: Choose a high-quality paper that is suitable for your preferred drawing medium.
- Pencils: Get a range of pencils with different lead hardness, such as 2H, HB, 2B, and 4B.
- Eraser: A kneaded eraser is ideal for easily correcting mistakes without leaving residue.
- Blending tools: You can use blending stumps, tortillons, or even a tissue for smudging and blending.
- Reference photo: Find a clear, high-resolution image of a Puli to guide your drawing.
Now that we have our materials ready, let's dive into the step-by-step process of drawing a Puli.
Step 1: Basic Outline
Start by lightly sketching the basic outline of the Puli's body using a harder pencil, such as the 2H. Pay attention to the proportions and shape of the head, body, and legs. Use simple geometric shapes as guides, such as circles for the head and body, and lines for the legs.
Step 2: Facial Features
Focus on the Puli's face in this step. Observe the reference photo closely to capture the unique characteristics of the breed. Add the eyes, nose, and mouth, paying attention to their placement and shape. Use the reference lines you drew in the previous step as a guide.
Step 3: Add Details to the Face
Tip: To enhance your drawing of a Puli, focus on capturing the dynamic nature of its corded coat by varying your pencil strokes—use a mix of light, loose lines for the outer layers and tighter, darker lines for the inner cords. Observing how the fur overlaps and bunches will help create a more realistic texture and movement, bringing your artwork to life.
Refine the facial features by adding more details. Add fur around the eyes, define the shape of the ears, and add texture to the nose. Use short, light strokes to suggest the Puli's curly coat, and vary the pressure on your pencil to create depth and dimension.
Step 4: Draw the Body and Legs
Now it's time to tackle the Puli's body and legs. Use the reference lines as a guide to sketch the shape of the body, adding volume and muscle definition. Pay attention to the unique shape of the Puli's chest and back. Add the legs, making sure they are properly proportioned and positioned.
Step 5: Add Texture and Detail to the Coat
The Puli's corded coat is one of its most distinctive features. Take your time to add the texture and details of the coat, using short, curved lines to represent the cords. Vary the thickness and darkness of the lines to create a realistic texture. Use a combination of the 2B and 4B pencils for this step.
Step 6: Refine and Shade
Once you have the basic outline and details in place, it's time to refine your drawing and add shading. Use a softer pencil, like the 2B or 4B, to darken the areas that need more depth and shadow. Pay attention to the reference photo to understand where the light is coming from and how it affects the Puli's form.
Step 7: Final Details and Highlights
In this step, add the final details to your Puli drawing. Enhance the facial features, refine the fur texture, and add any additional details that will bring your drawing to life. Use an eraser to create highlights and add a touch of realism to the eyes, nose, and fur.
Mistake Alert: A common mistake when drawing a Puli is rendering the corded fur as uniform, evenly spaced ropes, which can make the dog look stiff and unnatural. This often happens because beginners focus on drawing each cord individually, rather than observing how the cords overlap, twist, and bunch together in clumps around the body. To avoid this, study reference photos closely and notice the variety in cord thickness, direction, and grouping—some cords merge or split, and many are partially hidden behind others. Use loose, varied strokes and pay attention to areas where cords gather or splay out, especially around the legs and face, to create a more dynamic and realistic texture.
Conclusion
Congratulations on completing your Puli drawing! By following these step-by-step instructions and paying attention to the unique features of this breed, you have created a realistic and detailed representation of a Puli. Don't be afraid to experiment with different techniques and add your personal touch to make your drawing truly unique. With practice and patience, your drawing skills will continue to improve. Remember to have fun throughout the process and enjoy the journey of capturing the beauty of the Puli on paper.
Fun Facts About Pulis
- The Puli's iconic corded coat is naturally water-resistant, helping it stay dry while herding in wet conditions.
- Pulis are an ancient breed from Hungary, with a history dating back over 1,000 years.
- Despite their mop-like appearance, Pulis are incredibly agile and have been used as sheepdogs for centuries.
- Their unique coat requires regular maintenance to prevent matting.
- Pulis are known for their intelligence and can excel in dog sports like agility and obedience.
- They are often called "acrobat dogs" because of their energetic and bouncy movement.
- Pulis come in several colors, but black is the most common.
- Famous for their loyalty, Pulis form strong bonds with their families.
- Some Pulis have even served as police dogs in Hungary.
- The Puli's distinctive look has inspired artists and cartoonists worldwide.
Suggestions for Scenes and Settings for Puli Drawings
- A playful Puli bounding through a field of wildflowers, its cords bouncing in motion.
- A Puli herding a flock of sheep across a rolling Hungarian countryside.
- A close-up portrait of a Puli's face, capturing the texture and depth of its corded coat.
- A Puli splashing in a shallow pond, with water droplets clinging to its fur.
- A Puli sitting proudly on a rustic wooden porch, framed by potted plants and old farm tools.
- An energetic Puli weaving through an agility course, showing off its intelligence and speed.
- A whimsical scene of a Puli wearing a colorful scarf or bandana, surrounded by autumn leaves.
- A cozy indoor scene with a Puli curled up by a fireplace, its cords splayed out on a soft rug.
- A Puli meeting new friends at a bustling dog park, with a variety of breeds in the background.
- A magical night-time setting with a Puli gazing up at the stars, its coat softly illuminated by moonlight.