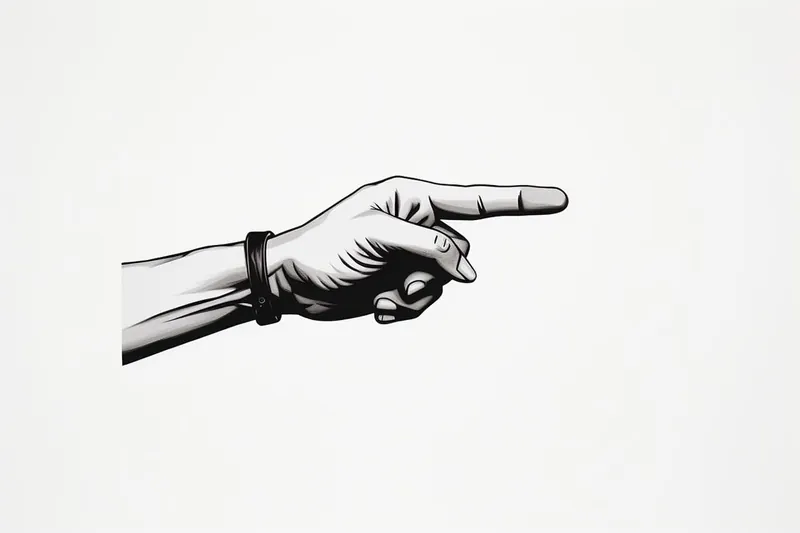
How to Draw a Pointing Finger
Learn how to draw a pointing finger with this easy step-by-step tutorial. Follow our expert artist's instructions to create a realistic and detailed finger drawing.
Materials You'll Need
- Pencil
- Paper
- Eraser
Fingers are among the most expressive parts of the human body, capable of conveying a wide range of emotions, directions, and intentions with just a single gesture. The pointing finger, in particular, is a universal symbol used to indicate, guide, or emphasize, making it a staple in everything from comic art and character design to educational illustrations and anatomy studies. Learning how to draw a pointing finger not only enhances your ability to depict hand gestures accurately, but also adds a dynamic element to your artwork, helping you communicate more vividly with your viewers.
Whether you're a beginner artist exploring human anatomy for the first time, or a more experienced illustrator looking to refine your skills, mastering the art of drawing hands—and especially gestures like the pointing finger—can be both challenging and rewarding. Hands are notoriously tricky to draw due to their complex structure and the subtle variations in pose, but with clear guidance and practice, you'll soon discover how to simplify the process. In this tutorial, we'll break down how to draw a pointing finger step by step, allowing you to build confidence in capturing proportions, foreshortening, and the natural flow of the hand.
You might want to learn how to draw a pointing finger for a variety of reasons: perhaps you're working on a comic strip where a character is emphasizing a point, designing an instructional poster, or simply aiming to expand your portfolio of gesture studies. Understanding the anatomy and movement of the finger not only improves the realism of your drawings but also gives you greater creative freedom in your projects. Throughout this guide, we'll focus on observation, sketching basic shapes, refining details, and adding shading to create a convincing and lifelike pointing finger.
Don't worry if drawing hands has felt daunting before; with patience and practice, anyone can improve. By following this step-by-step approach on how to draw a pointing finger, you'll develop a stronger grasp of both anatomy and gesture drawing. Gather your materials, relax, and enjoy the process—remember, each attempt brings you closer to mastering this essential artistic skill!
Materials Required
Before we begin, make sure you have the following materials prepared:
- Pencil (preferably an HB or 2B for initial sketching)
- Eraser
- Drawing paper or sketchbook
- Fine-tipped pen or ink pen (optional, for inking the final lines)
- Markers, colored pencils, or any other coloring tools (optional, for adding color)
Now that we have our materials ready, let's begin the process of drawing a pointing finger.
Step 1: Basic Shapes
Start by lightly sketching a rectangular shape for the palm of the hand. This shape should have rounded corners to mimic the natural curves of the hand. Next, draw a long oval shape extending from the rectangle to represent the middle finger. The size of the oval will depend on the desired length of the finger. Remember to keep the lines light and loose for easy adjustments.
Step 2: Outlining the Finger
Using the oval shape as a guide, refine the outline of the finger by carefully adding more curves to indicate the joints and contours. Pay attention to the natural curves and angles of the finger as you go along. Extend the outline slightly past the oval at the tip to create the fingertip.
Step 3: Adding the Knuckles
Tip: As you practice drawing a pointing finger, consider using a reference image or observing your own hand in different angles and positions to understand the natural curves and joints. This will help you capture the realistic flow of the finger and avoid stiff, mechanical shapes. Additionally, start with light sketches that allow for adjustments before committing to darker lines, which will enhance your confidence and accuracy in depicting hand gestures.
Now it's time to add the knuckles to our finger. To do this, sketch small circles or ovals at the joints of the finger. These circles should be placed at the base of each segment of the finger, starting from the palm and ending at the fingertip.
Step 4: Refining the Shape
With the basic structure in place, it's time to refine the shape of the finger. Use your initial sketch as a guide and carefully adjust the curves and lines to make them smoother and more anatomically accurate. Pay close attention to the proportions and angles of the finger to ensure a realistic result.
Step 5: Adding Details
Now that the finger shape is refined, it's time to add some details to make it more realistic. Start by sketching the nail on the fingertip. The nail should be slightly curved and extend beyond the flesh of the finger. Next, add lines to indicate the creases and wrinkles on the finger. These lines should follow the natural contours and curves of the finger, emphasizing the joints and folds.
Step 6: Shading and Texturing
To add depth and dimension to our drawing, apply some shading and texturing to the finger. Start by identifying the light source and determining where the shadows would fall. Use hatching or cross-hatching techniques with your pencil to create shading in these areas, gradually building up the darkness as needed. Pay attention to the subtle variations in value and texture to make the finger appear more three-dimensional.
Step 7: Finalizing the Drawing
At this stage, you can choose to ink the final lines with a fine-tipped pen or ink pen, going over the pencil lines you wish to keep. Erase any remaining pencil lines and smudges carefully. If you prefer a colored illustration, this is a good time to add colors using markers, colored pencils, or any other coloring tools of your choice. Be sure to use light and smooth strokes to maintain the realism of the finger.
Mistake Alert: A common mistake when drawing a pointing finger is making the extended finger look stiff or unnatural by aligning all the finger joints in a perfectly straight line. This often happens because we imagine the finger as a rigid stick, forgetting that each joint bends slightly even when fully extended. To avoid this, observe your own hand or use a reference photo and notice how the finger subtly curves, with gentle angles at each joint. Try sketching the gesture with light, flowing lines first, emphasizing the natural arc and taper of the finger, rather than forcing it into a straight, mechanical shape. This approach will help your pointing finger look more relaxed, expressive, and true to life.
Conclusion
Congratulations! You've successfully learned how to draw a pointing finger. By following these step-by-step instructions and practicing regularly, you'll be able to create detailed and realistic fingers in no time. Remember to pay attention to the proportions, angles, and details of the finger, and don't worry about making mistakes—practice makes perfect. So grab your drawing materials and start sketching your way to finger-drawing mastery!
Fun Facts About Pointing Finger
- The pointing finger gesture is recognized across many cultures as a way to indicate direction or draw attention.
- In ancient Roman art, the pointing finger was often used to symbolize authority and command.
- Pointing with the index finger is considered rude in some cultures, such as in parts of Asia.
- The famous "Uncle Sam Wants You" recruitment poster features a prominent pointing finger, making it one of the most iconic uses in history.
- In American Sign Language, the pointing finger is essential for indicating people, places, and objects.
- Leonardo da Vinci frequently used the pointing finger in his paintings to guide the viewer's attention.
- The "index finger" gets its name from the Latin word "indicare," meaning "to point out."
- In digital interfaces, the pointing finger icon (cursor) is widely used to indicate clickable links.
Suggestions for Scenes and Settings for Pointing Finger Drawings
- A teacher at a chalkboard, pointing to an important equation or diagram.
- A superhero dramatically pointing to the sky, signaling the start of a mission.
- A character in a comic strip, pointing to emphasize a punchline or important dialogue.
- A detective pointing at a clue during a tense investigation scene.
- A child pointing in wonder at an animal in a zoo or an exhibit in a museum.
- An artist's hand pointing to a specific spot on a canvas or sketchbook.
- An adventurer pointing toward a distant mountain or horizon, leading a group forward.
- A sports coach on the sidelines, pointing to direct a player's movement during a game.
- A crowd of hands pointing upward at fireworks during a celebration.
- A futuristic robot hand pointing at a digital interface or holographic screen.