How to Draw a Pointer
Learn how to draw a Pointer with this step-by-step tutorial. Create a realistic and detailed drawing of this dog breed using simple instructions and basic materials.
Materials You'll Need
- Pencil
- Paper
- Eraser
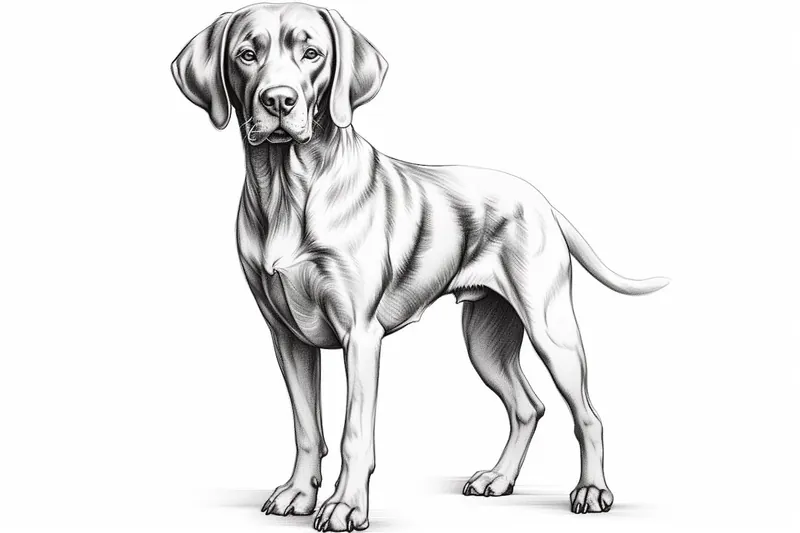
The Pointer is an elegant and athletic dog breed, renowned for its keen hunting instincts and graceful posture. With their distinctive long snout, expressive eyes, and muscular yet slender build, Pointers are admired not just for their abilities in the field but also for their striking appearance. Learning how to draw a Pointer is a rewarding challenge for artists, as it gives you the opportunity to capture the breed's unique physical traits and lively personality. Whether you are a dog lover, an aspiring pet portrait artist, or simply looking to expand your drawing skills, illustrating a Pointer can be both fun and educational.
In this tutorial on how to draw a pointer, you will be guided through each step, from sketching the basic shapes to refining details like fur texture and facial expression. This tutorial is designed for artists of all skill levels—beginners will find the clear instructions approachable, while more experienced artists can focus on perfecting anatomy and shading techniques. Throughout the process, you'll practice observation, proportion, and layering, which are essential skills in realistic animal drawing. Drawing a Pointer also helps you appreciate the subtle differences that make each dog breed unique, which is valuable for anyone interested in animal illustration.
No matter where you are on your artistic journey, remember that practice is key—and every drawing brings you one step closer to mastering your craft. So gather your favorite drawing materials, get comfortable, and follow along as we explore the art of depicting this beautiful and noble breed. With patience and creativity, you'll soon have your own impressive Pointer drawing to be proud of!
Materials Required
Before we begin, make sure you have the following materials ready:
- [Drawing paper or sketchbook](https://yonderoo.com/best-sketchbooks-for-artists/)
- Pencil (preferably a medium or soft graphite pencil)
- Eraser
- Drawing pen or fine-tip marker (optional)
- Colored pencils or markers (optional, for adding color to your drawing)
Now that you have everything you need, let's dive into the step-by-step process of drawing a Pointer.
Step 1: Start with Basic Shapes
Begin by lightly sketching the basic shapes that make up the body of the Pointer. Start with an oval shape for the head, followed by a large oval for the body. Add two circles for the chest and pelvis, making sure they are proportionate to the body. Finally, sketch lines to indicate the neck, back, and limbs.
Step 2: Define the Head and Eyes
Refine the shape of the head by adding details such as the muzzle and ears. Draw a curved line for the top of the muzzle and add a smaller curved line for the bottom part. Sketch two almond-shaped eyes, making sure they are evenly spaced and proportionate to the head. Add a small circular shape within each eye to represent the pupils.
Step 3: Outline the Body and Limbs
Using the basic shapes as a guide, outline the body of the Pointer. Pay attention to the muscular structure and contours of the breed. Add the details of the limbs, making sure they are in proportion with the body. Don't forget to include the tail, which is long and slender.
Step 4: Add Facial Features and Ears
Refine the facial features of the Pointer by adding details like the nose, mouth, and eyebrows. Draw a small triangular shape for the nose, slightly above the middle of the muzzle. Sketch a curved line for the mouth, slightly below the nose. Add two small diagonal lines above each eye to represent the eyebrows. Finally, draw the ears, which are long and droopy, starting from the top of the head and curving downwards.
Step 5: Refine the Details
Tip: As you work through the steps of drawing a Pointer, regularly reference real-life images or videos of the breed to improve your accuracy in capturing its unique features and proportions. Observing the dog's natural stance and movements can provide invaluable insights that enhance the realism of your drawing, particularly in conveying its athleticism and grace.
Now it's time to add more detail to your drawing. Carefully observe the texture and patterns of the Pointer's coat and add them to your sketch. Use light, feathery strokes to mimic the short, dense fur of the breed. Pay attention to the direction of the fur and the areas of shadow and highlight.
Step 6: Shade and Add Depth
To make your drawing more realistic, add shading to create depth and dimension. Identify the areas of shadow on the Pointer's body and use a softer pencil or a shading tool to fill them in. Gradually build up the intensity of the shading, paying attention to the light source and the way it interacts with the dog's form.
Step 7: Finalize and Refine
Take a step back and evaluate your drawing so far. Make any necessary adjustments or corrections to ensure accuracy and proportion. Use an eraser to clean up any stray lines or smudges. If desired, you can outline your drawing with a pen or fine-tip marker for a more defined and finished look.
Step 8: Optional - Add Color
If you prefer, you can add color to your drawing using colored pencils or markers. Research the specific coloration and patterns of Pointers to achieve a more realistic representation. Layer the colors gradually, starting from the lightest to the darkest, to create depth and dimension.
Mistake Alert: One common pitfall when drawing a Pointer is making the body too bulky or boxy, which can happen if you focus too much on muscle definition and forget the breed's naturally slender, athletic frame. This mistake often occurs because reference photos may show the dog in powerful poses, making the muscles seem more pronounced than they actually are. To avoid this, pay close attention to the length and flow of the neck, back, and legs—Pointers have elegant, elongated lines rather than blocky shapes. Use light construction lines to establish the overall gesture before adding muscle or detail, and regularly step back to check that your drawing maintains a graceful, streamlined silhouette.
Conclusion
Congratulations on completing your drawing of a Pointer! By following these step-by-step instructions, you have created a realistic and detailed representation of this beautiful dog breed. Remember, practice makes perfect, so keep honing your drawing skills and experimenting with different techniques. We hope you enjoyed this tutorial and found it helpful in improving your artistic abilities.
Fun Facts About Pointer
- The Pointer is one of the oldest sporting breeds, with origins tracing back to the 17th century in England.
- Pointers are famous for their "pointing" stance, where they freeze with one paw raised to indicate the location of game.
- This breed is known for its remarkable speed and stamina, making it a favorite among hunters.
- Pointers have a short, smooth coat that comes in a variety of colors, including liver, lemon, black, and orange.
- Despite their athleticism, Pointers are gentle and affectionate companions at home.
- The breed's keen sense of smell and intelligence make them excellent search and rescue dogs.
- Pointers require plenty of exercise and mental stimulation to stay happy and healthy.
- They are generally healthy dogs but can be prone to certain conditions like hip dysplasia.
- Pointers are known for their expressive eyes and noble, athletic posture.
Suggestions for Scenes and Settings for Pointer Drawings
- A Pointer in a classic pointing stance in a grassy field, with birds flying in the distance.
- A close-up portrait capturing the expressive eyes and long snout of a Pointer.
- A Pointer running energetically along a wooded trail or forest edge.
- A Pointer resting on a cozy rug in a sunlit living room, showing its relaxed side.
- A Pointer and its owner, sharing a moment during training or playtime in a park.
- A group of Pointers interacting with each other, showing social behaviors and body language.
- A Pointer puppy learning to track scents in a garden or backyard setting.
- A Pointer silhouetted against a sunset, highlighting its elegant posture.
- A Pointer exploring a lakeside or riverbank, with reflections in the water.
- A Pointer in a winter scene, bounding through snow with visible breath and joyful energy.