How to Draw a Plastic Bag
Learn how to draw a plastic bag with this step-by-step guide. Improve your drawing skills and explore your creativity with this simple and useful tutorial.
Materials You'll Need
- Pencil
- Paper
- Eraser
Plastic bags are familiar everyday items, yet their unique shapes, transparency, and the way they interact with light make them surprisingly interesting subjects for artists. Whether crumpled, stretched, or filled, a plastic bag offers endless variations in form and texture. Learning how to draw a plastic bag not only helps you hone your observation skills, but also trains your ability to capture subtle details such as folds, creases, and reflections, which are important techniques for realistic drawing.
You might want to draw a plastic bag for a variety of reasons—perhaps to practice rendering transparent materials, to add realism to a still life, or simply as a unique challenge to expand your artistic repertoire. This subject is suitable for artists of all levels: beginners will benefit from practicing basic shapes and shading, while more advanced artists can push themselves by experimenting with the play of light and shadow on the bag's surface. In this step-by-step tutorial on how to draw a plastic bag, you'll learn how to break down complex forms into simpler shapes, use gentle shading to suggest translucency, and add highlights and shadows for a three-dimensional effect.
No matter your skill level, drawing a plastic bag is a rewarding exercise that encourages close observation and patience. Don't be intimidated by the challenge—embrace the opportunity to develop new techniques and express your creativity. Gather your drawing materials, follow along, and enjoy the process as you bring this everyday object to life on paper!
Materials Required:
Step 1: Outlining the Basic Shape
Start by drawing a rectangular shape on your paper. This will be the main body of the plastic bag. Use your ruler if you need to ensure straight edges. Remember, the size of the rectangle will depend on how big you want your plastic bag to be.
Step 2: Adding Handles
Next, draw two handles on the top corners of the rectangle. These handles should be curved and slightly elongated. They will be used to carry the bag. Take your time to position them symmetrically on both sides.
Step 3: Creating Folds
Now, let's add some folds to make the plastic bag appear more realistic. Start by drawing a diagonal line from one handle to the opposite bottom corner of the rectangle. Repeat this step on the other side. These lines represent the folds in the bag.
Step 4: Adding Details
To make the plastic bag look more like a real bag, we need to add some details. Begin by drawing a curved line at the bottom of the bag to represent the base. Then, draw another curved line parallel to the first one, a little above it. This will create the illusion of a folded bottom.
Step 5: Adding a Logo (Optional)
If you want to give your plastic bag a personal touch, you can add a logo or design on it. Choose a simple shape or symbol and draw it on the front of the bag. You can make it as elaborate or as simple as you like. This step is optional, so feel free to skip it if you prefer a plain plastic bag.
Step 6: Finalizing the Drawing
Now that you have the basic outline and details in place, it's time to finalize your drawing. Go over your lines with a darker pencil or pen to make them more visible. Erase any unnecessary guidelines or stray marks. Take a step back and examine your drawing to make sure all the proportions and details look right.
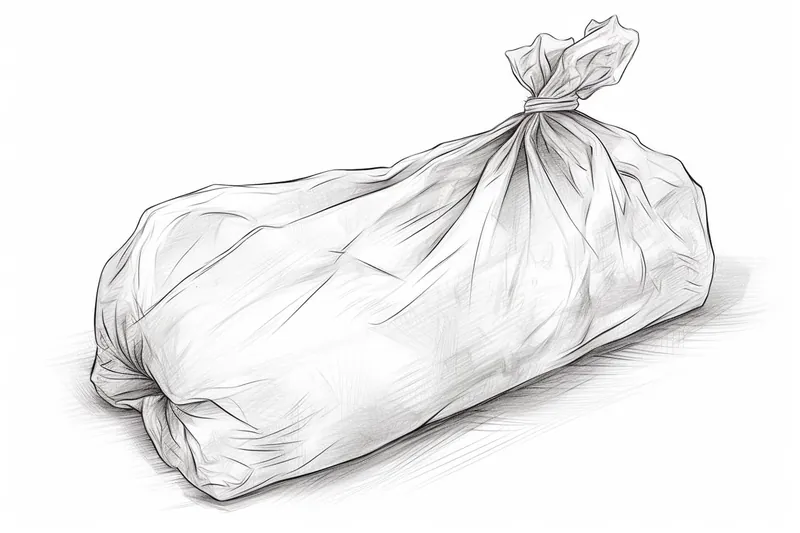
Tip: To effectively capture the unique characteristics of a plastic bag, start by using a range of pencils, from hard (H) for light lines to soft (B) for deep shadows. Begin with light, loose sketches to outline the bag's overall shape and any notable folds or creases, paying close attention to how these features affect the bag's form. Once satisfied with your sketch, gradually build up layers of shading, utilizing a blending stump or your finger to create smooth transitions that mimic the bag's translucency. Don't forget to observe the highlights where light hits the plastic—use an eraser to lift graphite and create these bright spots, as they are crucial for giving your drawing a three-dimensional quality. Lastly, practice patience; capturing the subtle details and varied textures of a plastic bag takes time, but it will significantly enhance your observational skills and artistic technique.
Conclusion
Congratulations! You have successfully learned how to draw a plastic bag. By following these step-by-step instructions, you have created a realistic representation of a common everyday object. Drawing can be a relaxing and rewarding activity, allowing you to express your creativity and improve your artistic skills. So, keep practicing and exploring new subjects to draw. We hope you enjoyed this tutorial and found it helpful in your artistic journey.
Fun Facts About Plastic Bag
- The first modern plastic bag was invented in Sweden in 1965 and quickly spread worldwide for its convenience and durability.
- Plastic bags are typically made from polyethylene, a type of polymer derived from natural gas and petroleum.
- It is estimated that over one trillion plastic bags are used globally each year.
- Plastic bags can take up to 1,000 years to decompose in landfills.
- Many countries and cities have implemented bans or taxes on plastic bags to reduce environmental impact.
- Plastic bags are lightweight and can easily become litter, posing a threat to wildlife that may ingest or become entangled in them.
- Some plastic bags are now designed to be biodegradable or compostable, but their effectiveness depends on specific environmental conditions.
- Reusing plastic bags for shopping or household tasks can significantly reduce their environmental footprint.
Suggestions for Scenes and Settings for Plastic Bag Drawings
- A crumpled plastic bag partially filled with groceries, with fruits and vegetables peeking out to add color and interest.
- A plastic bag caught mid-air on a windy day, twisting and floating above a city sidewalk.
- A clear plastic bag filled with water and a goldfish, reminiscent of a pet store purchase or a childhood memory.
- An empty plastic bag resting on a cluttered artist's desk, surrounded by sketchbooks, pencils, and erasers.
- A plastic bag tangled in the branches of a tree, with sunlight filtering through both leaves and plastic.
- A group of plastic bags stuffed inside a kitchen cabinet or hanging on a hook, showcasing different shapes and brands.
- A plastic bag used as an improvised rain hat or shoe cover on a rainy day, worn by a figure with wet clothing.
- A translucent plastic bag with an unusual object inside—a bouquet of flowers, a shiny toy, or a mysterious silhouette.
- A plastic bag floating on the surface of a pond, reflecting light and creating ripples in the water.
- A close-up study of a single plastic bag, focusing on intricate folds, creases, and dramatic highlights and shadows.