How to Draw a Pineapple
Learn how to draw a pineapple with this step-by-step tutorial. Perfect for artists of all levels, this guide will help you create realistic and stylized pineapple drawings.
Materials You'll Need
- Pencil
- Paper
- Eraser
Pineapples are instantly recognizable for their spiky green crowns and textured golden bodies, making them an appealing and dynamic subject for artists of all levels. Not only are they a symbol of hospitality and tropical warmth, but their distinct appearance offers a fun opportunity to explore shapes, patterns, and shading. Learning how to draw a pineapple can be both a delightful creative challenge and a great way to improve your observational skills, as you capture the intricate details that set this fruit apart from others. Their lively presence makes pineapples a favorite addition to everything from still life drawings to decorative illustrations and even whimsical cartoon art.
Whether you're new to drawing or looking to refine your technique, this tutorial on how to draw a pineapple will guide you through each step with clear, easy-to-follow instructions. You'll practice breaking down complex forms into simple shapes, adding texture with lines and shading, and capturing the bright, inviting character of this tropical fruit. This lesson is suitable for beginners, yet offers enough detail for more experienced artists to experiment with realism or stylized interpretations. No matter your skill level, you'll gain valuable practice in observation, pattern-making, and rendering dimensional surfaces. So grab your drawing tools, let your creativity shine, and get ready to infuse your sketchbook with a burst of tropical flair!
Remember, every artist has their own style and pace, so don't worry if your pineapple doesn't look perfect on the first try. The key is to enjoy the process and let your unique artistic voice come through. With a bit of patience and practice, you'll soon master how to draw a pineapple and add a splash of sunshine to your artwork. Let's dive in and have fun bringing this iconic fruit to life on your page!
Materials Required
Before we begin, gather the following materials:
Ensure you have a clean and comfortable workspace to work in. Now, let's dive into the step-by-step instructions!
Step 1: Draw the Outline
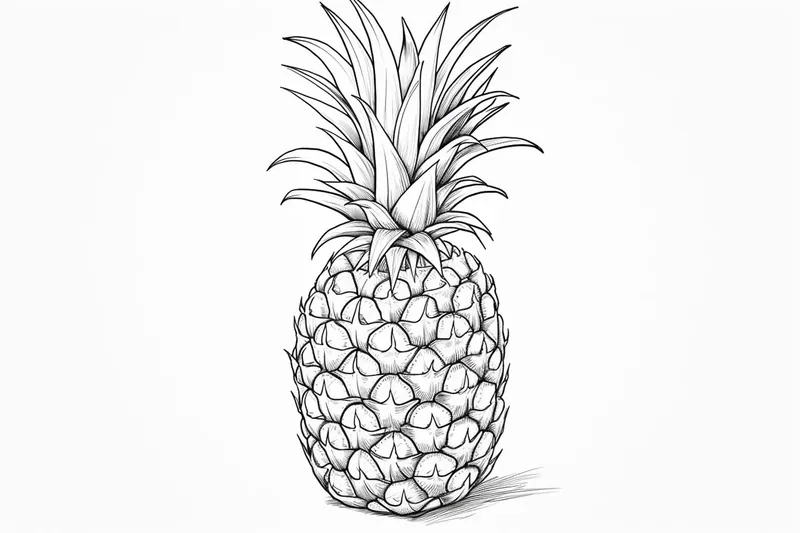
Start by drawing a vertical line in the center of your paper. This line will serve as the backbone of your pineapple. Next, sketch an oval shape at the top of the line. This oval will be the crown of the pineapple, which consists of large leaves. Then, draw a larger oval shape below the crown. This will form the body of the pineapple.
Step 2: Add the Details to the Crown
Tip: As you work on your pineapple drawing, consider using references from real pineapples to study their unique shapes and textures closely; this will help you appreciate the subtle variations in their diamond patterns and the irregularities in the crown. Taking time to observe these details will not only enhance the realism of your artwork but also allow your personal style to emerge more naturally in your interpretation of the fruit.
To create the spiky leaves of the crown, draw a series of connected "V" shapes around the oval you drew earlier. These "V" shapes should point outward and be randomly spaced. Make sure to vary their sizes and angles to add realism.
Step 3: Define the Body Texture
The body of a pineapple has a unique texture with distinct diamond-shaped patterns. To achieve this, draw diagonal lines across the entire oval shape. These lines should intersect and create a diamond pattern. Remember to keep the lines loose and not too precise to maintain a natural look.
Step 4: Refine the Shape
Take a moment to analyze your drawing and make any necessary adjustments to the shape. Pineapples come in various sizes and proportions, so feel free to modify the size of your crown or elongate the body according to your preference.
Step 5: Add Detail to the Leaves
To enhance the realism of your pineapple, add more details to the leaves. Draw smaller "V" shapes along the edges of the larger ones. This will create a layered effect and make the leaves appear more three-dimensional. You can also add some curved lines to show the veins on each leaf.
Step 6: Shade the Body
To give your pineapple a three-dimensional look, add some shading to the body. Start by determining the light source for your drawing. Imagine the light coming from a specific direction, which will create highlights and shadows. With this in mind, shade one side of each diamond to create shadows. Leave the other side lighter to represent the highlights.
Step 7: Refine and Adjust
Take a step back and observe your drawing as a whole. Now is the time to make any necessary refinements or adjustments. Erase any unwanted lines and clean up your drawing. Pay attention to the overall proportions and details to ensure a well-balanced and accurate representation of a pineapple.
Step 8: Optional Coloring
If you want to take your drawing to the next level, you can add color to your pineapple. Use yellow or golden-colored pencils or markers for the body and green for the leaves. Add darker shades to the shadows and lighter shades to the highlights to create depth. Experiment with different color combinations and techniques to achieve the desired effect.
Mistake Alert: A common mistake when drawing pineapples is making the body too smooth or evenly patterned, which can make your fruit look flat and artificial. This happens because it's tempting to draw perfect, repetitive diamond shapes or skip the subtle irregularities that give the pineapple its authentic texture. To avoid this, observe real pineapples closely—notice how the diamond pattern varies in size and angle, and how the "eyes" (the raised bumps) aren't perfectly aligned. Try sketching your guidelines lightly and then add slight variations to each segment, using curved lines and adjusting the spacing as you go. This approach will help your pineapple look more natural and three-dimensional, capturing the lively, organic feel of the real thing.
Conclusion
Congratulations! You have successfully learned how to draw a pineapple. By following these step-by-step instructions, you can create a realistic representation of this tropical fruit or even explore your own unique artistic style. Remember to practice regularly to refine your skills and develop your own artistic voice. So grab your pencil, paper, and unleash your creativity to create stunning pineapple drawings in no time!
Fun Facts About Pineapple
- Pineapples are native to South America and were first discovered by Europeans in 1493 during Christopher Columbus's voyage to the Caribbean.
- Despite their name, pineapples are not related to apples; they are actually a type of bromeliad.
- It takes about 18 to 24 months for a single pineapple to fully mature and be ready for harvest.
- Pineapples contain bromelain, an enzyme that can break down proteins and is sometimes used as a meat tenderizer.
- The pineapple became a symbol of hospitality in colonial America, often displayed at gatherings to welcome guests.
- Hawaii was once the world's leading producer of pineapples, but today most are grown in countries like Costa Rica, the Philippines, and Thailand.
- Pineapples do not continue to ripen after being picked, so they must be harvested at peak ripeness.
- The word "pineapple" in English was first recorded in 1398, originally referring to pine cones before being used for the fruit.
Suggestions for Scenes and Settings for Pineapple Drawings
- A pineapple lounging on a tropical beach, wearing sunglasses and surrounded by seashells and palm trees.
- A whimsical still life featuring a pineapple alongside other exotic fruits, with dramatic lighting and patterned tablecloths.
- A cartoon pineapple character hosting a summer pool party with fruit friends and festive decorations.
- A realistic pineapple nestled among lush jungle foliage, with sunlight filtering through the leaves.
- A pineapple being sliced open, revealing its juicy interior, with splashes and droplets for added energy.
- A pineapple as the centerpiece at a vibrant tropical banquet, surrounded by flowers and colorful drinks.
- A pineapple shaped hot air balloon floating over a scenic island landscape.
- A pineapple transformed into a cozy house, complete with windows, a door, and tiny garden gnomes.
- A close-up study focusing on the intricate patterns and textures of the pineapple's skin and crown.
- A pineapple being painted by another fruit, in a playful "still life within a still life" composition.