How to Draw a Perfect Star
Learn how to draw a perfect star step by step in this easy-to-follow tutorial. Create symmetrical stars with these clear and concise instructions.
Materials You'll Need
- Pencil
- Paper
- Eraser
Drawing a star may seem simple at first glance, but creating a perfectly proportioned and symmetrical star shape is a satisfying skill that can enhance your artistic repertoire. Stars are iconic symbols found everywhere—from holiday decorations to school projects, logos, and even in fine art. Learning how to draw a perfect star is not only a fun exercise, but it also helps develop your understanding of geometry, balance, and precision in drawing. Whether you want to design a striking piece of art or simply add some flair to your doodles, mastering this shape is a great place to start.
People of all ages and skill levels find stars enjoyable to draw because of their universal appeal and versatility. You might want to draw a star for a festive card, a classroom poster, or just to practice your line work and symmetry. In this tutorial, we'll explore how to draw a perfect star using easy-to-follow, step-by-step instructions. You'll learn techniques to ensure each point is even and every angle is just right, making your star stand out with crisp, clean lines. This lesson is suitable for beginners, but even experienced artists can appreciate refining their technique and achieving flawless results.
So, gather your pencil, ruler, eraser, and paper as we embark on this creative journey. Remember, drawing is about patience and practice, and with each attempt, your skills will improve. Don't worry if your first star isn't perfect—each step you take brings you closer to mastering how to draw a perfect star. Let's get started and watch your confidence grow with every line you draw!
Materials Required
Before we begin, make sure you have the following materials:
- A pencil
- A ruler
- Eraser
- Paper
Now that you have everything you need, let's learn how to draw a perfect star!
Step 1: Draw a Circle
Tip: To enhance your star-drawing skills, practice sketching the circle and dividing it into equal sections multiple times before committing to your final outline. Using a light hand with construction lines allows you to make quick adjustments, ensuring that the star's points are evenly spaced and symmetrical. This foundational step not only aids in accuracy but also boosts your confidence in achieving a polished look when you finalize your drawing.
To start, draw a circle on your paper. You can use a compass or trace around a circular object to create a perfect circle. This circle will serve as the foundation for your star.
Step 2: Divide the Circle
Next, divide the circle into equal sections. Start by drawing a horizontal line across the center of the circle, and then draw a vertical line perpendicular to the horizontal line. These lines will divide the circle into four equal sections.
Step 3: Add Diagonal Lines
To create the points of the star, draw diagonal lines connecting the opposite ends of each section. Start at the top of the circle and draw a line diagonally to the left, intersecting with the bottom right section. Repeat this process for each section, creating a total of five diagonal lines.
Step 4: Connect the Points
Now, connect the points where the diagonal lines intersect the circle. Start at the top of the circle and draw a straight line to the point where the first diagonal line intersects the circle. Repeat this process for each diagonal line, connecting the points to form the outline of the star.
Step 5: Refine the Shape
Take a moment to evaluate the shape of your star. If any lines are not symmetrical or do not meet correctly, make small adjustments as needed. Use your ruler and eraser to refine the shape until you are satisfied with the proportions and symmetry of the star.
Step 6: Add Details
Once you have the basic outline of the star, you can add additional details to make it more visually appealing. Consider adding smaller, curved lines within the star to give it a more intricate look. Experiment with different patterns and designs to make your star unique.
Step 7: Darken the Lines
Now that you are happy with the shape and details of your star, carefully darken the lines using your pencil. Start from one point of the star and work your way around, following the outline. Apply a consistent amount of pressure to create bold, defined lines.
Step 8: Erase the Guidelines
Lastly, erase any remaining guidelines that you drew in the earlier steps. Be careful not to smudge or erase any of the darkened lines. Use your eraser to gently remove the pencil marks, leaving behind a clean and polished star.
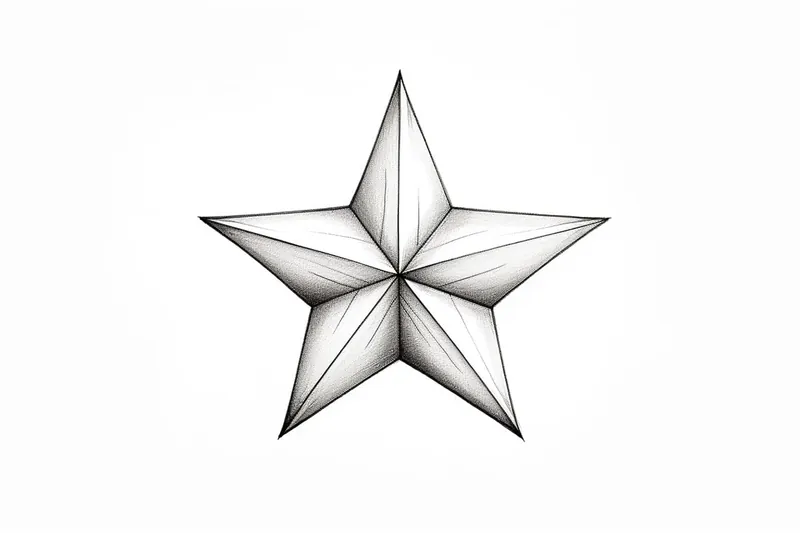
Congratulations! You have successfully drawn a perfect star! With practice, you will become more comfortable and confident in creating stars of different sizes and styles.
Mistake Alert: A frequent stumbling block when drawing a perfect star is uneven spacing between the star's points, which often happens when artists try to freehand each line without guiding marks. This can lead to lopsided shapes where some points look much longer or shorter than others, throwing off the star's symmetry. To avoid this, lightly sketch a circle first as a guide, and use a protractor or divide the circumference into five equal segments before connecting the points. Taking the time to map out these guidelines ensures each arm of your star radiates evenly from the center, resulting in a much more balanced and satisfying final shape. Don't be afraid to use plenty of light construction lines—they'll set you up for crisp, confident outlines when you're ready to finalize your star!
Conclusion
In this tutorial, we have learned how to draw a perfect star step by step. Drawing a symmetrical star may seem challenging at first, but with the right techniques and practice, you can achieve great results. Remember to be patient and take your time during each step. By following these instructions and refining your skills, you will soon be able to create stunning stars in your artwork.
So grab your pencil and paper, and start drawing your perfect star today!
Fun Facts About Stars
- The classic five-pointed pentagram has been used as a symbol for thousands of years in cultures around the world.
- Drawing a perfect star involves precise geometric angles, with each point of a regular five-pointed star separated by exactly 72 degrees.
- Stars are a common motif in national flags, with over 60 countries featuring at least one star.
- The pentagram was used by ancient Greeks as a symbol of mathematical perfection and the golden ratio.
- Perfect stars are not only artistic but also mathematical, as they can be constructed using only a compass and straightedge.
- In heraldry, a perfect star is called a mullet and can have different numbers of points.
- The five-pointed star is a symbol of excellence and achievement, commonly used in awards and ratings.
- Perfect stars are often used in geometry lessons to teach about symmetry, angles, and polygons.
Suggestions for Scenes and Settings for Perfect Star Drawings
- Draw a perfect star as the centerpiece of a night sky filled with swirling galaxies and shimmering constellations.
- Design a festive holiday card featuring a large, symmetrical star surrounded by twinkling lights and ornaments.
- Create a motivational poster with a perfect star at the center and inspirational words radiating from each point.
- Illustrate a scene where a child is reaching up to catch a perfect star falling from the sky.
- Draw a row of perfectly aligned stars as part of a school achievement chart or classroom display.
- Use a perfect star as the focal point in a geometric mandala or abstract art composition.
- Imagine a magical forest where perfect stars hang from the branches of ancient trees like glowing lanterns.
- Incorporate a perfect star into a logo design for a fictional company or sports team.
- Draw a star shaped window through which you can see a dreamy landscape or outer space adventure.
- Decorate the border of a certificate or award with repeating patterns of perfect stars.