How to Draw a Norfolk Terrier
Learn how to draw a Norfolk Terrier in a step-by-step tutorial. Capture the adorable features of this lovable breed with clear instructions and helpful tips.
Materials You'll Need
- Pencil
- Paper
- Eraser
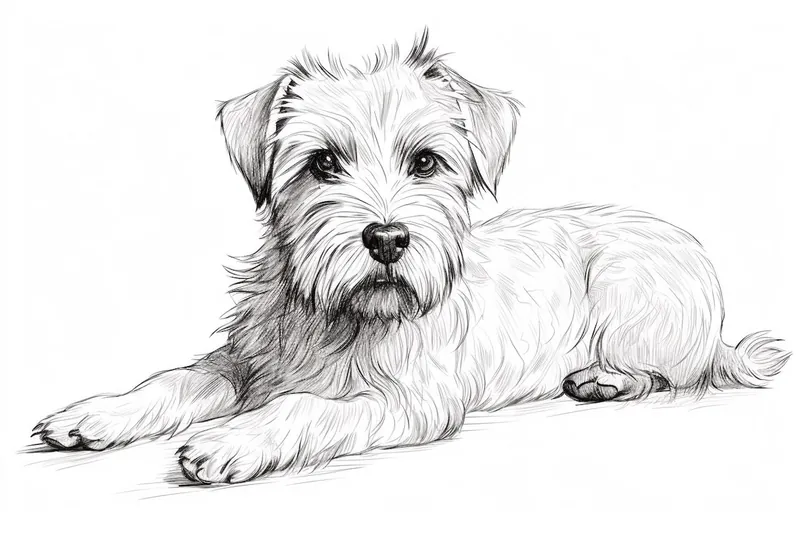
The Norfolk Terrier is a small, spirited breed known for its expressive eyes, wiry coat, and friendly personality. Recognized for their compact build and alert expression, Norfolk Terriers make delightful companions and are beloved by dog enthusiasts for their affectionate nature and playful energy. Their distinctive features—such as their tousled fur, perky ears, and endearing face—make them a wonderful subject for artists who want to capture the charm and character of this lovable breed on paper.
If you've ever admired the unique look of this breed or simply love drawing dogs, learning how to draw a Norfolk Terrier can be both a fun and rewarding experience. This tutorial is designed for artists of all skill levels, from beginners eager to practice basic shapes and textures, to more advanced artists looking to refine their techniques for drawing fur and portraying personality. Along the way, you'll discover tips for sketching accurate proportions, creating lifelike fur textures, and bringing out the lively spirit that makes Norfolk Terriers so special.
Don't worry if you're new to drawing or working with animal subjects—this guide will break down each step in a clear and approachable way. With a bit of patience and creativity, you'll be able to create a charming and realistic Norfolk Terrier portrait that you can be proud of. So, gather your drawing supplies, follow along, and most importantly, have fun as you bring this delightful dog to life on your page!
Materials Required
To successfully complete this drawing, you will need the following materials:
- Drawing paper
- Pencils (HB and 2B)
- Eraser
- Blending stump (optional)
- Reference photo of a Norfolk Terrier for guidance
Step 1: Sketch the Basic Shapes
To begin, lightly sketch the basic shapes that make up the Norfolk Terrier. Start with an oval for the head, a larger oval for the body, and circles for the limbs.
Step 2: Define the Head
Using the initial oval as a guide, start adding more details to define the shape of the head. Draw the ears, which are triangular and pointy, on either side of the head. Add small curves to indicate where the eyes and nose will be located.
Step 3: Add the Facial Features
Refine the facial features by drawing the eyes, nose, and mouth. Norfolk Terriers have round, expressive eyes, a small triangular nose, and a cute smile. Pay close attention to the placement and proportions of these features to capture the breed accurately.
Step 4: Outline the Body
Next, move on to outlining the body of the Norfolk Terrier. Start from the neck and work your way down to the tail. Pay attention to the breed's specific body structure, which is compact and muscular. Add small curves to represent the legs and paws.
Step 5: Define the Fur
Norfolk Terriers have a thick double coat, so it's important to capture the texture of their fur. Use short, overlapping strokes to create the appearance of fur on the body, while leaving the face smoother and more detailed. This will help to create a sense of realism in your drawing.
Step 6: Refine the Details
Now that the basic structure of the Norfolk Terrier is complete, it's time to focus on refining the details. Pay close attention to the shape and size of the ears, the placement of the eyes, and the texture of the fur. Use your reference photo as a guide to ensure accuracy.
Step 7: Shade and Add Depth
To add depth to your drawing, start shading the darker areas of the Norfolk Terrier. Use your 2B pencil to create shadows on the body, face, and around the eyes. Gradually build up the shading, using a combination of hatching and cross-hatching techniques to create a sense of volume and texture.
Step 8: Blend and Smoothen
If you have a blending stump, use it to blend the shaded areas and create a softer transition between light and dark. This will help to achieve a more realistic appearance. Be careful not to overblend, as you still want to maintain the texture and definition of the fur.
Step 9: Final Touches
Before finalizing your drawing, take a step back and assess it for any areas that require adjustment. Pay attention to the overall proportions, the positioning of the features, and the level of detail. Make any necessary corrections using your eraser and pencil to achieve the desired result.
Tip: When drawing a Norfolk Terrier, pay close attention to the direction and layering of the fur—start by sketching the main shapes lightly, then use short, overlapping pencil strokes to mimic the wiry, tousled texture of their coat, especially around the muzzle and ears. A kneaded eraser can help lift out highlights along the fur to add realism and dimension. Focus on the eyes early in your process, as their expressive, round shape is key to capturing the breed's spirited personality. For extra depth, use a slightly darker pencil to define the shadows beneath the chin and around the ears, which will make your terrier pop off the page.
Conclusion
Congratulations! You have now successfully drawn a Norfolk Terrier. By following the step-by-step instructions in this guide, you've learned how to capture this adorable breed's unique characteristics and charm. Remember to practice regularly to improve your skills; don't be afraid to experiment with different techniques. Happy drawing!
Fun Facts About Norfolk Terrier
- The Norfolk Terrier is one of the smallest working terriers, standing only about 9 to 10 inches tall at the shoulder.
- This breed is known for its distinctive folded, or "dropped," ears, which set it apart from the similar Norwich Terrier.
- Norfolk Terriers were originally bred to hunt vermin and small rodents on farms in England.
- Despite their small size, Norfolk Terriers are fearless and have a big-dog attitude.
- The breed is known for its wiry, weather-resistant double coat, which requires regular grooming.
- Norfolk Terriers are highly social and thrive on companionship, making them excellent family pets.
- They are intelligent and quick learners, but their independent streak can make training a fun challenge.
- The breed was officially recognized by the American Kennel Club in 1979.
- Norfolk Terriers are known for their expressive, dark eyes that give them a lively and intelligent appearance.
Suggestions for Scenes and Settings for Norfolk Terrier Drawings
- A Norfolk Terrier joyfully digging in a garden, dirt flying and nose to the ground.
- The terrier perched on a cozy window seat, gazing curiously at birds outside.
- A playful Norfolk Terrier bounding through autumn leaves in a park.
- The dog snuggled up in a soft blanket, its expressive eyes peeking out.
- A Norfolk Terrier sporting a jaunty bandana, ready for an outdoor adventure.
- The terrier trotting along a sandy beach, wet paws and wind-tousled fur.
- A lively scene of the Norfolk Terrier playing fetch with a favorite toy in a backyard.
- The breed sitting attentively beside a pair of muddy boots after a countryside walk.
- A peaceful portrait of the Norfolk Terrier resting in a patch of sunlight on the floor.
- The terrier interacting with another animal friend, such as a cat or another dog, showcasing its friendly nature.