How to Draw a Nest
Learn how to draw a nest step-by-step with these easy-to-follow drawing instructions. Perfect for aspiring artists and beginners.
Materials You'll Need
- Pencil
- Paper
- Eraser
Nests are one of nature's most fascinating creations, woven together with care and ingenuity by birds to provide a safe haven for their eggs and young. Each nest is unique, reflecting not only the species that built it but also the environment in which it was constructed. Learning how to draw a nest allows you to capture the intricate beauty and structure of these natural wonders, making it an excellent subject for artists who appreciate both the delicate and the detailed aspects of the natural world. Whether you're inspired by the symbolism of nests—representing home, safety, and new beginnings—or simply attracted to their organic shapes and textures, drawing a nest can be a rewarding and meditative experience.
Tackling how to draw a nest is a great way to practice observational skills and texture techniques, as you'll need to pay attention to overlapping twigs, gentle curves, and the subtle shadows that give the nest its volume and depth. This tutorial is designed for artists of all levels, from beginners eager to try their hand at natural subjects, to more experienced creators looking to refine their detail work. Using simple materials and step-by-step instructions, you'll learn how to break down the complex appearance of a nest into manageable parts, gradually building up a realistic and engaging drawing.
Don't worry if you're new to drawing or if you've never tried capturing such intricate textures before—every artist starts somewhere, and practice makes perfect. Gather your materials, follow along, and most importantly, have fun with the process. By the end of this tutorial, you'll not only know how to draw a nest, but you'll also have gained valuable skills that you can apply to many other natural subjects. Let's get started and let your creativity take flight!
Materials Required
To draw a nest, you will need the following materials:
- Paper: Choose a high-quality drawing paper that is suitable for your preferred drawing medium.
- Pencils: A set of graphite pencils ranging from 2H to 6B will be ideal for shading and adding detail.
- Eraser: Have a good quality eraser handy to correct any mistakes or lighten areas.
- Sharpener: Keep a sharpener nearby to maintain a fine point on your pencils.
- Reference Image: Find a clear image of a nest for inspiration and guidance.
- Optional: Colored pencils or watercolors if you wish to add color to your drawing.
Now that you have gathered your materials, let's begin the step-by-step process of drawing a nest.
Step 1: Basic Outline
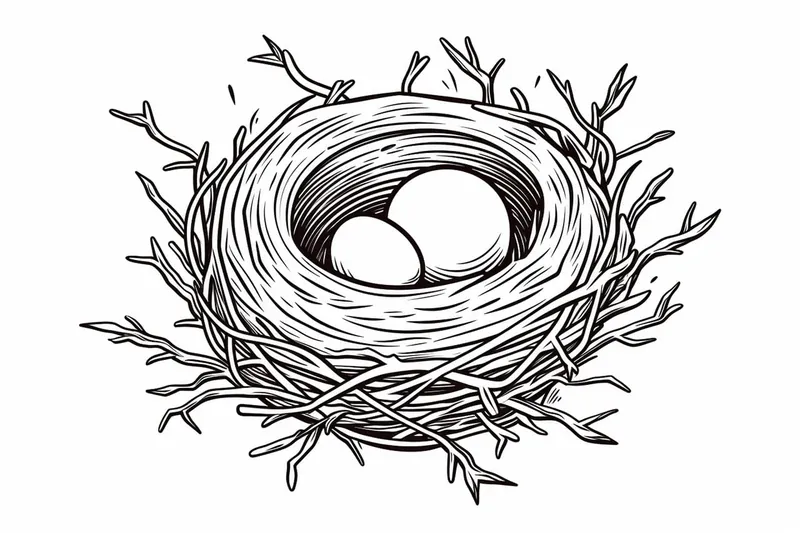
Start by lightly sketching a circular shape on your paper to represent the base of the nest. Nests are rarely perfectly circular, so don't worry about creating a perfect shape. Add a couple of curved lines around the circle to indicate the inner structure of the nest.
Step 2: Weaving the Nest
Next, start adding crisscrossing lines within the circular shape to create a woven texture. These lines should follow the curve of the circle, as nests are usually built in a rounded shape. Vary the thickness of the lines to make the nest look more realistic. Keep the lines loose and uneven, as nests are not perfectly symmetrical.
Step 3: Adding Depth
To give your nest drawing depth, darken the areas where the lines overlap or cross over each other. This will create shadows and make the nesting material stand out. Use a softer pencil, such as a 4B or 6B, to achieve a richer tone.
Step 4: Texture and Details
Nests are made from various natural materials such as twigs, leaves, and grass. Add these details by sketching small, irregular shapes to represent twigs and other materials. Pay attention to the placement and direction of these elements to create a realistic texture. Vary the size and angle of the twigs to add interest to your drawing.
Step 5: Inner Structure
Inside the nest, birds often line the interior with softer materials such as feathers, moss, or fur. Depict this inner structure by adding a few curved lines representing the softer materials. Use a lighter touch and a softer pencil to create a contrast with the outer structure of the nest.
Step 6: Nesting Material
To make your nest drawing appear more realistic, add shading and texture to the nesting materials. Use hatching and cross-hatching techniques with your pencil to create the illusion of different textures. Darken areas where the materials overlap to create depth and shadows. Take your time with this step, as the details will enhance the overall realism of your drawing.
Step 7: Final Touches
Review your drawing and make any necessary adjustments or refinements. Clean up any stray lines or smudges with an eraser. If you wish to add color to your nest, use colored pencils or watercolors to bring your drawing to life. Experiment with different color combinations to achieve the desired effect.
Tip: When drawing a nest, use a sharp pencil or fine-tipped pen to capture the intricate layering of twigs and grasses—start by lightly sketching a loose, circular base to establish the overall shape, then build up overlapping lines in different directions to mimic the organic tangle of materials. Vary the pressure and angle of your strokes to create a sense of depth and randomness, just as real nests are never perfectly uniform. For added realism, occasionally break up the smooth lines with short, jagged marks to suggest snapped twigs or rough textures. Don't forget to leave some gaps and negative spaces between the lines, as these small openings help the nest look airy and natural rather than solid or overworked.
Conclusion
Congratulations! You have successfully learned how to draw a nest. By following these step-by-step instructions and adding your own creative touches, you have created a beautiful artwork. Drawing nests can be challenging but also incredibly rewarding. Practice regularly and experiment with different techniques to further develop your artistic skills.
Remember, every artist's journey starts with a simple step. So grab your pencils, paper, and reference image, and start creating your nest drawing today!
Fun Facts About Nests
- Some birds, like the weaverbird, create intricate nests by weaving grass and twigs together, showcasing remarkable engineering skills.
- The largest bird nest ever recorded was built by a bald eagle in Florida, measuring over 9 feet wide and weighing nearly 2 tons.
- Not all birds build nests—some, like the common murre, lay their eggs directly on bare rock ledges.
- Many birds use unusual materials in their nests, including spider silk, animal fur, and even human-made items like string or plastic.
- Some species, such as the megapode, build massive mound nests that use heat from decomposing vegetation to incubate their eggs.
- Swallows often build their nests out of mud, attaching them to vertical surfaces like cliffs or buildings.
- Hummingbirds construct tiny, cup-shaped nests using plant down, spider webs, and lichen, making them both strong and flexible.
- Some birds, like the cuckoo, are brood parasites and lay their eggs in the nests of other species, leaving the host birds to raise their young.
Suggestions for Scenes and Settings for Nest Drawings
- A close-up of a nest cradled in the fork of a blossoming tree branch in springtime, with delicate petals surrounding it.
- A nest built on a rocky cliff edge, overlooking a sweeping landscape or ocean, with wind-blown grasses nearby.
- A hidden nest among thick ferns and undergrowth on a forest floor, bathed in soft, dappled sunlight.
- A nest woven from unusual materials—like colorful ribbons, strings, or bits of paper—found in an urban park.
- A group of tiny hatchlings peering out from a nest lined with feathers and moss, with a parent bird nearby.
- A nest nestled in the crook of a weathered fence post or abandoned mailbox in a countryside setting.
- A winter scene featuring a snow-dusted empty nest, highlighting the textures of twigs and frozen leaves.
- A nest suspended from a tree by a weaving bird, such as an oriole, with the builder in action.
- An imaginative or fantastical nest, perhaps made of glowing crystals, seashells, or otherworldly materials.
- A serene pond scene with a waterbird's nest floating among lily pads and reeds, reflecting in the water.