How to Draw a Minion
Learn how to draw a minion with this step-by-step tutorial. Follow the instructions and create your own adorable minion character. Perfect for beginners and aspiring artists!
Materials You'll Need
- Pencil
- Paper
- Eraser
Welcome to this detailed step-by-step tutorial on how to draw a minion! Minions are instantly recognizable characters from the hugely popular "Despicable Me" franchise, adored by audiences of all ages for their playful antics, unique language, and endearing personalities. With their bright yellow bodies, big expressive eyes, and signature blue overalls, minions have captured the hearts of millions and become a favorite subject for both artists and fans alike. Drawing a minion not only allows you to celebrate these delightful characters, but also offers a fun way to practice your artistic skills.
There are many reasons you might want to learn how to draw a minion. Perhaps you're a fan of the movies, looking to create your own minion-themed artwork, or searching for a creative project to share with friends or children. Drawing minions can be a fantastic way to personalize greeting cards, posters, or school projects, and it's also a great way to explore character design and simple cartoon anatomy.
This tutorial is designed to be accessible to artists of all skill levels. If you're a beginner, you'll find that minions are made up of basic geometric shapes and straightforward lines, making them an ideal character to start with. For those with more experience, you'll have the opportunity to experiment with facial expressions, poses, and even try your hand at shading and coloring techniques to bring extra life and personality to your minion. Throughout the lesson, we'll break down each step, so you'll gain confidence in sketching and refining your drawing as you go along.
Whether you're drawing for fun, for a loved one, or simply to improve your skills, you're in the right place to discover how to draw a minion from start to finish. So gather your drawing materials, get comfortable, and let's embark on this creative adventure together. Remember, the most important thing is to enjoy the process and let your creativity shine—your minion will be as unique as you are!
Materials Required
Before we begin, make sure you have the following materials at hand:
- Drawing paper: Choose a smooth and sturdy paper that is suitable for sketching and shading.
- Pencils: Have a range of pencils with different lead grades, such as HB, 2B, and 4B.
- Eraser: A soft eraser will be helpful for fixing any mistakes along the way.
- Fine-tip black pen: This will be used for adding details and outlines.
- Colored pencils or markers (optional): If you want to add color to your minion drawing, have some colored pencils or markers ready.
Now that you have your materials ready, let's start creating our minion!
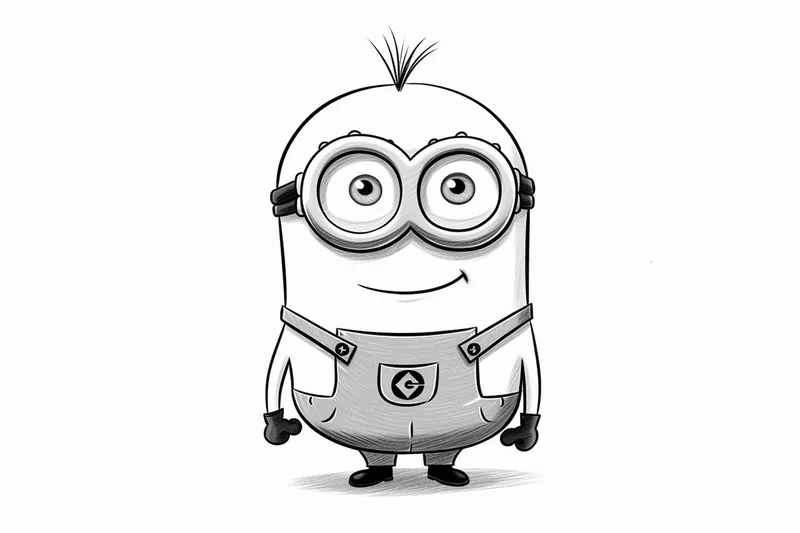
Step 1: Draw a Basic Shape
Begin by drawing a large oval shape in the center of your paper. This will be the body of the minion. Try to make it slightly taller than it is wide, as minions have a distinctive shape.
Step 2: Add Goggles
On the upper part of the oval shape, draw a slightly curved horizontal line. This will serve as the band for the minion's goggles. Next, draw two circles within the oval shape, one on each side of the head, to represent the eye sockets.
Step 3: Draw Eyes
Inside each eye socket, draw two smaller circles, leaving a small gap between them. These will be the minion's eyes. Add a small dot in the middle of each circle to represent the pupils.
Step 4: Define the Mouth
Just below the eyes, draw a curved line to form the minion's mouth. This line should curve upward at each end, creating a smiley face expression.
Step 5: Draw the Straps
Extend two straight lines from the goggles' band on each side of the head. These lines will form the straps that hold the goggles in place.
Step 6: Create the Overall Shape
Below the body, draw a rectangular shape. This will be the overall that the minion wears. Make sure it extends slightly beyond the sides of the body and reaches down to the feet.
Step 7: Add the Arms and Hands
Begin by drawing two long, slightly curved lines extending from the shoulders to the sides of the body. These will serve as the minion's arms. At the end of each arm, draw a circle shape to represent the hands.
Step 8: Draw the Feet
Tip: As you draw your minion, don't be afraid to personalize your character by experimenting with different expressions and accessories; this can elevate your artwork and make it more unique. Consider adding fun details like a quirky hairstyle or a specific outfit that reflects a unique personality trait, which can also help you practice character design and storytelling through art.
At the bottom of the overall shape, draw two small rectangular shapes slightly angled outward. These will be the minion's feet.
Step 9: Add the Minion's Hair
On top of the head, draw small curved lines in various directions to create the minion's unique hairstyle. Minions often have short, messy hair that adds to their playful appearance.
Step 10: Refine the Outline
Go over your pencil lines with a fine-tip black pen to add more definition to your drawing. Trace over the main features, such as the body, goggles, eyes, mouth, straps, overall, arms, feet, and hair. Use short, confident strokes to achieve a clean and crisp outline.
Step 11: Erase Guidelines
Carefully erase any remaining pencil guidelines and stray marks on your drawing. Take your time and use a gentle touch to avoid smudging the pen lines.
Step 12: Optional - Add Color
If you want to add color to your minion, grab your colored pencils or markers and have fun! Minions are typically yellow, so start by coloring the body in a sunny shade. Add blue to the straps and goggles, and mix in some gray for the overall. You can also experiment with different colors for the hair and eye color.
Challenge: Once you've mastered drawing a classic minion, try creating your own original minion character with a unique personality and occupation! Imagine what kind of gadgets, costumes, or accessories your new minion might have—maybe they're a chef, a scientist, or even a superhero. Place your custom minion in a fun scene, like a laboratory full of inventions or a busy minion workplace, and think about how their pose and facial expression can tell a story. This is a great exercise for stretching your creativity, practicing character design, and experimenting with dynamic compositions—all while having a blast with these lovable characters.
Conclusion
Congratulations! You have successfully learned how to draw a minion. By following these step-by-step instructions, you can create your very own adorable minion character. Remember to have fun, be patient, and keep practicing. Soon, you'll be able to draw minions with ease and even add your own creative twist to them. Enjoy your newfound drawing skills and keep exploring the wonderful world of art!
Fun Facts About Minions
- Minions first appeared in the 2010 animated film Despicable Me.
- Their unique language, called Minionese, is a playful mix of various languages and gibberish.
- Minions are known for their bright yellow color and signature blue overalls, making them instantly recognizable worldwide.
- Each minion has a different number of eyes—some have one, while others have two, as detailed on Mental Floss.
- The voice of all the minions is performed by co-director Pierre Coffin.
- Minions have become so popular that they received their own spin-off movie, Minions, released in 2015.
- Their favorite food is bananas, a running joke throughout the franchise.
- Minions are designed to be nearly indestructible, surviving explosions and other cartoonish mishaps.
- There are hundreds of minions, but the most famous ones are Kevin, Stuart, and Bob.
- The Minions' design was inspired by Jawas from Star Wars and Oompa Loompas from Willy Wonka and the Chocolate Factory.
- Evil Minions are purple because purple is the opposite color of yellow on the color spectrum.
- Minions have three fingers on each hand and can survive in outer space without oxygen.
Suggestions for Scenes and Settings for Minion Drawings
- A minion baking cookies in a messy kitchen, covered in flour and chocolate chips.
- A superhero minion flying over a bustling city, wearing a cape and mask.
- A group of minions having a picnic in a sunny park with bananas and fun games.
- A minion dressed as a pirate, searching for treasure on a tropical island.
- A scientist minion in a laboratory, mixing colorful potions and causing a funny explosion.
- A minion building a snowman or sledding down a snowy hill in winter gear.
- A minion DJing at a lively dance party, spinning records and wearing headphones.
- A minion exploring outer space in an astronaut suit, floating near a rocket ship.
- A minion painting a masterpiece on a giant canvas, splashing paint everywhere.
- A minion on a jungle adventure, swinging on vines and discovering exotic animals.