How to Draw a Milkshake
Learn how to draw a mouth-watering milkshake with this step-by-step tutorial. Follow along and create your own delicious-looking masterpiece.
Materials You'll Need
- Pencil
- Paper
- Eraser
Drawing a milkshake is a delightful way to combine creativity with a touch of whimsy, making it a perfect subject for artists of all skill levels. Milkshakes, with their creamy texture, swirled toppings, and playful garnishes like straws and cherries, offer a fantastic opportunity to practice capturing both shape and detail. Whether you're aiming to create a realistic depiction or a charming cartoon-style illustration, learning how to draw a milkshake can expand your artistic repertoire and help sharpen your observational skills.
Many people are drawn to sketching food and beverages because they evoke a sense of nostalgia and comfort, and milkshakes are no exception. They represent a classic treat that is both visually appealing and fun to illustrate. This tutorial is designed to guide you through the process step-by-step, using simple techniques that make the drawing approachable for beginners while still offering enough detail and nuance to engage more experienced artists. You'll learn how to create smooth curves, add highlights for a glossy effect, and carefully render the layered elements that make milkshakes so distinctive.
Whether you are new to drawing or looking to improve your skills, this guide on how to draw a milkshake will inspire you to experiment with shading, proportions, and textures. So, gather your pencils and paper, and get ready to create a deliciously fun piece of art that you can be proud of. Remember, every great artist started with simple shapes and lines—this is your chance to bring a tasty favorite to life on the page!
Materials Required
Here are the materials you will need to complete this drawing:
- A pencil: You can use any type of drawing pencil, but a regular HB pencil should work fine.
- Paper: Choose a smooth, white drawing paper that is suitable for pencil drawings.
- Eraser: You'll need an eraser to correct any mistakes or make adjustments to your drawing.
- Colored pencils or markers (optional): These can be used to add color to your milkshake drawing, but they are not necessary.
Now that you have your materials ready, let's begin creating a mouth-watering milkshake drawing!
Step 1: Sketch the Glass
Tip: As you draw your milkshake, consider using reference images to visualize the textures and colors better, especially for details like the whipped cream and highlights on the glass. Observing real-life milkshakes or photographs can provide inspiration and help you capture the playful aspects of your drawing more vividly, enhancing both realism and creativity in your artwork.
To start, lightly sketch the outline of the glass that will hold the milkshake. Begin by drawing a vertical line that represents the middle of the glass. Then, draw two curved lines on either side of the vertical line to create the shape of the glass. Make sure the top and bottom of the glass are slightly wider than the middle.
Step 2: Add the Base
Next, draw the base of the glass. Draw a horizontal line at the bottom of the glass shape to create the base. Make the base slightly wider than the glass.
Step 3: Draw the Straw
Now, let's add the straw to our milkshake drawing. Start by drawing a thin rectangle shape coming out of the top of the glass. This will represent the straw. You can make the straw as long or short as you'd like. Feel free to add some curves or bends to make it look more natural.
Step 4: Outline the Milkshake
To complete the milkshake shape, draw a curved line around the glass and the straw, connecting them together. This will create the outline of the milkshake. Make the line slightly wavy to give the milkshake a more realistic appearance.
Step 5: Add Details
Now it's time to add some delicious details to our milkshake drawing. Start by drawing a circle shape at the top of the glass, which represents the whipped cream. You can make the whipped cream as big or small as you'd like. Add some swirls or peaks to make it look fluffy.
Next, draw a cherry on top of the whipped cream. Draw a small circle shape and add a stem coming out of it. Place the cherry slightly off-center to make it look more natural.
Step 6: Shade the Glass
To give the glass some dimension, let's add some shading. Start by shading the area below the milkshake outline. Use light, horizontal strokes to create a gradient effect from darker at the bottom to lighter at the top. This will give the glass a transparent appearance.
Step 7: Shade the Milkshake
Now, let's add some shading to the milkshake itself. Start by shading the bottom part of the milkshake using light, circular motions. Gradually darken the shading as you move towards the bottom of the milkshake. This will create the illusion of depth and make the milkshake look more realistic.
Step 8: Add Shadows and Highlights
To make our milkshake drawing even more realistic, let's add some shadows and highlights. Shade the side of the glass opposite the light source to create a shadow. Use light, diagonal strokes to indicate the shadows. Add some highlights to the glass and whipped cream by leaving some areas unshaded. This will create a sense of reflection and shine.
Step 9: Optional - Add Color
If you'd like to add some color to your milkshake drawing, now is the time to do it. Use colored pencils or markers to add hues to the whipped cream, cherry, and any other elements you'd like to highlight. Experiment with different colors to make your milkshake look even more delicious!
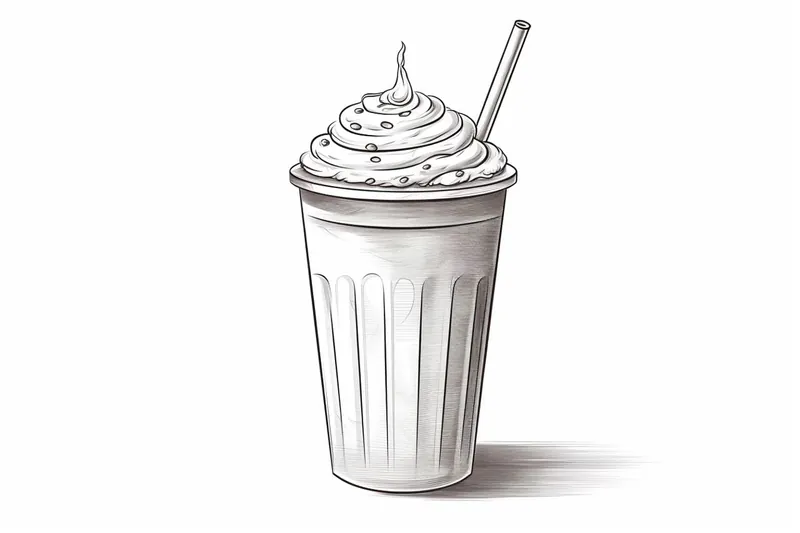
And there you have it, a mouth-watering milkshake drawing that looks good enough to drink!
Conclusion
Drawing a milkshake can be a fun and creative way to practice your artistic skills. By following these step-by-step instructions, you can create a realistic and appetizing milkshake drawing. Remember to take your time, be patient, and have fun throughout the process. I hope you enjoy creating your own milkshake masterpiece!
Fun Facts About Milkshakes
- The first milkshake was made in the late 19th century and originally contained whiskey, making it an alcoholic drink.
- Milkshakes became popular in soda fountains in the early 20th century as a sweet, creamy treat.
- The classic milkshake is made with ice cream, milk, and flavoring, but modern versions include a variety of ingredients like fruit, candy, and even vegetables.
- In 2019, the world's largest milkshake was made in the United States, weighing over 2,000 pounds.
- Milkshakes are often served with whipped cream and a cherry on top, a tradition that dates back to the 1930s.
- The term "milkshake" was first used in print in 1885, originally describing a whiskey-based drink.
- Milkshakes are a popular subject in pop culture, often symbolizing nostalgia and classic American diners.
Suggestions for Scenes and Settings for Milkshake Drawings
- A retro 1950s diner scene with a classic milkshake on a chrome counter, surrounded by checkered floors and neon signs.
- A cozy picnic setting in a sunny park, featuring a milkshake with fresh fruit garnishes and a striped straw nestled among a blanket and basket.
- A whimsical cartoon-style milkshake character with eyes, arms, and a smile, holding a tiny umbrella on a tropical beach background.
- A close-up view of a milkshake being poured into a tall glass, capturing the creamy texture and swirling motion of the liquid.
- A festive party table with colorful milkshakes topped with whipped cream, sprinkles, cherries, and party hats on the cups.
- A milkshake integrated into a fantasy world, such as a castle made of whipped cream and candy straws, with miniature knights and dragons.
- A cozy café interior with a milkshake placed beside a book and steaming cup of coffee on a wooden table by a window.
- A summery outdoor scene with a milkshake sitting on a picnic table next to sunglasses, sunscreen, and blooming flowers.
- A dynamic action shot of a milkshake being enjoyed on a sunny boardwalk, with rollercoasters and carnival rides in the background.
- An artistic still life composition featuring a milkshake surrounded by complementary objects like vintage spoons, napkins, and fruit slices on a textured cloth.