How to Draw a Masculine Body
Learn how to draw a masculine body step-by-step with this clear and concise guide. Improve your drawing skills and create realistic representations of the male form.
Materials You'll Need
- Pencil
- Paper
- Eraser
Drawing the human form has captivated artists for centuries, with the masculine body often serving as a symbol of strength, movement, and anatomical precision. Understanding the structure and proportions of the male physique is not only essential for figure drawing, but it is also invaluable for creating dynamic characters in comics, animation, or fine art. In this tutorial, we will break down each step so you can learn how to draw a masculine body with confidence, focusing on muscle groups, posture, and realistic proportions that define the male form.
Whether you are a complete beginner looking to master basic anatomy or an experienced artist aiming to refine your figure drawing skills, learning how to draw a masculine body can greatly enhance your portfolio. This subject is particularly useful for those interested in character design, storytelling, and portraiture, as it allows you to capture emotion and power through the human figure. We'll cover fundamental techniques such as gesture drawing, mapping out basic shapes, and gradually adding detail to create a lifelike and expressive result.
Don't worry if it feels challenging at first—drawing the human body takes practice and patience. Remember, every artist started with simple lines and rough sketches before progressing to more complex forms. By following this guide, you'll gain a deeper understanding of anatomy and build the skills necessary to draw convincing and dynamic male figures. So grab your sketchbook, keep an open mind, and let's embark on the exciting journey of learning how to draw a masculine body together!
Materials Required
Before we begin, let's make sure you have all the materials you'll need:
- Sketchbook or drawing paper
- Pencils of various hardness (2H, HB, 2B, 4B, 6B, etc.)
- Eraser (kneaded or vinyl eraser)
- Pencil sharpener
- Ruler
- Optional: Colored pencils or markers for adding depth and shading
Now that we have everything we need, let's dive into the process of drawing a masculine body.
Step 1: Establish the Pose
Start by determining the pose and gesture of your figure. Consider the action or emotion you want to convey through your drawing. Draw a simple stick figure to establish the basic pose and proportion of the body. Pay attention to the angles and lines of the pose, as they will serve as the foundation for the rest of your drawing.
Step 2: Block In the Torso
Tip: To enhance your figure drawing skills, frequently practice gesture drawing, which focuses on capturing the essence and movement of the body quickly and loosely. This technique helps you develop a better understanding of proportion, balance, and the natural flow of the masculine form. Set a timer for just a few minutes per sketch to encourage spontaneity and reduce the pressure to create a perfect drawing, allowing you to build confidence and improve your overall accuracy over time.
Using simple geometric shapes, block in the torso. Start with a rectangular shape for the ribcage and a cylindrical shape for the abdomen. Connect the two shapes with a curved line to suggest the waist. Adjust the size and proportions as necessary, keeping in mind that a masculine body tends to have broader shoulders and a narrower waist compared to a feminine body.
Step 3: Add the Head and Neck
Draw a circle or oval shape to represent the head. Use construction lines to indicate the center and the angle of the head. Add a curved line to connect the head to the torso, forming the neck. Keep the neck strong and muscular, but avoid making it too bulky.
Step 4: Sketch the Arms
Starting from the shoulder joint, sketch the upper arm as a cylinder. Gradually taper the cylinder towards the elbow and then further towards the wrist for the lower arm. Add circles or ovals for the joints, and use straight lines to indicate the direction of the bones. Remember to keep the muscles in mind and add volume accordingly.
Step 5: Outline the Hands
Draw the hands by sketching basic shapes for the palm and fingers. Pay attention to the proportions and angles of the fingers, keeping in mind that the fingers of a masculine hand are typically broader and less delicate than those of a feminine hand. Refine the shapes and add details like knuckles and fingernails.
Step 6: Establish the Legs
Starting from the hip joint, sketch the upper leg as a cylinder. Gradually taper the cylinder towards the knee and then further towards the ankle for the lower leg. Add circles or ovals for the joints, and use straight lines to indicate the direction of the bones. Pay attention to the muscles and add volume accordingly.
Step 7: Outline the Feet
Draw the feet by sketching basic shapes for the sole and toes. Again, pay attention to the proportions and angles of the toes, keeping in mind that a masculine foot tends to be larger and broader compared to a feminine foot. Refine the shapes and add details like the arch of the foot and the ankle bone.
Step 8: Refine and Add Details
Now that you have the basic structure of the masculine body sketched out, it's time to refine and add details. Pay close attention to the natural curves and contours of the body. Study reference images or observe your own body to understand how the muscles and bones interact and create various shapes. Add shading and highlights to give your drawing depth and dimension.
Mistake Alert: A common mistake when drawing the masculine body is making the torso and shoulders too boxy or rigid, which can result in stiff, unnatural poses. This often happens because beginners focus on copying the outline of muscles instead of considering the underlying structure and flow of the body. To avoid this, start with a loose gesture sketch that captures the movement and tilt of the torso before adding muscle detail. Remember, the ribcage is an oval shape that twists and bends with the spine, and the shoulders form a gentle slope rather than a perfect rectangle. Keep checking your sketch for natural curves and asymmetry, which will make your figures look more lifelike and dynamic.
Conclusion
Congratulations! You've reached the end of this step-by-step guide on how to draw a masculine body. By following these instructions and practicing regularly, you'll be able to create realistic and dynamic representations of the male form. Remember, drawing is a skill that improves with time and dedication, so keep sketching and exploring different poses and styles. Happy drawing!
Fun Facts About Masculine Body
- The average adult male body contains about 42 liters of water, making up roughly 60% of total body weight.
- Men typically have a higher percentage of muscle mass compared to women.
- The male skeleton is generally larger and denser than the female skeleton.
- Testosterone, the primary male sex hormone, plays a key role in developing masculine physical traits.
- The broad shoulders and narrow hips of the masculine body are due to differences in pelvic and shoulder bone structure.
- On average, adult men have about 5.6 million red blood cells per microliter of blood, which is higher than women.
- Facial hair growth in men is triggered by androgens during puberty.
- The Adam's apple, more prominent in men, is a result of a larger larynx.
Suggestions for Scenes and Settings for Masculine Body Drawings
- Athlete mid-action—capturing a basketball player leaping toward the hoop or a sprinter just leaving the starting blocks.
- Classic heroic pose—standing tall with hands on hips, reminiscent of comic book superheroes.
- Relaxed seated figure—sitting on a bench or step, elbows resting on knees, head bowed in thought.
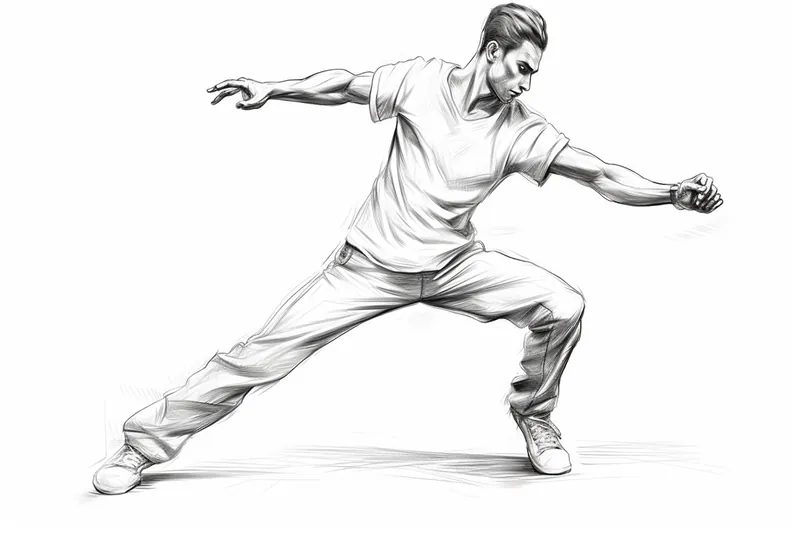
- Martial arts stance—mid-kick or in a strong defensive pose, emphasizing dynamic muscle tension.
- Weightlifter hoisting a barbell—focusing on the strain and definition of upper body muscles.
- Swimmer emerging from water—highlighting wet skin, defined torso, and natural body movement.
- Dancer in motion—executing a dramatic leap or spin, showing both grace and power.
- Reclining figure—lying on one side in a relaxed posture, emphasizing the back and shoulder muscles.
- Historical warrior—dressed as a gladiator or knight, holding a shield and sword in an action-ready pose.
- Construction worker at rest—leaning on a tool or sitting on a beam, capturing the natural strength in a casual moment.