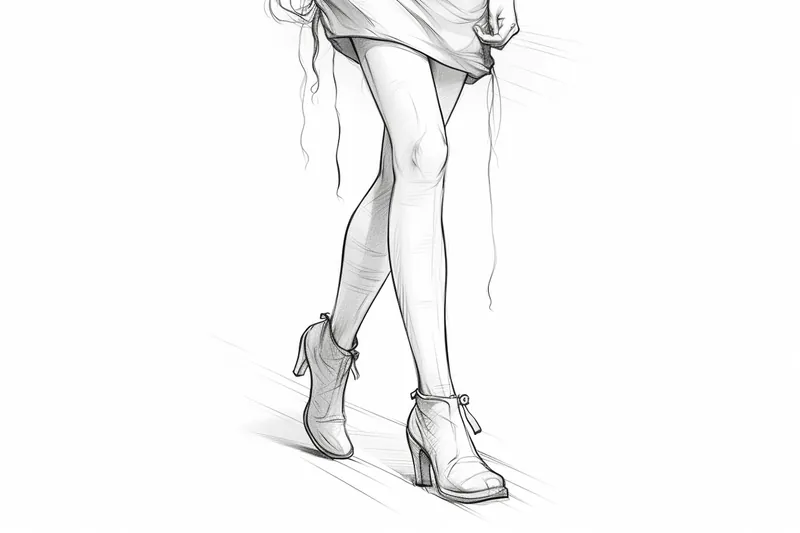
How to Draw a Leg
Learn how to draw a leg with this step-by-step tutorial. From basic structure to shading and fine details, master the art of capturing the human form.
Materials You'll Need
- Pencil
- Paper
- Eraser
Welcome to this comprehensive guide on how to draw a leg, an essential skill for artists who want to master human anatomy and improve their figure drawing abilities. The leg is a complex structure composed of muscles, bones, and joints that work together to create movement and balance. Whether you're aiming to illustrate dynamic poses, fashion sketches, or realistic portraits, understanding how to accurately depict the leg will significantly enhance the overall quality and realism of your artwork.
Learning how to draw a leg involves studying its proportions, the subtle curves of muscles, and how light interacts with its form. This tutorial is designed to cater to various skill levels, from beginners who are just starting to explore human anatomy to intermediate artists looking to refine their technique. You'll learn how to break down the leg into simple shapes, apply shading to create depth, and capture the natural flow of the muscles and bones. With practice, these techniques will help you draw legs that look both anatomically correct and artistically expressive.
Drawing a leg might seem challenging at first, but with patience and consistent practice, you will develop confidence and improve your skills. Remember, every great artist started with the basics and built their expertise step by step. So, whether you're sketching for fun or preparing for a professional project, this tutorial on how to draw a leg will equip you with the knowledge and tools you need to succeed. Let's embark on this artistic journey together and bring your drawings to life!
Materials Required
Before we dive into the step-by-step instructions, let's gather the materials you'll need for this drawing tutorial:
- Paper: Select a smooth, heavyweight paper suitable for drawing. It should be large enough to accommodate the size and details of your leg drawing.
- Pencils: Have a range of graphite pencils with different hardness levels, such as 2H, HB, 2B, and 4B. These will help you achieve different shades and textures.
- Eraser: Make sure to have a soft eraser to correct any mistakes and lighten areas that need adjustment.
- Blending Tools: Consider having blending stumps, tortillons, or tissue paper to smudge and blend graphite for smoother shading.
Now that you have your materials ready, let's begin the step-by-step process of drawing a leg.
Step 1: Basic Structure
Start by lightly sketching the basic structure of the leg. Imagine a straight line for the center of the leg and lightly indicate its length on your paper. Then, add a horizontal line near the top to represent the hip joint and another near the bottom for the ankle.
Step 2: Outline the Shape
Next, outline the shape of the leg by adding curves and angles. Pay close attention to the bone structure and muscles. Begin from the hip joint, following the line you drew earlier, and gradually define the thigh, knee, calf, and ankle. Remember to keep your lines light and loose at this stage.
Step 3: Add Details
Now it's time to add more details to your leg drawing. Start by sketching the placement of the knee cap, paying attention to its size and positioning in relation to the rest of the leg. Then, add curves and contours to depict the muscles in the thigh and calf regions. Observe references or your own leg for guidance on muscle placement.
Step 4: Shading and Shadows
To give your leg drawing depth and dimension, it's important to add shading and shadows. Begin by identifying the light source and determining where the light falls on the leg. Use light, even strokes with your pencil to gradually build up the values, paying attention to the darkest areas, mid-tones, and highlights.
Step 5: Refine and Adjust
Tip: As you practice drawing legs, consider using a live model or reference photos to observe the subtleties of muscle definition and joint placement, particularly in different poses and movements. This will not only help you understand the anatomy better but also enhance your ability to capture realistic proportions and dynamics in your artwork. Remember to take note of how light interacts with the leg's form to improve your shading techniques as well.
Take a step back and assess your leg drawing. This is the stage where you can make any necessary adjustments and refine the details. Use your eraser to lighten areas or correct any mistakes. Pay attention to the overall proportion and shape of the leg, making sure it looks balanced and anatomically correct.
Step 6: Texture and Fine Details
To add a realistic touch to your leg drawing, focus on texture and fine details. Study the skin and observe any wrinkles, creases, or veins that are visible. Use light, controlled strokes to replicate these details, taking care not to overdo it. Remember, subtlety is key when it comes to capturing the realistic texture of skin.
Conclusion
Congratulations! You've successfully learned how to draw a leg. With practice and patience, you'll continue to refine your skills and capture the grace and strength of the human form. Remember to start with a basic structure, outline the shape, add details, and then focus on shading and texture. With time, you'll be amazed at how your drawings progress. Keep up the great work!
Fun Facts About Leg
- The human leg contains 4 major bones: the femur, patella, tibia, and fibula, which provide support and mobility.
- The femur is the longest and strongest bone in the human body, crucial for bearing weight.
- Leg muscles like the quadriceps and hamstrings work together to enable walking, running, and jumping.
- The knee joint is the largest and most complex joint in the leg, allowing for flexion and extension.
- Leg veins contain valves that help return blood to the heart against gravity, preventing pooling. CDC - Venous System
- Humans have evolved longer legs relative to body size compared to other primates, aiding in efficient bipedal locomotion.
- The calf muscle, or gastrocnemius, is essential for pushing off the ground during walking and running.
- Leg bones can withstand forces up to 30 times the body weight during activities like jumping.
Suggestions for Scenes and Settings for Leg Drawings
- A dancer mid-leap, capturing the dynamic stretch and muscle tension in the legs.
- A close-up of a runner's legs pounding on a track, emphasizing movement and muscle definition.
- A seated figure with crossed legs, focusing on natural folds and relaxed muscles.
- A fashion sketch showcasing legs in high heels, highlighting posture and leg contours.
- A medieval knight's legs clad in armor, blending anatomy with textured metallic surfaces.
- A child's legs playing in sand or mud, showing playful posture and natural wrinkles.
- A yoga practitioner in a complex pose, illustrating balance and muscle engagement in the legs.
- A portrait of a cyclist's legs pedaling, emphasizing muscular effort and shading.
- A reclining figure with legs extended, capturing foreshortening and subtle muscle curves.
- An elderly person's legs, focusing on wrinkles, veins, and textured skin details.