How to Draw a Labrador Husky
Learn how to draw a Labrador Husky with this step-by-step tutorial. Create a realistic and detailed drawing of this stunning dog breed using clear and concise instructions.
Materials You'll Need
- Pencil
- Paper
- Eraser
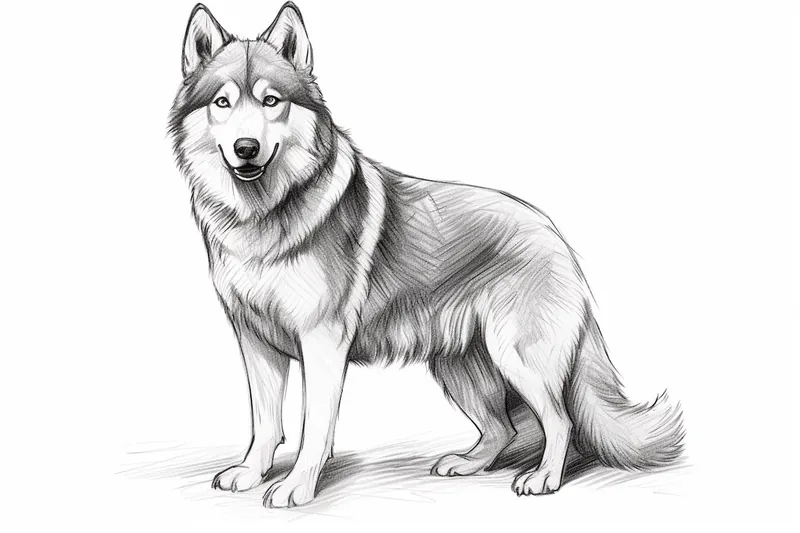
The Labrador Husky is a remarkable and unique dog breed that combines the friendly, loyal nature of the Labrador Retriever with the striking looks and energetic personality of the Siberian Husky. With their expressive eyes, thick double coats, and athletic build, Labrador Huskies captivate dog lovers and artists alike. Drawing this breed allows you to explore a fascinating blend of features—the soft, rounded muzzle of the Lab, the keen, wolf-like gaze of the Husky, and the overall powerful yet approachable stance that makes them so beloved. Understanding these signature traits will help you capture the spirit and character of the Labrador Husky in your artwork.
Learning how to draw a Labrador Husky can be a rewarding challenge for artists at any skill level. Whether you're a beginner eager to improve your observation skills or an experienced artist looking to practice animal anatomy and fur textures, this subject offers plenty of opportunities to develop your technique. You'll work on sketching accurate proportions, creating lifelike fur with shading, and capturing the intelligent expression that makes this breed so endearing. Many people choose to draw Labrador Huskies because they make wonderful companions and their dynamic poses are perfect for practicing movement and form.
This step-by-step tutorial on how to draw a labrador husky will guide you through each stage, from outlining the basic shape to adding the final touches of detail and personality. Don't worry if you're just starting out—patience and practice are key, and you'll be amazed at what you can achieve with a bit of guidance. So gather your drawing supplies, get comfortable, and let's embark on this creative journey together. With each step, you'll gain more confidence and skill, and by the end, you'll have a wonderful drawing to be proud of!
Materials Required
Before we begin, let's gather all the materials you'll need for this drawing:
- Pencil: A graphite pencil with a medium or soft lead (HB or softer) is recommended for sketching and shading.
- Paper: Choose a smooth drawing paper or sketchbook that can handle erasing and shading without smudging too easily.
- Eraser: A kneaded eraser works best for removing or lightening pencil lines without damaging the paper.
- Blending Stump: This tool is useful for smoothly blending and shading the graphite pencil marks.
- Reference Image: Find a clear and detailed photo of a Labrador Husky to use as a reference throughout the drawing process.
Once you have gathered these materials, find a comfortable and well-lit workspace to begin your drawing.
Step 1: Outline the Basic Shape
Start by lightly sketching the basic shape of the Labrador Husky using your pencil. Begin with an oval shape for the head, followed by a slightly elongated oval for the body. Add a few lines to indicate the position of the limbs, tail, and ears. Remember to keep your lines light and easily erasable as we'll refine the details in later steps.
Step 2: Define the Facial Features
Now, let's focus on the facial features of the Labrador Husky. Using your reference image as a guide, sketch the eyes, nose, and mouth. Pay close attention to the shape and positioning of these features, as they greatly contribute to capturing the characteristic expression of the breed. Take your time to get the proportions right, making sure to leave enough space for the surrounding fur.
Step 3: Add Fur Details
Labrador Huskies have a thick and fluffy coat, so it's important to capture the texture and volume in your drawing. Start by lightly sketching the general flow of the fur using curved lines. Pay attention to the direction of the fur and its varying lengths on different parts of the dog's body. Use short, overlapping strokes to gradually build up the fur texture, keeping in mind the reference image for guidance.
Step 4: Refine the Body and Limbs
Now that we have the basic outlines and fur details, it's time to refine the shape of the body and limbs. Use your pencil to add more definition and volume to the Labrador Husky's body, paying attention to the musculature and curves. Refine the shape of the legs and paws, adding individual toes and claws. Don't forget to include the tail, which is often thick and bushy.
Step 5: Shading and Depth
To create depth and dimension in your drawing, it's important to add shading. Observe the reference image and identify areas of light and shadow. Use your pencil to lightly shade the darker areas, gradually building up the tones by layering more graphite. Use a blending stump to smooth out the transitions between light and dark areas, creating a more realistic and three-dimensional effect.
Step 6: Final Details and Highlights
In this final step, focus on adding the finishing touches to your Labrador Husky drawing. Enhance the facial features by adding more details to the eyes, nose, and mouth. Use your eraser to lighten any areas that may have become too dark and to create highlights on the fur. Pay attention to small details such as whiskers or subtle markings that are unique to each dog. Take your time to ensure all the details are precise and reflective of the breed.
Tip: To capture the Labrador Husky's distinctive look, use a soft pencil (like a 2B or 4B) to loosely sketch the head and body, focusing on the gentle curve of the Lab's muzzle and the upright, alert ears reminiscent of a Husky. Pay special attention to the eyes—a combination of Husky intensity and Lab warmth—by layering light, careful shading around the iris and adding a crisp highlight for that signature sparkle. When rendering the double coat, alternate between short, gentle strokes for the underfur and longer, directional lines for the outer guard hairs, following the way the fur naturally grows along the neck, chest, and tail. This method will help you achieve a more realistic, dimensional texture that brings your Labrador Husky to life on the page.
Conclusion
Congratulations! You have successfully learned how to draw a Labrador Husky step by step. By following these clear and concise instructions, you have created a realistic and detailed drawing of this beautiful dog breed. Remember, practice makes perfect, so don't be afraid to experiment and continue honing your skills. Keep exploring and capturing the beauty of the world through your artwork.
Fun Facts About Labrador Husky
- The Labrador Husky is not a mix of Labrador Retriever and Siberian Husky, but a distinct breed native to northern Canada.
- This breed was originally developed to pull sleds and work in harsh Arctic conditions.
- Labrador Huskies have a thick double coat that helps them withstand extremely cold temperatures.
- They are known for their high energy and intelligence, making them excellent working and companion dogs.
- Labrador Huskies are often mistaken for wolf hybrids due to their wolf-like appearance.
- This breed is very social and thrives in environments where they have plenty of interaction.
- Labrador Huskies are rare outside of their native region of Labrador, Canada.
- They require a lot of exercise and mental stimulation to stay happy and healthy.
- Labrador Huskies are generally healthy but can be prone to hip dysplasia.
Suggestions for Scenes and Settings for Labrador Husky Drawings
- A Labrador Husky bounding through a snowy forest, its thick coat dusted with flakes and its eyes bright with excitement.
- The breed playfully splashing in a sparkling lake, water droplets caught in mid-air around its muscular frame.
- A close-up portrait of a Labrador Husky with heterochromia (one blue eye, one brown), capturing its intense, intelligent gaze.
- A Labrador Husky curled up by a cozy fireplace, its fur glowing in the warm light, radiating contentment.
- The dog running alongside a sled or a group of children on a winter adventure, showing off its Husky heritage and energy.
- A family camping scene, with the Labrador Husky alert and watchful by the tent, blending protection and companionship.
- The breed standing atop a rocky hill at sunrise, wind ruffling its fur as it surveys the landscape below.
- A playful scene of a Labrador Husky chasing autumn leaves in a park, its joyful energy captured in a dynamic pose.
- A gentle moment of the dog resting its head on a child's lap, highlighting its loyal and affectionate Labrador side.
- A dramatic evening scene with the Labrador Husky silhouetted against the Northern Lights, emphasizing its Arctic roots.