How to Draw a Kimono
Learn how to draw a kimono step by step with this easy-to-follow tutorial. Discover the art of drawing this traditional Japanese garment and unleash your creativity.
Materials You'll Need
- Pencil
- Paper
- Eraser
Welcome to this comprehensive tutorial on how to draw a kimono, a traditional and elegant Japanese garment known for its flowing lines and intricate patterns. The kimono holds a rich cultural significance, often symbolizing grace, beauty, and tradition. Whether you're an artist looking to expand your repertoire or a beginner eager to explore new subjects, mastering how to draw a kimono offers a unique opportunity to practice capturing both the delicate folds of fabric and the detailed ornamental designs that make this attire so distinctive.
Drawing a kimono involves understanding not only the basic form and structure of the garment but also the subtle nuances that bring it to life. This tutorial is designed for artists at various skill levels, guiding you through essential techniques such as sketching smooth, flowing lines, creating depth with shading, and adding intricate patterns that reflect the kimono's traditional motifs. With patience and practice, you will develop greater control over your line work and shading, enhancing your overall drawing skills while producing a stunning piece that captures the essence of this iconic garment.
As you follow along with this step-by-step guide on how to draw a kimono, remember that every stroke is a step closer to mastering the art of depicting fabric and pattern. Embrace the challenge, experiment with colors and textures, and most importantly, enjoy the creative process. By the end of this tutorial, you'll not only have a beautiful drawing but also a deeper appreciation for the artistry behind one of Japan's most celebrated cultural symbols. Let's embark on this artistic journey together and bring the timeless beauty of the kimono to your sketchbook!
Materials Required
Before we begin, gather the following materials:
- Pencil
- Eraser
- Paper
- Colored pencils or markers (optional)
- Reference images of kimonos (recommended)
Having these materials ready will make the drawing process smoother and more enjoyable.
Step 1: Sketch the Basic Outline
Start by lightly sketching the basic outline of the kimono. Begin with a vertical line down the center of your paper, as this will act as the spine of the garment. Then, draw two horizontal lines intersecting the vertical line near the top and bottom. These will serve as guidelines for the collar and hem of the kimono.
Step 2: Draw the Collar
Using the upper horizontal guideline as a reference, draw a curved line extending from the center line. This will be the collar of the kimono. The shape and size of the collar may vary depending on the style you want to depict. Experiment with different shapes to create different looks.
Step 3: Add the Sleeves
Next, draw the sleeves of the kimono. Start by drawing two curved lines extending from each side of the collar, following the guidelines you drew earlier. The shape and length of the sleeves can vary, so feel free to explore different designs. You can make them shorter or longer, wider or narrower, depending on your artistic preference.
Step 4: Define the Body of the Kimono
Now, let's define the body of the kimono. Draw a diagonal line from the end of the collar to the lower horizontal guideline. This will create the opening of the kimono. From there, draw two more lines, slightly curved, to connect the sleeves to the bottom of the kimono. Remember to keep the lines flowing and graceful to capture the elegance of the kimono.
Step 5: Add Details and Patterns
This step is where you can add unique details and patterns to your kimono. Feel free to get creative and personalize your design. You can add floral patterns, geometric shapes, or any other motifs that inspire you. Take reference from traditional kimonos or explore your own imagination. Use light, gentle strokes to create delicate patterns.
Step 6: Refine Your Drawing
Now it's time to refine your drawing. Take a closer look at the overall shape and proportion of the kimono. Make any necessary adjustments, erasing any unwanted lines or adding more definition where needed. Pay attention to the flow of the fabric and the way it hangs on the body. This step will help bring your drawing to life.
Tip: As you draw your kimono, consider using reference images not only for accuracy but also to inspire your own unique designs; observing the subtle variations in fabric folds and patterns can help you develop a more authentic and personalized representation of this traditional garment.
Step 7: Finalize Your Drawing
Once you are satisfied with the overall composition and details of your kimono, darken the lines you want to keep and erase any remaining guidelines. This will give your drawing a clean and finished look. Take your time and be patient during this step, as it can make a significant difference in the final result.
Conclusion
Congratulations on completing your kimono drawing! By following these steps, you have learned how to create a beautiful representation of this traditional Japanese garment. Remember to practice regularly and experiment with different styles and patterns to further enhance your skills. Embrace your creativity and enjoy the process of drawing. Happy creating!
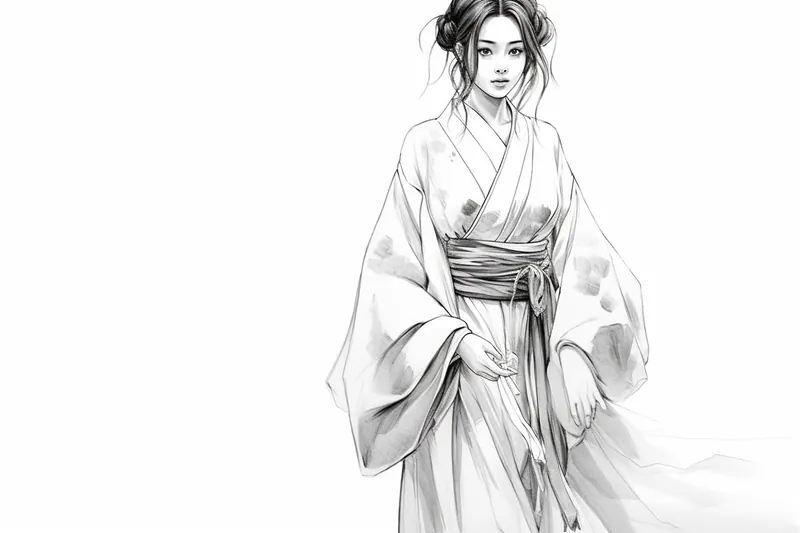
Gallery of Kimono Drawings


Fun Facts About Kimonos
- The kimono is a traditional Japanese garment that dates back over a thousand years, evolving significantly during the Heian period.
- Kimonos are often made from silk and feature intricate hand-painted or embroidered designs that symbolize seasons, nature, or auspicious motifs.
- The word "kimono" literally means "thing to wear" in Japanese, reflecting its role as everyday clothing in historical Japan.
- Kimonos are traditionally worn with an obi, a wide belt that can be tied in various styles depending on the occasion and wearer's status.
- There are different types of kimonos for men, women, and children, each with unique patterns, colors, and sleeve lengths to indicate age, marital status, and formality.
- Wearing a kimono properly requires knowledge of many layers and accessories, and it can take years to master the art of dressing in one.
- Modern designers have reinterpreted the kimono, blending traditional elements with contemporary fashion to keep the garment relevant today.
- Kimonos are often worn during special ceremonies such as weddings, tea ceremonies, and festivals, symbolizing respect for tradition and culture.
Suggestions for Scenes and Settings for Kimono Drawings
- A graceful woman wearing a brightly patterned kimono standing beneath cherry blossom trees in full bloom.
- A traditional tea ceremony setting with participants dressed in elegant kimonos, seated around a low table.
- An outdoor festival scene featuring dancers in colorful kimonos performing with paper fans and lanterns.
- A serene garden with a pond and koi fish, where a figure in a flowing kimono is feeding the fish.
- A close-up study focusing on the intricate patterns and textures of an obi belt and kimono sleeve.
- A vintage street scene from historical Japan, showcasing multiple people in various kimono styles and accessories.
- A modern fusion look combining traditional kimono fabrics with contemporary fashion elements.
- A nighttime scene illuminated by soft lantern light, highlighting the delicate folds and shadows of the kimono fabric.
- A portrait of a geisha in full attire with detailed hair ornaments and makeup, capturing cultural authenticity.
- A dynamic pose of a kimono-clad figure in mid-movement, emphasizing the flowing lines and fabric motion.